4. AI Vision Projects
4.1 Single Color Recognition
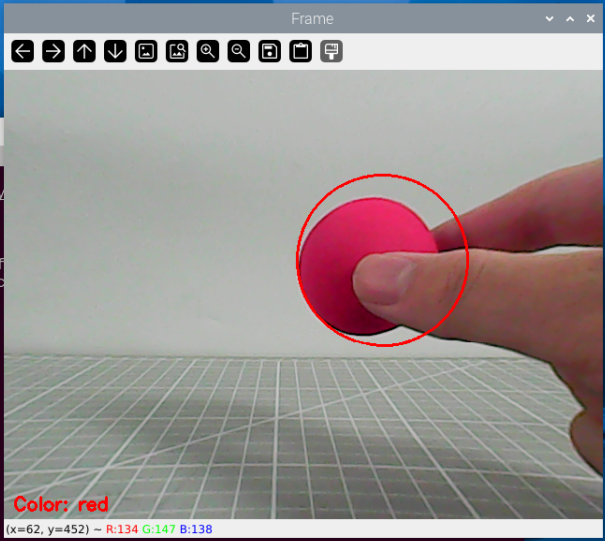
In this section, the camera detects colors. When a red ball is recognized, the buzzer will emit a beep, and the red ball will be highlighted in the transmitted image with “Color: red” displayed.
4.1.1 Program Description
The implementation of color recognition consists of two parts: color detection and execution feedback after recognition.
First, for the color detection part, Gaussian filtering is applied to the image to reduce noise. The Lab color space is then used to convert the color of the object (you can learn more about the Lab color space in the “OpenCV Vision Basic Course” section of the tutorial materials).
Next, the object’s color within the circle is recognized using color thresholding, followed by masking (masking involves using selected images, shapes, or objects to globally or locally obscure the image being processed).
After performing morphological operations such as opening and closing on the object image, the object with the largest contour is circled.
Opening: The image undergoes erosion followed by dilation. This operation removes small objects, smooths shape boundaries, and preserves the area. It can eliminate small noise particles and separate connected objects.
Closing: The image undergoes dilation followed by erosion. This operation fills small holes within objects, connects nearby objects, closes broken contour lines, and smooths boundaries while preserving the area.
After recognition, the servo and buzzer are set up to provide feedback based on the detected color. For example, when red is detected, the buzzer will emit a sound.
For detailed feedback behavior, please refer to section 3. Function Implementation of this document.
4.1.2 Start and Close the Game
Note
The input command is case-sensitive, and keywords can be auto-completed using the Tab key.
(1) Power on the robot and use VNC Viewer to connect to the remote desktop.

(2) Click the icon  in the top left corner of the system desktop or press the shortcut “Ctrl+Alt+T” to open the LX terminal.
(3) Execute the command to navigate to the directory where the program is located, then press Enter:
cd uhandPi/function_demo/
(4) Enter the command and press Enter to start the program:
python3 individual_colors.py
(5) To close the program, simply press “Ctrl+C” in the LX terminal. If it does not close, press it multiple times.
4.1.3 Program Outcome
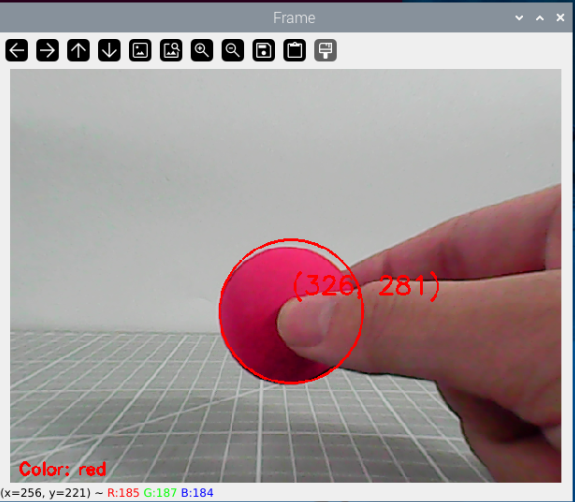
After starting the game, the camera will be used to detect colors. When a red ball is recognized, the buzzer will emit a beep sound, and the ball will be circled in the transmitted image, with “Color: red” printed.
Note
During the recognition process, ensure the environment is well-lit to avoid inaccurate recognition due to poor lighting conditions.
Ensure that no objects with similar or matching colors to the target are present in the background within the camera’s visual range, as this may cause misrecognition.
4.1.4 Program Analysis
The source code of this program is saved in: /home/pi/uhandpi/function_demo/individual_colors.py
Import Function Library
 1#!/usr/bin/python3
 2# coding=utf8
 3import sys
 4import cv2
 5import time
 6import math
 7import signal
 8import threading
 9import numpy as np
10from common import yaml_handle
11from common.pid import PID
12from common import misc
13from calibration.camera import Camera
(1) Import Libraries for OpenCV, Time, Math, and Threading To use functions from a library, we can call them with the syntax:
library_name.function_name(parameter1, parameter2, ...)
107time.sleep(0.01)
For example, to call the sleep function from the time library, we use:
In Python, several libraries like time, cv2, and math are built-in and can be directly imported and used. You can also create your own libraries, like the yaml_handle file-reading library mentioned above.
(2) Instantiate a Library
Some library names can be long and hard to remember. To simplify function calls, we often instantiate libraries. For example:
9import numpy as np
Main Function Analysis
In a Python program, __name__ == '__main__' indicates the main function of the program, where the program starts by reading an image.
88if __name__ == '__main__':
89    from common.ros_robot_controller_sdk import Board
90    from common.action_group_controller import ActionGroupController
91    board = Board()
92    agc = ActionGroupController(board)
(1) Image Processing
① Function run() for Image Processing
49def run(img):
50    global buzzer_triggered
51    detect_color = 'None'
52    draw_color = range_rgb["black"]
53
54    img_copy = img.copy()
55    img_h, img_w = img.shape[:2]
56
57    frame_resize = cv2.resize(img_copy, size, interpolation=cv2.INTER_NEAREST)
58    frame_gb = cv2.GaussianBlur(frame_resize, (3, 3), 3)
59    frame_lab = cv2.cvtColor(frame_gb, cv2.COLOR_BGR2LAB)
② Resizing the Image. The image size is resized to facilitate processing.
57 frame_resize = cv2.resize(img_copy, size, interpolation=cv2.INTER_NEAREST)
The first parameter img_copy is the input image.
The second parameter size specifies the output image size, which can be customized.
The third parameter interpolation=cv2.INTER_NEAREST defines the interpolation method.
INTER_NEAREST: Nearest-neighbor interpolation.
INTER_LINEAR: Bilinear interpolation (default if not specified).
INTER_CUBIC: Bicubic interpolation over a 4x4 pixel neighborhood.
INTER_LANCZOS4: Lanczos interpolation over an 8x8 pixel neighborhood.
(2) Gaussian Filtering
To remove noise from the image, Gaussian filtering is applied. This filter smooths the image to improve feature visibility.
58 frame_gb = cv2.GaussianBlur(frame_resize, (3, 3), 3)
The first argument frame_resize is the input image.
The second argument (3, 3) specifies the size of the Gaussian kernel.
The third argument 3 is the standard deviation of the Gaussian kernel in the X direction.
59 frame_lab = cv2.cvtColor(frame_gb, cv2.COLOR_BGR2LAB)
The first parameter "frame_gb" is the image to be converted.
The second parameter cv2.COLOR_BGR2LAB converts the image from BGR format to LAB format. To convert to RGB, use cv2.COLOR_BGR2RGB.
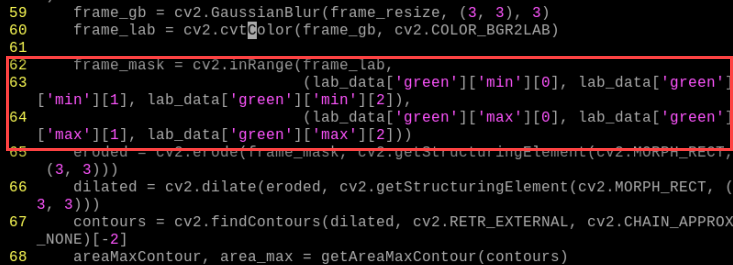
(3) Convert the Image to a Binary Image
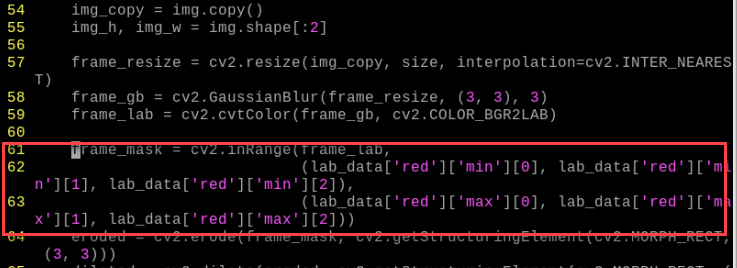
The image is simplified by converting it to a binary image, containing only 0s and 1s, which reduces the data size and makes it easier to process. The cv2.inRange() function is used for thresholding.
61    frame_mask = cv2.inRange(frame_lab,
62                             (lab_data['red']['min'][0], lab_data['red']['min'][1], lab_data['red']['min'][2]),
63                             (lab_data['red']['max'][0], lab_data['red']['max'][1], lab_data['red']['max'][2]))
The first parameter "frame_lab" is the input image.
The second parameter (lab_data['red']['min'][0], lab_data['red']['min'][1], lab_data['red']['min'][2]) specifies the lower color threshold.
The third parameter (lab_data['red']['max'][0], lab_data['red']['max'][1], lab_data['red']['max'][2]) specifies the upper color threshold.
(4) Dilation and erosion
To reduce interference and create smoother images, erosion and dilation processes are applied.
64    eroded = cv2.erode(frame_mask, cv2.getStructuringElement(cv2.MORPH_RECT, (3, 3)))
65    dilated = cv2.dilate(eroded, cv2.getStructuringElement(cv2.MORPH_RECT, (3, 3)))
erode() function is applied to erode image. Here uses an example of the code eroded = cv2.erode(frame_mask, cv2.getStructuringElement(cv2.MORPH_RECT, (3, 3))). The meaning of parameters in parentheses are as follow:
The first parameter frame_mask is the input image.
The second parameter cv2.getStructuringElement(cv2.MORPH_RECT, (3, 3)) is the structural elements and kernel that determines the nature of operation. The first parameter in parentheses is the shape of kernel and the second parameter is the size of kernel.
dilate() function is applied to dilate image. The meaning of parameters in parentheses is the same as the parameters of erode() function.
(5) Obtain the contour of the maximum area
After processing the above image, obtain the contour of the recognition target. The findContours() function in cv2 library is involved in this process.
66 contours = cv2.findContours(dilated, cv2.RETR_EXTERNAL, cv2.CHAIN_APPROX_NONE)[-2]
The erode() function is applied to erode. Take code contours = cv2.findContours(dilated, cv2.RETR_EXTERNAL, cv2.CHAIN_APPROX_NONE)[-2] as example.
The first parameter dilated is the input image.
The second parameter cv2.RETR_EXTERNAL is the contour retrieval mode.
The third parameter cv2.CHAIN_APPROX_NONE)[-2] is the approximate method of contour.
Find the maximum contour from the obtained contours. To avoid interference, set a minimum value. Only when the area is greater than this
minimum value, the target contour will take effect. The minimum value here is “100”.
(6) Find the Largest Contour
69    if areaMaxContour is not None and area_max > 200:
70        if not buzzer_triggered:
71            board.set_buzzer(1900, 0.1, 0.2, 1)  # Trigger the buzzer
72            buzzer_triggered = True  # 更新状态为已触发
Display the Transmitted Image
101            result_image = cv2.resize(Frame, (320, 240))  # Resize image to 320x240
102            cv2.imshow('color_tracking', result_image)
103            key = cv2.waitKey(1)
104            if key == 27:  # Exit on ESC key
105                break
The function cv2.imshow() is used to display an image in a window. The first parameter "frame" is the name of the window, and the second parameter "Frame" is the content to be displayed.
It is important to include cv2.waitKey() after cv2.imshow(), as the image will not be displayed without it.
The function cv2.waitKey() waits for a key press, and the parameter 1 specifies the delay time in milliseconds.
4.1.5 Function Extension
Change Default Recognition Color
The color recognition program is pre-configured to recognize three colors: red, green, and blue. By default, when red is detected, the buzzer emits a “beep-beep” sound, a circle is drawn around the detected color in the video feed, and “Color: red” is printed. This guide explains how to change the recognized color to green, with detailed steps as follows:
(1) Enter the following command in the terminal and press Enter:
cd uhandpi/function_demo
(2) Enter the following command to open the file for editing and press Enter:
sudo vim individual_colors.py
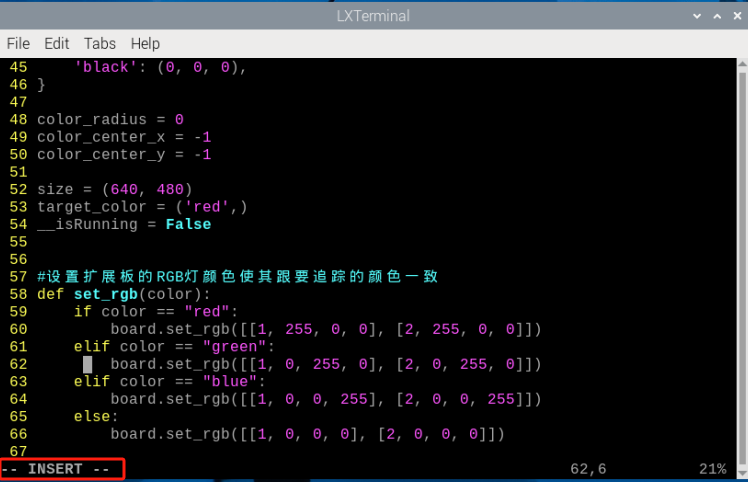
(3) Press the i key on the keyboard to switch to edit mode.
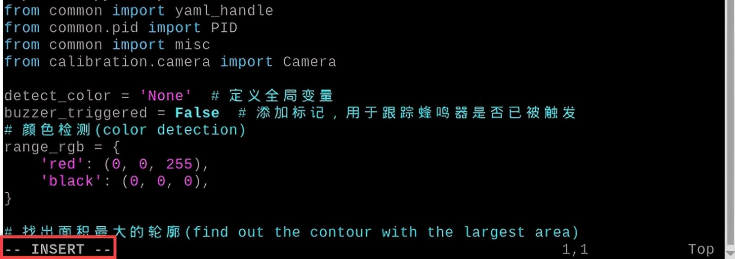
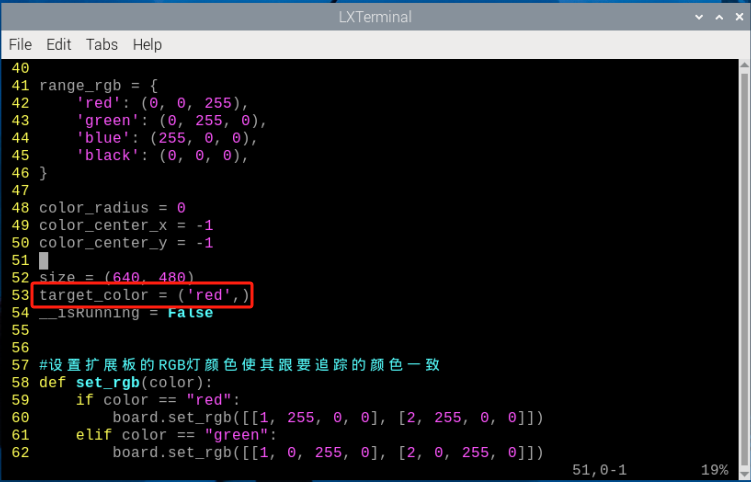
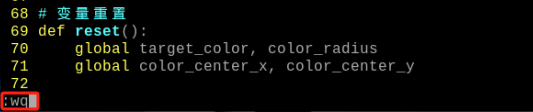
(4) Find the section of code highlighted in the red box in the image below.

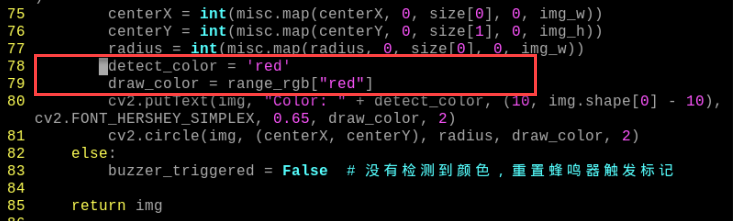
(5) Replace the corresponding line with the following code:
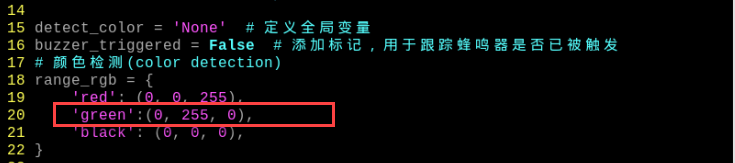
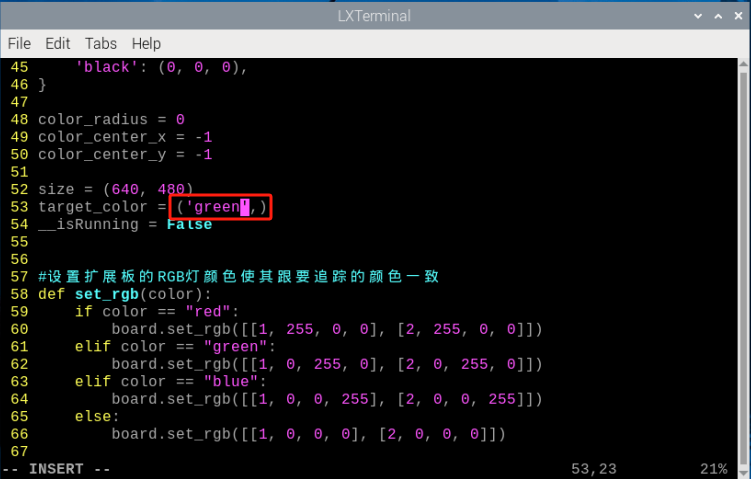
(6) Locate the code snippet shown in the image and replace red with green.
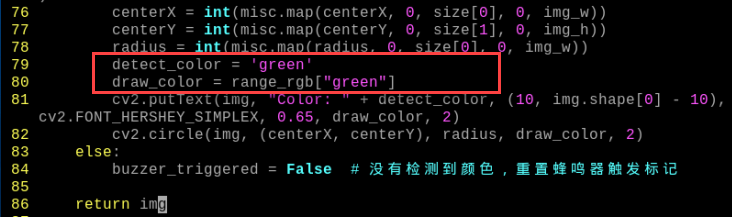
(7) Modify the code so that the circle and text displayed in the video feed are green.
(8) Press the Esc key. Type the following command (note the colon : before wq) and press Enter to save changes and exit:
(9) Run the program using the following command and press Enter:
python3 individual_colors.py
Add New Recognition Color
In addition to the three built-in colors, you can add custom colors for recognition. Below are the steps to add purple as an additional recognizable color:
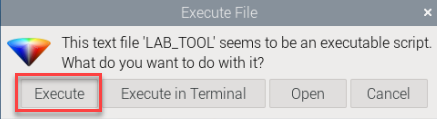
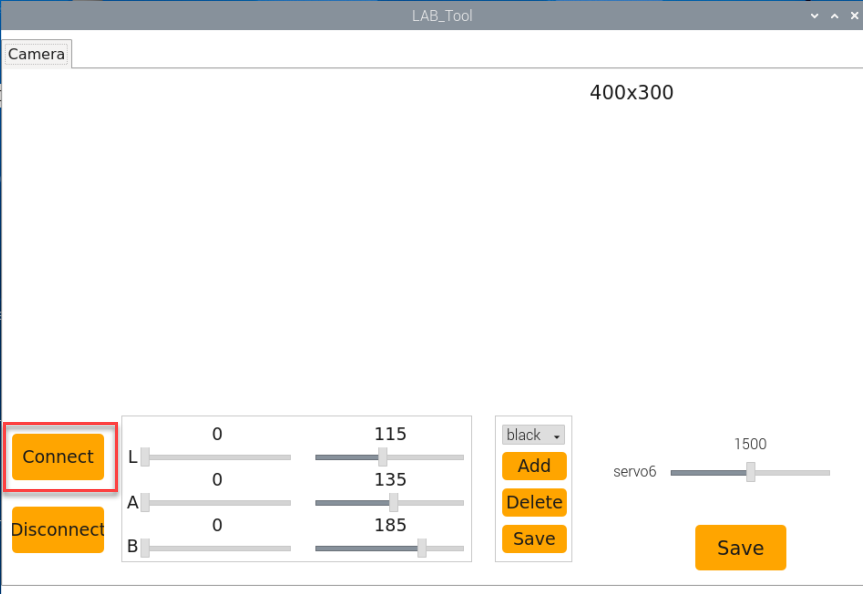
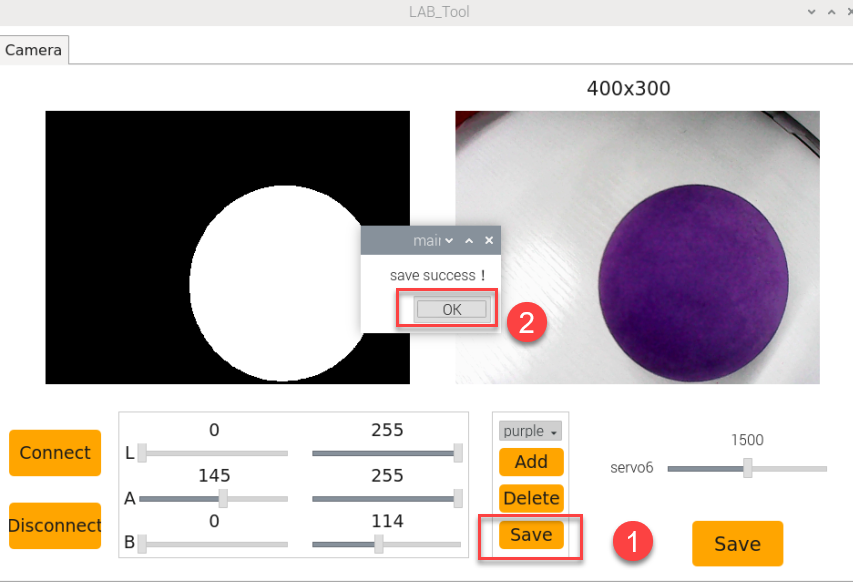
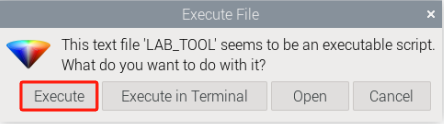
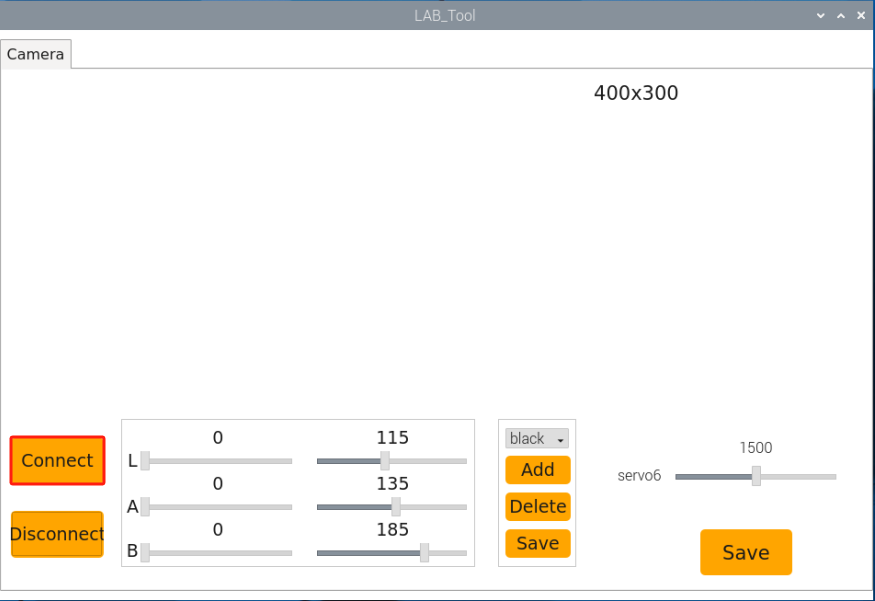
(1) Double-click the LAB icon on the system desktop. In the pop-up prompt, simply select “Execute”.

(2) Once the interface pops up, click the “Connect” button.
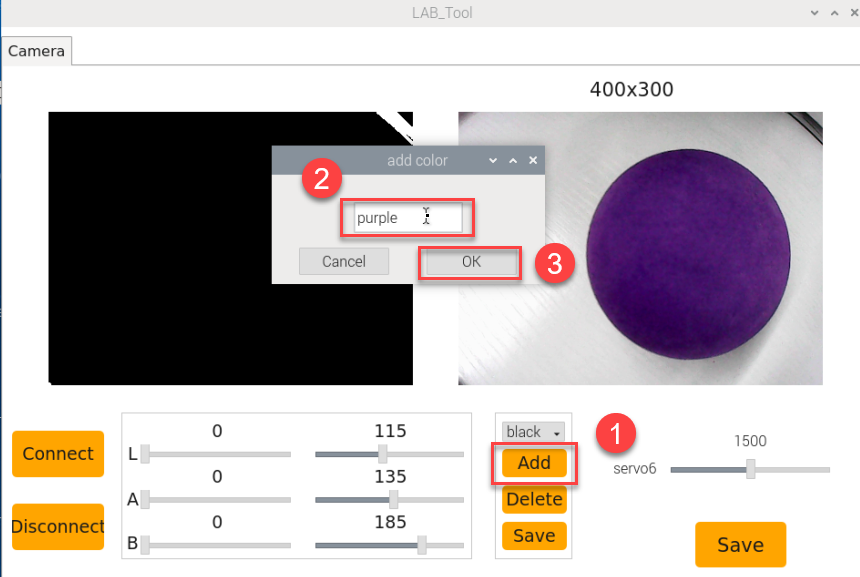
(3) Click the “Add” button, then name the new color (e.g., “purple”) and click “OK”.
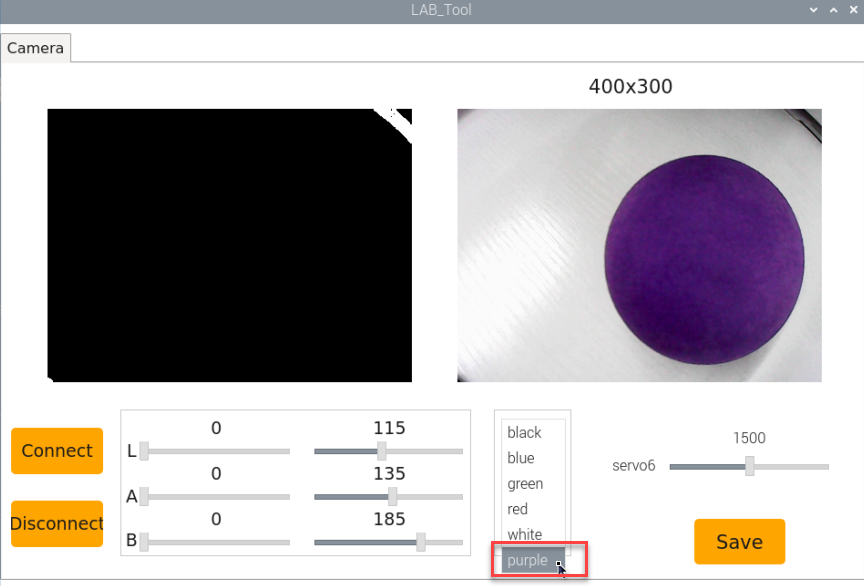
(4) Click the drop-down button in the color selection box and choose “purple”.
(5) Point the camera at a purple object and adjust the L, A, and B sliders. Move them until the purple area in the left-side display becomes white, and other areas turn black.
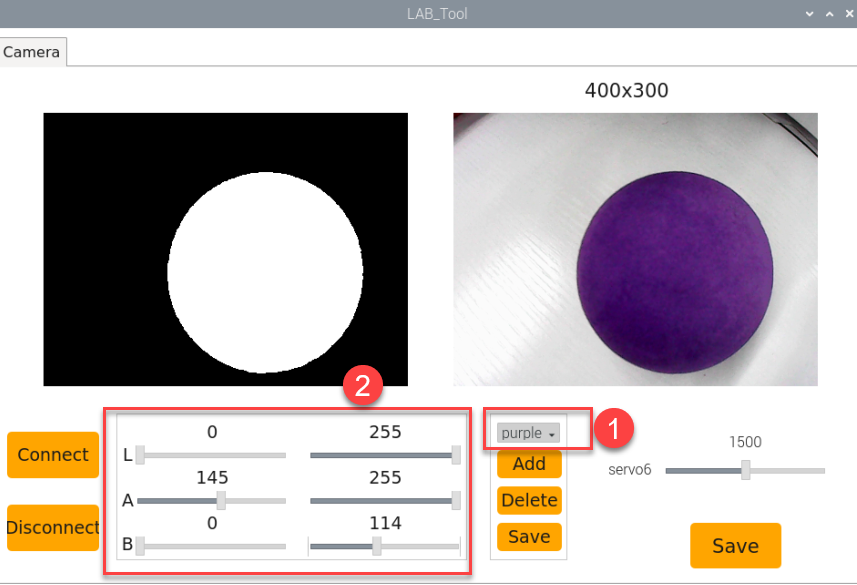
(6) Once the threshold adjustment is complete, click “Save” to store the color settings.
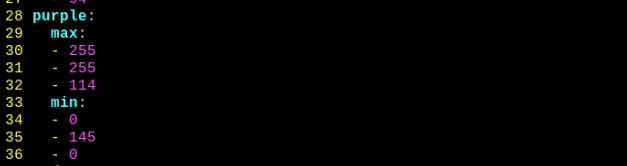
(7) After saving, check if the modified color values have been successfully written. Navigate to the program code directory:
cd uhandpi/config
(8) Enter the following command to open the program file, then press Enter:
sudo vim lab_config.yaml
(9) In the file, you can verify the purple color threshold parameters.
(10) To set purple as the default recognized color, follow the steps in 4.1.5 Function Extension -> Change Default Recognition Color to replace the default color with purple. If you need to add other colors, you can follow the same steps as described above.
4.2 Color Sorting
4.2.1 Program Description
Human eyes can easily distinguish different colors in the world. How can robots recognize object colors? We can add a camera vision module to uHandPi. Through visual recognition, uHandPi can identify different colors.
First, in the color recognition section, we utilize the Lab color space to convert the colors of objects. For detailed learning about the Lab color space, you can refer to “OpenCV Basic Courses”.
Next, we use color threshold to identify the colors of objects in the circle, followed by masking the image. Masking involves covering parts of the processed image globally or locally using selected images, graphics, or objects.
Afterward, the image of the object undergoes opening and closing operation. Finally, the largest contour of the object is encircled with a circle.
Opening operation: It involves first corrosion followed by dilation of the image. Its purpose is to eliminate small objects, smooth the shape boundaries, and maintain the area unchanged. It can remove small particle noise and break connections between objects. Closing operation: It involves first dilation followed by corrosion of the image. Its purpose is to fill small holes inside objects, connect nearby objects, reconnect broken contour lines, and smooth their boundaries while maintaining the area unchanged.
After recognition, settings are applied to the pan-tilt and RGB lights to provide corresponding feedback based on different colors. For instance, if red is recognized, the RGB lights illuminate red. Then, if a ball is placed in the center of the hand, the hand grasps the ball, and the hand turns to the left before opening the hand.
4.2.2 Start and Close the Game
Note
Instructions must be entered with strict attention to case sensitivity and spacing.
(1) Turn on robotic hand, and connect it to Raspberry Pi desktop through VNC.
(2) Click the icon  in the upper left corner of the desktop, or press “Ctrl+Alt+T” to open LX terminal.
(3) Input the following command to navigate to the directory where the game program is located, then press Enter.
cd uhandpi/functions
(4) Input the command of activating the program and press Enter.
python3 color_classification.py
(5) To close this game, simply wait for the game program to finish loading, then press “Ctrl+C”. If the closing fails, you can try pressing “Ctrl+C” multiple times.
4.2.3 Program Outcome
Note
You can take out the small balls from the accessory pack and use them in combination with the setup.
When the camera recognizes a red ball, the transmitted image will outline it within the feedback area. When the ball is placed in front of the hand of uHandPi, uHandPi will grab the ball. Then, the hand will rotate, followed by opening the palm. If the recognized ball is red, the hand will rotate to the right. If the recognized ball is blue, the hand will rotate to the left.
4.2.5 Function Extension
Adjust color threshold
During the game experience, if the color recognition effect is not satisfactory, adjustments to the color thresholds are required. In this section, adjusting red color is taken as an example, and other color settings can be adjusted following the same method. The operational steps are as follows:
(1) Double-click the icon  on the desktop, and click “Execute” in the prompt interface.
(2) Then click “Connect” to connect it to the camera.

(3) After connection successfully, select “red” in the bottom right corner of the selection bar.
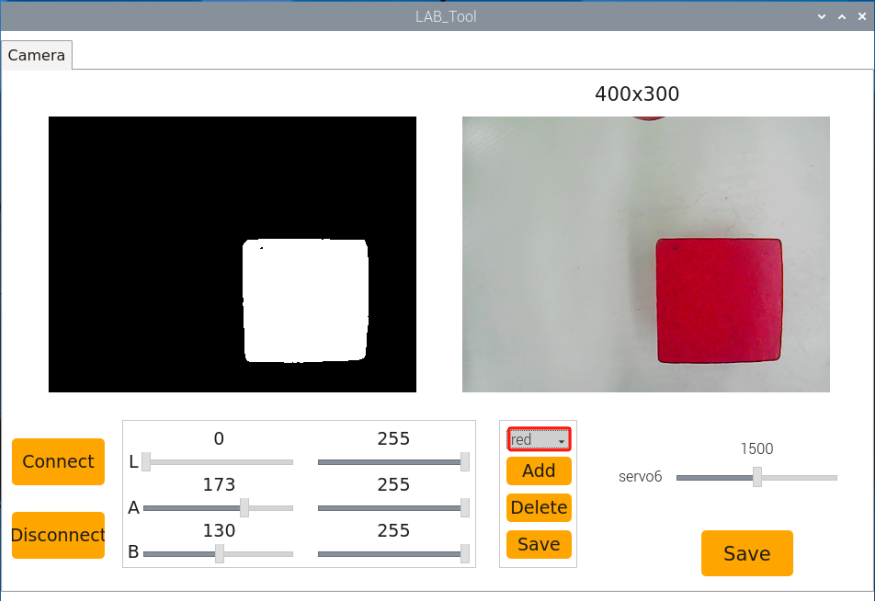
(4) If the transmitted image does not appear in the popped-up interface, it indicates that the camera is not successfully connected. Please check the camera connection cable to ensure it is properly connected.
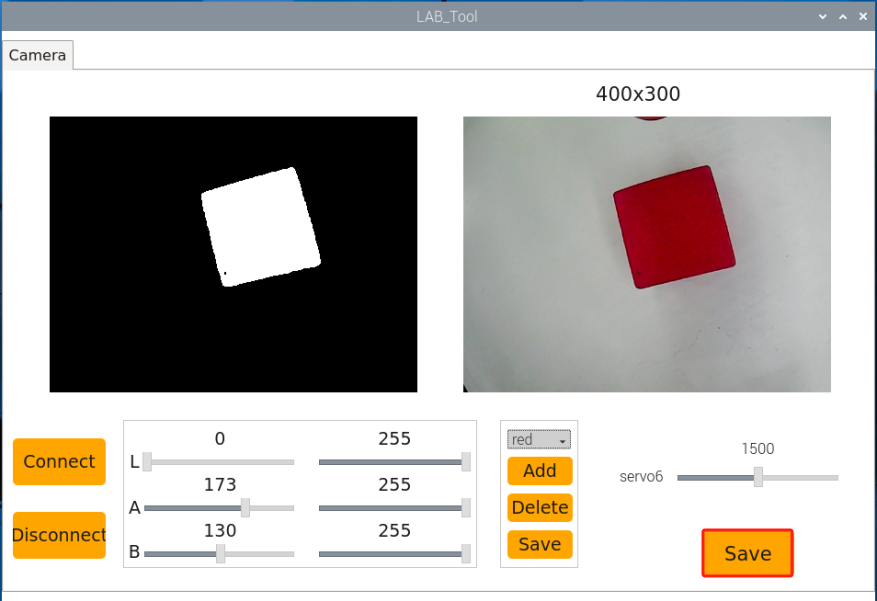
(5) In the interface below, the right side displays the real-time transmitted image, while the left side shows the color to be captured. Align the camera with the red ball, then drag the six sliders below to make the area of the red ball on the left side of the screen completely white, while the other areas become black. Then, click the “Save” button to save the data.
Change default recognized color
There are three built-in colors in the program: red, green and blue. By default, it recognizes red and blue colors, performing corresponding actions by the robot when detected.
Here, we’ll use changing the recognized color to green as an example. The specific modification steps are as follows:
(1) Input the following command and press Enter to switch to the source code program path.
cd uhandpi/functions
(2) Then input command and press Enter to open the program file.
sudo vim color_classification.py
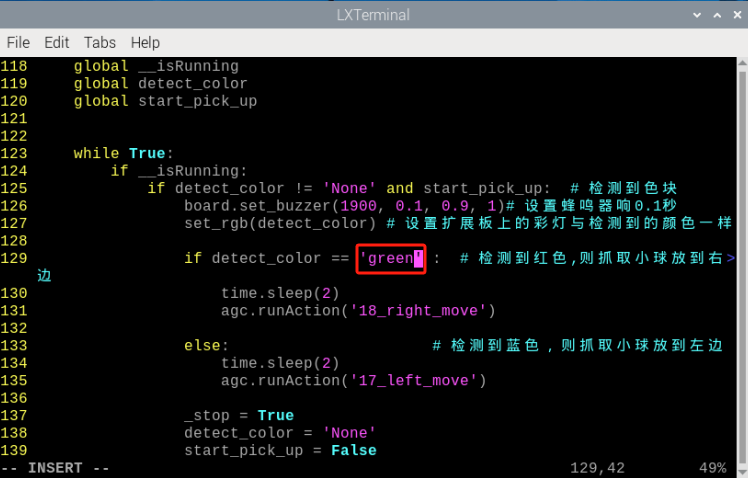
(3) Locate the code outlined in the image in the opened program.
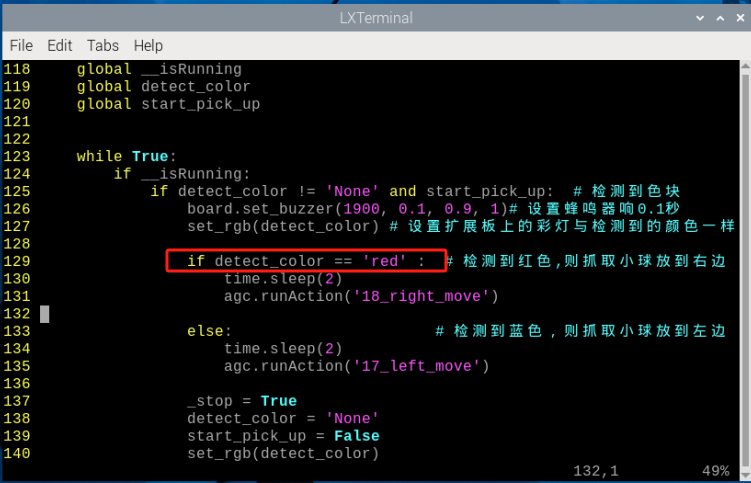
(4) Press “i” on the keyboard to enter the editing mode.
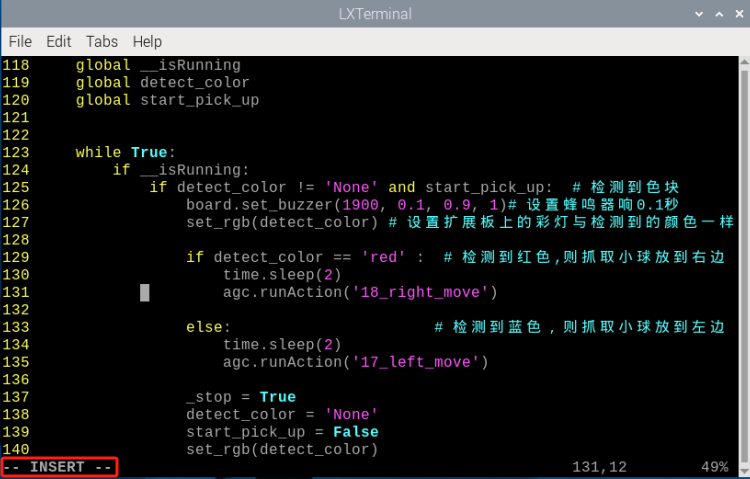
(5) Replace “red” with “green” in detect_color == 'red'as pictured:
(6) Next, save the modified contents. Press “Esc” key and input “:wq” in turn (make sure there is a colon before “wq”). Then press Enter to save and exit.
(7) Input command again and press Enter to start recognizing green. And the hand will rotate to the right.
python3 color_classification.py
4.2.4 Program Analysis
The source code of this program is located in: /home/pi/uhandpi/functions/color_classification.py
Note
Before modifying the program, it’s crucial to create a backup of the original factory program. Avoid modifying parameters in the wrong way, which may cause the robot to malfunction and become irreparable.
Import parameter module
| Import module | Function |
|---|---|
| import sys | The Python "sys" module has been imported for accessing system-related functions and variables. |
| import cv2 | The OpenCV library has been imported for image processing and computer vision-related functionalities. |
| import time | The Python "time" module has been imported for time-related functionalities, such as delay operations. |
| import threading | Provides an environment for running multiple threads concurrently. |
| import yaml_handle | Contains functionalities or tools related to processing YAML format files. |
| from common.action_group_controller import ActionGroupController | Import action group execution library |
| from common.ros_robot_controller_sdk import Board | Import board library to control sensor |
Function Logic
Capture image information through the camera, then process the image, specifically by performing binarization. At the same time, to reduce interference and make the image smoother, perform corrosion and dilation operations on the image. Next, obtain the largest area contour to determine the color of the color block and provide corresponding feedback.
Program Analysis
(1) Initialization
① Import function library
In this initialization step, the first task is to import the required libraries for subsequent program calls. For details on the imports, refer to “4.2.4 Program Analysis -> Import Parameter Module”.
 1#!/usr/bin/python3
 2# coding=utf8
 3#2.AI视觉玩法/第1课 颜色分类(2.AI Vision Game/Lesson 1 Color Sorting)
 4import sys
 5import cv2
 6import time
 7import math
 8import signal
 9import threading
10import numpy as np
11from common import yaml_handle
12from calibration.camera import Camera
② Set initial state
Set initial state, including the initial position of servo, PID, color threshold value, etc.
29# 初始位置(initial position)
30def init_move():
31    agc.runAction('15_5_12345')
32    set_rgb('None')
33
34range_rgb = {
35    'red': (0, 0, 255),
36    'blue': (255, 0, 0),
37    'black': (0, 0, 0),
38}
Image processing
(1) Image pre-processing
Resizing and Gaussian blur processing of the image.
171    frame_resize = cv2.resize(img_copy, size, interpolation=cv2.INTER_NEAREST)
172    frame_gb = cv2.GaussianBlur(frame_resize, (3, 3), 3)
cv2.resize(img_copy, size, interpolation=cv2.INTER_NEAREST) is an operation to resize the image.
The first parameter img_copy is the image to be resized.
The second parameter size is the target size.
The third parameter interpolation is the interpolation method, which is used to determine the pixel interpolation algorithm used for resizing.
cv2.GaussianBlur(frame_resize, (3, 3), 3) applies Gaussian blur to the image.
The first parameter frame_resize is the image to be blurred.
The second parameter (3, 3) is the size of the Gaussian kernel, indicating that the width and height of the kernel are both 3.
The third parameter 3 is the standard deviation of the Gaussian kernel, used to control the degree of blur.
(2) Color space conversion
Convert the BGR image to LAB image.
168 frame_lab = cv2.cvtColor(frame_gb, cv2.COLOR_BGR2LAB) # 将图像转换到LAB空间(convert the image to LAB space)
(3) Binarization processing
Use inRange() function in cv2 library to process binarization.
180            if i in lab_data:
181                frame_mask = cv2.inRange(frame_lab,
182                                             (lab_data[i]['min'][0],
183                                              lab_data[i]['min'][1],
184                                              lab_data[i]['min'][2]),
185                                             (lab_data[i]['max'][0],
186                                              lab_data[i]['max'][1],
187                                              lab_data[i]['max'][2]))  #对原图像和掩模进行位运算(perform bitwise operation to original image and mask)
The first parameter frame_lab is inputting image.
The second parameter lab_data[i]['min'][0] is the lower limit of the threshold.
The third parameter lab_data[i]['max'][0] is the upper limit of the threshold.
(4) Opening and closing operation
188                opened = cv2.morphologyEx(frame_mask, cv2.MORPH_OPEN, np.ones((3, 3), np.uint8))  # 开运算(opening operation)
189                closed = cv2.morphologyEx(opened, cv2.MORPH_CLOSE, np.ones((3, 3), np.uint8))  # 闭运算(closing operation)
This line of code performs an opening operation on a binary image using cv2.morphologyEx(frame_mask, cv2.MORPH_OPEN, np.ones((3, 3), np.uint8)).
The first parameter frame_mask is the binary image on which morphological operations are to be performed.
The second parameter, cv2.MORPH_OPEN, specifies the opening operation to be performed.
The third parameter, np.ones((3, 3), np.uint8), is the structuring element used in morphological operations, defining the shape and size of the operation. Here, a 3x3 matrix filled with ones is used as the structuring element.
The same applies to the closing operation function.
(5) Get the contour with the largest area
After completing the above image processing, it is necessary to obtain the contours of the recognized targets. This involves using the findContours() function from the cv2 library.
190 contours = cv2.findContours(closed, cv2.RETR_EXTERNAL, cv2.CHAIN_APPROX_NONE)[-2] # 找出轮廓(find out contour)
Take code contours = cv2.findContours(closed, cv2.RETR_EXTERNAL, cv2.CHAIN_APPROX_NONE)[-2] as example:
The first parameter dilated is inputting image.
The second parameter cv2.RETR_EXTERNAL is the contour retrieval mode.
The third parameter cv2.CHAIN_APPROX_NONE)[-2] is the contour approximation method.
Find the contour with the largest area in the obtained contour. In order to avoid interference, you need to set a minimum value. The target contour is considered valid only if its area is greater than this value.
191                areaMaxContour, area_max = get_area_maxContour(contours)  # 找出最大轮廓(find out the largest contour)
192                if areaMaxContour is not None:
193                    if area_max > max_area:  # 找最大面积(find the largest area)
194                        max_area = area_max
195                        color_area_max = i
196                        areaMaxContour_max = areaMaxContour
(6) Determine the largest color block
202            if not start_pick_up:
203                if color_area_max == 'red':  # 红色最大(red is the largest area)
204                    color = 1
205                elif color_area_max == 'blue':  # 蓝色最大(blue is the largest area)
206                    color = 2
207                else:
208                    color = 0
209                color_list.append(color)
(7) Multiple judgments
Take the average by multiple judgments, and determine the recognized color.
211                if len(color_list) == 50:  # 多次判断(determine for multiple times)
212                    # 取平均值(take average value)
213                    color = np.mean(np.array(color_list))
214                    color_list = []
215                    start_pick_up = True
216                    if color == 1:
217                        detect_color = 'red'
218                        draw_color = range_rgb["red"]
219                    elif color == 2:
220                        detect_color = 'blue'
221                        draw_color = range_rgb["blue"]
222                    else:
223                        start_pick_up = False
224                        detect_color = 'None'
225                        draw_color = range_rgb["black"]
Color recognition
(1) Open RGB light and buzzer
131        if __isRunning:
132            if detect_color != 'None' and start_pick_up:  # 检测到色块(a color block is detected)
133                board.set_buzzer(1900, 0.1, 0.9, 1)# 设置蜂鸣器响0.1秒(set the buzzer to emit for 0.1 seconds)
134                set_rgb(detect_color) # 设置扩展板上的彩灯与检测到的颜色一样(set the color light on the expansion board to match the detected color)
Call the function set_rgb() to set the color light on the expansion board to match the detected color. Set the RGB lights on the expansion board based on the input color parameters.
Call the function set_buzzer() to set the buzzer to emit for 0.1 seconds continuously. It is used to control the buzzer sound effect and duration.
You can control the RGB lights on the expansion board based on the detected color and provide feedback through the buzzer’s sound.
Execute action group
136                if detect_color == 'red' :  # 检测到红色,则抓取小球放到右边(red is detected, grasp the ball and place it to the right)
137                    time.sleep(2)
138                    agc.runAction('18_right_move')
139
140                else:                      # 检测到蓝色,则抓取小球放到左边(blue is detected, grasp the ball and place it to the left)
141                    time.sleep(2)
142                    agc.runAction('17_left_move')
Use agc.runAction function to call the action group based on the recognized result.
4.3 Target Position Recognition
4.3.1 Brief Analysis of the Task
The implementation of target tracking can be divided into two parts: color recognition and position marking. First, for the color recognition part, Gaussian filtering is applied to the image for noise reduction. The Lab color space is then used to convert the color of the objects (for more details on the Lab color space, please refer to the “OpenCV Vision Basic Course”).
Next, color thresholding is used to identify the color of objects within the circle. The image is then masked (masking involves using a selected image, shape, or object to globally or locally occlude the processed image).
After performing morphological operations (open and close operations) on the object’s image, the largest contour is outlined with a circle.
Opening operation: The image is eroded first and then dilated. This operation is used to remove small objects, smooth shape boundaries, and preserve the overall area. It helps remove small noise particles and separate objects that are connected.
Closing operation: The image is dilated first and then eroded. This operation is used to fill small holes within the objects, connect adjacent objects, and reconnect broken contour lines while smoothing the boundaries without changing the area.
Position marking requires specific detection algorithms. The basic principle is to search for areas in the image that match predefined features or patterns, then return the position and bounding box of these areas.
4.3.2 Start and Close the Game
Note
The input of commands must strictly distinguish between uppercase and lowercase letters, as well as spaces. Additionally, you can use the “Tab” key on the keyboard to auto-complete keywords.
(1) Power on the robot and use VNC Viewer to connect to the remote desktop.
(2) Click the icon in the top left corner of the system desktop or press the shortcut “Ctrl+Alt+T” to open the LX terminal.
(3) In the terminal, enter the command to navigate to the directory where the program is located, then press Enter:
cd uhandpi/function_demo
(4) Enter the command and press Enter to start the program:
python3 Target_location_identification.py
(5) To close the program, simply press “Ctrl+C” in the LX terminal. If it does not close, press it multiple times.
4.3.3 Program Outcome
The program defaults to recognizing red, green, and blue balls. After recognition, it will highlight the objects in the transmitted image and display their XY coordinates.
4.3.4 Program Description
The source code for this program is located at: /home/pi/uhandpi/function_demo/Target_location_identification.py
Importing Libraries
 1#!/usr/bin/python3
 2# coding=utf8
 3import os
 4import sys
 5import cv2
 6import time
 7import signal
 8import math
 9import threading
10import datetime
11import numpy as np
12from common import misc
13from common import yaml_handle
14from common.pid import PID
15from calibration.camera import Camera
Import the necessary libraries, including OpenCV, time, math, threading, and inverse kinematics. To call a function from a library, use the format LibraryName.FunctionName(Parameters). For example:
148 time.sleep(0.01)
This calls the sleep function from the time library, which is used for adding delays.
Python comes with several built-in libraries like time, cv2, math, which can be imported directly. You can also create your own libraries, such as the “yaml_handle” file reading library.
Instantiating Libraries
Sometimes, library names are long and hard to remember. To make function calls more convenient, we often instantiate libraries using shorter names. For example:
131if __name__ == '__main__':
132    from common.ros_robot_controller_sdk import Board
133    from common.action_group_controller import ActionGroupController
134    board = Board()
After instantiation, functions from the Board library can be called as:
Board.FunctionName(Parameters)
This makes calling functions much easier.
60 board.set_buzzer(1900, 0.1, 0.9, 1) # 以1900Hz的频率,持续响0.1秒,关闭0.9秒,重复1次(at a frequency of 1900Hz for 0.1 seconds, followed by silence for 0.9 seconds, and repeat this sequence once)
Main Function Analysis
The main function in the Python program is defined by the statement __name__ == ‘__main__ ‘. The function init() is called first to initialize the configuration. In this program, initialization includes resetting the robotic arm to its initial position and reading the color threshold file. Generally, other configurations like ports, peripherals, and timer interrupts are also set up during initialization.
131if __name__ == '__main__':
132    from common.ros_robot_controller_sdk import Board
133    from common.action_group_controller import ActionGroupController
134    board = Board()
135    camera = Camera()
136    camera.camera_open(correction=True)
(1) Reading Camera Image
135    camera = Camera()
136    camera.camera_open(correction=True)  # 开启畸变矫正, 默认不开启
(2) Image Processing
When the image is successfully read, the value of img will no longer be empty.
137    while True:
138        img = camera.frame
139        if img is not None:
140            frame = img.copy()
141            Frame = run(frame)  # Make sure run() is defined and imported appropriately
142            result_image = cv2.resize(Frame, (320, 240))  # Resize image to 320x240
143            cv2.imshow('face_demo.py', result_image)
144            key = cv2.waitKey(1)
145            if key == 27:  # Exit on ESC key
146                break
The function img.copy() copies the contents of img to frame.
The function run() processes the image. Detailed image processing steps are provided in Section Image Processing.
(3) Displaying Image in Window
142            result_image = cv2.resize(Frame, (320, 240))  # Resize image to 320x240
143            cv2.imshow('face_demo.py', result_image)
144            key = cv2.waitKey(1)
145            if key == 27:  # Exit on ESC key
146                break
The function cv2.resize() resizes the processed image to an appropriate size.
The function cv2.imshow() displays the image in a window. frame is the window name, and frame_resize is the content to be displayed. It is important to include cv2.waitKey(), otherwise, the image will not display.
The function cv2.waitKey() waits for a key input. The parameter 1 specifies the delay time (in milliseconds).
Image Processing
72def run(img):
73    global draw_color
74    global color_list
75    global detect_color
76
77    img_copy = img.copy()
78    img_h, img_w = img.shape[:2]
79
80    frame_resize = cv2.resize(img_copy, size, interpolation=cv2.INTER_NEAREST)
81    frame_gb = cv2.GaussianBlur(frame_resize, (3, 3), 3)
82    frame_lab = cv2.cvtColor(frame_gb, cv2.COLOR_BGR2LAB)  # 将图像转换到LAB空间(convert image to the LAB space)
(1) Image Resizing
The image is resized for easier processing.
80 frame_resize = cv2.resize(img_copy, size, interpolation=cv2.INTER_NEAREST)
The first parameter img_copy is the input image.
The second parameter size specifies the output image size.
(2) Gaussian Filtering
Images often contain noise, which can degrade the quality and make features less distinguishable. Depending on the type of noise, different filtering methods should be chosen. Common methods include Gaussian filtering, median filtering, and mean filtering.
81 frame_gb = cv2.GaussianBlur(frame_resize, (3, 3), 3)
The first parameter frame_resize is the input image.
The second parameter (3, 3) is the size of the Gaussian kernel.
The third parameter 3 is the standard deviation of the Gaussian kernel in the X direction.
(3) Color Space Conversion
The image is converted to the LAB color space using the cv2.cvtColor() function.
82 frame_lab = cv2.cvtColor(frame_gb, cv2.COLOR_BGR2LAB) # 将图像转换到LAB空间(convert image to the LAB space)
The first parameter frame_gb is the input image.
The second parameter cv2.COLOR_BGR2LAB specifies the conversion format. cv2.COLOR_BGR2LAB converts BGR to LAB format. If you need to convert to RGB, use cv2.COLOR_BGR2RGB.
(4) The image is converted to a binary image with only two values: 0 and 1. This simplifies the image and reduces data size, making it easier to process. The inRange() function from cv2 is used for binarization.
88    for i in lab_data:
89        if i != 'black' and i != 'white':
90            frame_mask = cv2.inRange(frame_lab,
91                                     (lab_data[i]['min'][0],
92                                      lab_data[i]['min'][1],
93                                      lab_data[i]['min'][2]),
94                                     (lab_data[i]['max'][0],
95                                      lab_data[i]['max'][1],
96                                      lab_data[i]['max'][2]))  #对原图像和掩模进行位运算(operate bitwise operation to original image and mask)
The first parameter frame_lab is the input image.
The second parameter (lab_data[i]['min'][0], lab_data[i]['min'][1], lab_data[i]['min'][2]) is the lower threshold for the color.
The third parameter (lab_data[i]['max'][0], lab_data[i]['max'][1], lab_data[i]['max'][2]) is the upper threshold for the color.
(5) Morphological Operations (Opening and Closing)
To reduce noise and smooth the image, opening and closing operations are applied. Opening is erosion followed by dilation, while closing is dilation followed by erosion. The cv2.morphologyEx() function is used for these morphological operations.
97            eroded = cv2.erode(frame_mask, cv2.getStructuringElement(cv2.MORPH_RECT, (3, 3)))  #腐蚀(corrosion)
98            dilated = cv2.dilate(eroded, cv2.getStructuringElement(cv2.MORPH_RECT, (3, 3))) #膨胀(dilation)
For erosion, the first parameter frame_mask is the input binary image.
For dilation, the first parameter eroded is the result of the erosion operation.
The second parameter cv2.getStructuringElement(cv2.MORPH_RECT, (3, 3)) defines the structuring element used for the morphological transformation. This specifies the shape and size of the neighborhood used during the transformation. Here, cv2.MORPH_RECT specifies a rectangular shape, and (3, 3) defines a 3x3 rectangular structuring element.
(6) Contour Detection
After the image processing steps, the contours of the identified target need to be extracted using cv2.findContours().
100 areaMaxContour, area_max = getAreaMaxContour(contours) #找出最大轮廓(find out the contour with the maximal area)
The first parameter dilated is the input image, which is the result of the dilation operation.
The second parameter cv2.RETR_EXTERNAL specifies the contour retrieval mode, meaning only the outermost contours are retrieved, ignoring any nested contours.
The third parameter cv2.CHAIN_APPROX_NONE)[-2] specifies the contour approximation method, which stores each point of the contour for an accurate representation.
The largest contour is then identified by area, and a minimum threshold area is set. Only contours with an area greater than the threshold are considered valid.
100            areaMaxContour, area_max = getAreaMaxContour(contours)  #找出最大轮廓(find out the contour with the maximal area)
101            if areaMaxContour is not None:
102                if area_max > max_area:#找最大面积(find out the maximal area)
103                    max_area = area_max
104                    color_area_max = i
105                    areaMaxContour_max = areaMaxContour
106
107    if max_area > 200:  # 有找到最大面积(the largest area is found)
(7) Obtaining Position Information
The cv2.minEnclosingCircle() function is used to find the minimum enclosing circle of the target contour and obtain its center coordinates and radius.
Since the image was previously resized, the Misc.map() function is used to map the center coordinates and radius to their actual size.
107    if max_area > 200:  # 有找到最大面积(the largest area is found)
108        ((centerX, centerY), radius) = cv2.minEnclosingCircle(areaMaxContour_max)  # 获取最小外接圆(get the minimum circumcircle)
109        centerX = int(misc.map(centerX, 0, size[0], 0, img_w))
110        centerY = int(misc.map(centerY, 0, size[1], 0, img_h))
111        radius = int(misc.map(radius, 0, size[0], 0, img_w))
112        cv2.circle(img, (centerX, centerY), radius, range_rgb[color_area_max], 2)#画圆(draw circle)
Finally, the center coordinates are displayed in both the terminal and the image.
127    cv2.putText(img, "Color: " + detect_color, (10, img.shape[0] - 10), cv2.FONT_HERSHEY_SIMPLEX, 0.65, draw_color, 2)
128    cv2.putText(img, f"({centerX}, {centerY})", (centerX, centerY - 20), cv2.FONT_HERSHEY_SIMPLEX, 1.0, range_rgb[color_area_max], 2)
129    return img
4.4 Color Tracking
4.4.1 Program Logic
In the previous lessons, we learned how to implement simple color recognition using uHandPi. In this lesson, we will further explore a related game called “color tracking”.
The principle of this experiment is similar to the previous one, still using the Lab color space to convert the color of objects. For detailed learning about the Lab color space, you can refer to “OpenCV Basic Courses”.
Second, identify the object color in the circle using color threshold value, then apply a mask to that part of the image. Masking is the process of using selected images, graphics, or objects to globally or locally obscure parts of the processed image.
After processing the opening operation and closing operation of the object image, the largest object contour is circled.
Opening operation: It involves first corrosion followed by dilation of the image. Its purpose is to eliminate small objects, smooth the shape boundaries, and maintain the area unchanged. It can remove small particle noise and break connections between object.
Closing operation: It involves first dilation followed by corrosion of the image. Its purpose is to fill small holes inside objects, connect nearby objects, reconnect broken contour lines, and smooth their boundaries while maintaining the area unchanged.
Finally, by comparing the center coordinates of the frame with the position of the tracked target using the PID algorithm, the pan-tilt servos are controlled to rotate and achieve tracking. The PID algorithm is the most widely used type of automatic controller. In process control, it operates based on the error’s proportion (P), integral (I), and derivative (D). It has the advantages of being simple in principle, easy to implement, versatile in application, with control parameters being independent of each other, and relatively simple parameter selection.
4.4.2 Operation Steps
Note
Instructions must be entered with strict attention to case sensitivity and spacing.
(1) Power on the robot and use VNC Viewer to connect to the remote desktop.
(2) Click the icon  in the upper left corner of the desktop, or press “Ctrl+Alt+T” to open LX terminal.
(3) Input the following command to navigate to the directory where the game program is located, then press Enter.
cd uhandpi/functions
(4) Input the below command of activating the program and press Enter.
python3 color_tracking.py
(5) To close this game, simply wait for the game program to finish loading, then press “Ctrl+C”. If the closing fails, you can try pressing “Ctrl+C” multiple times.
4.4.3 Program Outcome
Note
The program defaults to recognizing the color red. To switch to other color, refer to “4.4.5 Function Extension -> Change default recognized color”.
When the camera detects an object of the specified color, the feedback on the screen will outline it, and the uHandPi pan-tilt platform will rotate accordingly.
4.4.5 Function Extension
Adjust Color Threshold
During the game, if the color recognition effect is not satisfactory, adjustments to the color thresholds are required. In this section, adjusting red color is taken as an example, and other color settings can be adjusted following the same method. The operational steps are as follows:
(1) Double-click the icon on the desktop, and click “Execute” in the prompt interface.

(2) Then click “Connect” to connect it to the camera.
(3) After connection successfully, select “red” in the bottom right corner of the selection bar.

(4) If the transmitted image does not appear in the popped-up interface, it indicates that the camera is not successfully connected. Please check the camera connection cable to ensure it is properly connected.
(5) In the interface below, the right side displays the real-time transmitted image, while the left side shows the color to be captured. Align the camera with the red ball, then drag the six sliders below to make the area of the red ball on the left side of the screen completely white, while the other areas become black. Then, click the “Save” button to save the data.

Change default recognized color
The color recognition program is built with three predefined colors: red, green, and blue. By default, it recognizes red. When red is detected, the feedback on the screen will outline it, and the uHandPi pan-tilt platform will rotate accordingly.
Here, we’ll use changing the recognized color to green as an example. The specific modification steps are as follows:
(1) Input the following command and press Enter to switch to the source code program path.
cd uhandpi/functions
(2) Then input the command below and press Enter to open the program file.
sudo vim color_tracking.py
(3) Locate the code outlined in the image in the opened program.
(4) Press “i” on the keyboard to enter the editing mode.
(5) Replace “red” with “green” in detect_color == 'red'as pictured:
(6) Next, save the modified contents. Press “Esc” key and input “:wq” in turn (make sure there is a colon before “wq”). Then press Enter to save and exit.
(7) Input command again and press Enter to open the game.
python3 color_tracking.py
4.4.6 Programming Analysis
The source code of this program is locate in: /home/pi/uhandpi/functions/color_tracking.py
Color tracking program mainly uses the resize() and GaussiamBlur() function in the cv2 library.
The resize() function is used to resize images. The first parameter within the parentheses is the input image, the second parameter is the output image size, and the third parameter is the interpolation method.
The GaussianBlur() function is used to apply Gaussian filtering to an image. Take the code “frame_GaussianBlur = cv2.GaussianBlur(frame_resize, (3, 3), 0)” as example, the parameters inside the parentheses are interpreted as follows:
The first parameter frame_resize is the input image.
The second parameter (3, 3) is the size of the Gaussian kernel.
The third parameter 0 specifies the variance allowed near the mean in Gaussian filtering. A larger value allows for a larger variance around the mean, while a smaller value allows for a smaller variance around the mean.
Note
Before modifying the program, it’s crucial to create a backup of the original factory program. Avoid modifying parameters in the wrong way, which may cause the robot to malfunction and become irreparable!!!
Import parameter module
| Import module | Function |
|---|---|
| import sys | The Python "sys" module has been imported for accessing system-related functions and variables. |
| import cv2 | The OpenCV library has been imported for image processing and computer vision-related functionalities. |
| import time | The Python "time" module has been imported for time-related functionalities, such as delay operations. |
| from common import misc | The Misc module has been imported for processing obtained rectangle data. |
| from common.pid import PID | Import PID control library |
| import threading | Provides an environment for running multiple threads concurrently |
| import yaml_handle | Contains functionalities or tools related to processing YAML format files. |
| from common.action_group_controller import ActionGroupController | Import action group execution library |
| from common.ros_robot_controller_sdk import Board | Import board library to control sensor |
Function Logic
Capture image information through the camera, then process the image, specifically by performing binarization. At the same time, to reduce interference and make the image smoother, perform erosion and dilation operations on the image. Next, obtain the largest area contour and minimum enclosing circle of the target. Get the color block tracking area and rotate the robot hand to the color block position based on PID algorithm.
Program logic and related code analysis
(1) Initialization
① Import function library
In this initialization step, the first task is to import the required libraries for subsequent program calls. For details on the imports, refer to “4.4.6 Programming Analysis -> Import parameter module”.
 4import sys
 5import cv2
 6import time
 7import math
 8import signal
 9import threading
10import numpy as np
11from common import yaml_handle
12from common.pid import PID
13from common import misc
14from calibration.camera import Camera
② Set initial state
Set initial state, including the target color, the initial position of servo, motor state, etc.
33# 初始位置(initial position)
34def init_move():
35    agc.runAction('15_5_12345')
36
37range_rgb = {
38    'red': (0, 0, 255),
39    'green': (0, 255, 0),
40    'blue': (255, 0, 0),
41    'black': (0, 0, 0),
42}
(2) Image pre-processing
① Image pre-processing
Resizing and Gaussian blur processing of the image.
167    frame_resize = cv2.resize(img_copy, size, interpolation=cv2.INTER_NEAREST)
168    frame_gb = cv2.GaussianBlur(frame_resize, (3, 3), 3)
cv2.resize(img_copy, size, interpolation=cv2.INTER_NEAREST) is an operation to resize the image.
The first parameter img_copy is the image to be resized.
The second parameter size is the target size.
The third parameter interpolation is the interpolation method, which is used to determine the pixel interpolation algorithm used for resizing.
cv2.GaussianBlur(frame_resize, (3, 3), 3) applies Gaussian blur to the image.
The first parameter frame_resize is the image to be blurred.
The second parameter(3, 3) is the size of the Gaussian kernel, indicating that the width and height of the kernel are both 3.
The third parameter 3 is the standard deviation of the Gaussian kernel, used to control the degree of blur.
② Color space conversion
Convert the BGR image to LAB image
169 frame_lab = cv2.cvtColor(frame_gb, cv2.COLOR_BGR2LAB) # 将图像转换到LAB空间(convert the image to LAB space)
③ Binarization processing
Use “inRange()” function in cv2 library to process binarization.
164            frame_mask = cv2.inRange(frame_lab,
165                                         (lab_data[i]['min'][0],
166                                          lab_data[i]['min'][1],
167                                          lab_data[i]['min'][2]),
168                                         (lab_data[i]['max'][0],
169                                          lab_data[i]['max'][1],
170                                          lab_data[i]['max'][2]))  #对原图像和掩模进行位运算(perform bitwise operation to original image and mask)
The first parameter frame_lab is inputting image.
The second parameter lab_data[i]['min'][0] is the lower limit of the threshold.
The third parameter lab_data[i]['max'][0] is the upper limit of the threshold.
④ Opening and closing operation
181            opened = cv2.morphologyEx(frame_mask, cv2.MORPH_OPEN, np.ones((3, 3), np.uint8))  # 开运算(opening operation)
182            closed = cv2.morphologyEx(opened, cv2.MORPH_CLOSE, np.ones((3, 3), np.uint8))  # 闭运算(closing operation)
This line of code performs an opening operation on a binary image using cv2.morphologyEx(frame_mask, cv2.MORPH_OPEN, np.ones((3, 3), np.uint8)).
The first parameter frame_mask is the binary image on which morphological operations are to be performed.
The second parameter, cv2.MORPH_OPEN, specifies the opening operation to be performed.
The third parameter, np.ones((3, 3), np.uint8), is the structuring element used in morphological operations, defining the shape and size of the operation. Here, a 3x3 matrix filled with ones is used as the structuring element.
The same applies to the closing operation function.
⑤ Get position information
After completing the above image processing, it is necessary to obtain the contours of the recognized targets. This involves using the “findContours()” function from the cv2 library.
183 contours = cv2.findContours(closed, cv2.RETR_EXTERNAL, cv2.CHAIN_APPROX_NONE)[-2] # 找出轮廓(find out contour)
Take code contours = cv2.findContours(closed, cv2.RETR_EXTERNAL, cv2.CHAIN_APPROX_NONE)[-2] as example:
The first parameter dilated is inputting image.
The second parameter cv2.RETR_EXTERNAL is the contour retrieval mode.
The third parameter cv2.CHAIN_APPROX_NONE)[-2] is the contour approximation method.
Find the contour with the largest area in the obtained contour. In order to avoid interference, you need to set a minimum value. The target contour is considered valid only if its area is greater than this value. Then, get the minimum bounding circumcircle through minEnclosingCircle() function.
186    if area_max > 1000:  # 有找到最大面积(the largest area is found)
187        (center_x, center_y), radius = cv2.minEnclosingCircle(areaMaxContour)  # 获取最小外接圆(get the minimum bounding circumcircle)
188        color_radius = int(misc.map(radius, 0, size[0], 0, img_w))
189        color_center_x = int(misc.map(center_x, 0, size[0], 0, img_w))
190        color_center_y = int(misc.map(center_y, 0, size[1], 0, img_h))
191        if color_radius > 300:
192            color_radius = 0
193            color_center_x = -1
194            color_center_y = -1
195            return img
(3) Target tracking
After image processing is completed, if the tracing game is chosen, it is implemented by calling board.pwm_servo_set_position() function.
133    while True:
134        if __isRunning:
135            if color_center_x != -1 and color_center_y != -1:
136                set_rgb(target_color[0]) # 设置扩展板上的彩灯与检测到的颜色一样(set the color light on the expansion board to match the detected color)
137                # 手掌云台追踪(hand pan-tilt tracking)
138                # 根据摄像头X轴坐标追踪(track based on the camera x-axis)
139                if abs(color_center_x - img_w/2.0) < 15: # 移动幅度比较小,则不需要动(if the movement amplitude is relatively small, there is no need to move)
140                    color_center_x = img_w/2.0
141                servo6_pid.SetPoint = img_w/2.0    # 设定(set)
142                servo6_pid.update(color_center_x)  # 当前(current)
143                servo_6 += int(servo6_pid.output)  # 获取PID输出值(get PID output value)
144
145                servo_6 = 800 if servo_6 < 800 else servo_6  # 设置舵机范围(set servo range)
146                servo_6 = 2200 if servo_6 > 2200 else servo_6
147                board.pwm_servo_set_position(0.01, [[6, 3000-servo_6]]) # 设置舵机移动(set servo movement)
148                time.sleep(0.01)
Use board.pwm_servo_set_position function to control servo. The parameter definition The meaning of the parameters within the parentheses is as follows:
The first parameter 0.02 is the action duration in seconds.
The second parameter [[6, servo_6]] indicates that servo NO.6 will rotate by a pulse width of servo_6.
4.5 Face Detection
4.5.1 Program Description
Once a face is detected, the buzzer will emit a beeping sound and highlight the face in the returned image.
Facial recognition is one of the most widely used applications in artificial intelligence, particularly in image recognition. It is commonly applied in scenarios such as smart locks and facial unlocking for smartphones.
In this section, the trained face model will first scale and detect the face in the image. Then, the detected face coordinates are converted back to the original scale. The system will identify the largest face, outline it, and trigger the buzzer to emit a beeping sound.
4.5.2 Start and Close the Game
Note
Instructions must be entered with strict attention to case sensitivity and spacing.
(1) Power on the robot and use VNC Viewer to connect to the remote desktop.
(2) Click at upper left corner, or press “Ctrl+Alt+T” to open LX terminal.
(3) Enter the following command and press Enter into the directory where the game programs are stored.
cd uhandpi/function_demo
(4) Enter the command below and press Enter to start the game.
python3 face_demo.py
(5) If want to quit this game, press “Ctrl+C” after the game program completes loading. If the game cannot be quit, please try again.
4.5.3 Program Outcome
Note
For optimal performance, please avoid using this feature under strong lighting conditions, such as direct sunlight or close proximity to incandescent lights, as intense light can affect the accuracy of facial recognition. It is recommended to use this feature indoors, with the face positioned at a distance of 50cm to 1m from the camera.
During detection, uHandPi will rotate left and right. When the camera detects a face, uHandPi will stop rotating, perform a “waving” gesture, and outline the face in the feedback on the screen.
4.5.4 Program Analysis
The source code of this program is locate in :/home/pi/uhandpi/function_demo/face_demo.py
Import Parameter Module
| Import module | Function |
|---|---|
| import sys | The Python "sys" module has been imported for accessing system-related functions and variables. |
| import cv2 | The OpenCV library has been imported for image processing and computer vision-related functionalities. |
| import time | The Python "time" module has been imported for time-related functionalities, such as delay operations. |
| import mediapipe as mp | The Mediapipe structure is imported for processing the face information. |
| import threading | Provides an environment for running multiple threads concurrently |
| import numpy as np | Import the NumPy library, which supports a wide range of multidimensional arrays and matrix operations, as well as mathematical function libraries. |
| from common.action_group_controller import ActionGroupController | Import action group execution library |
| from common.ros_robot_controller_sdk import Board | The board library is imported to control sensor. |
Function logic
Based on the implementation outcome, the program logic can be summarized as below:
Capture image information through the camera, then process the image, specifically by performing color space conversion. Then call face detection machine of the MediaPipe library to detect face.
Once the face is detected, the robot hand will execute “waving” motion. If no face is detected, the robot hand will move left and right to search for a face.
Program logic and related code analysis
(1) Initialization
① Import function library
In this initialization step, the first task is to import the required libraries for subsequent program calls. For details on the imports, refer to “4.5.4 Program Analysis -> Import Parameter Module”.
 3import sys
 4import cv2
 5import time
 6import signal
 7import threading
 8import mediapipe as mp
 9from calibration.camera import Camera
10from common.ros_robot_controller_sdk import Board
② Set Initial State
Set initial state, including the initial position of servo, face detection machine, etc.
12board = Board()
13# 人脸检测(face detection)
14di_once = True
15if sys.version_info.major == 2:
16    print('Please run this program with python3!')
17    sys.exit(0)
18
19# 导入人脸识别模块(import human face detection module)
20face = mp.solutions.face_detection
21# 自定义人脸识别方法,最小的人脸检测置信度0.5(custom human face recognition method, the minimum human face detection confidence is 0.5)
22face_detection = face.FaceDetection(min_detection_confidence=0.5)
23di_once = True
24detect_people = False
(2) Image Processing
① Color Space Conversion
Convert the BGR image to LAB image
45 image_rgb = cv2.cvtColor(img_copy, cv2.COLOR_BGR2RGB)
② Use Mediapipe Face Model for Recognition
Perform face detection and draw a rectangular box around the detected face.
48    results = face_detection.process(image_rgb)
49
50    # 如果检测到人脸
51    if results.detections:
52        for detection in results.detections:
53            bboxC = detection.location_data.relative_bounding_box
54            bbox = (int(bboxC.xmin * img_w), int(bboxC.ymin * img_h),
55                    int(bboxC.width * img_w), int(bboxC.height * img_h))
56            cv2.rectangle(img, bbox, (0, 255, 0), 2)
57
58        # 如果之前没有检测到人脸,则触发蜂鸣器
59        if di_once:
60            board.set_buzzer(1900, 0.3, 0.5, 1)
61            di_once = False
62    else:
63        # 如果没有检测到人脸,重置蜂鸣器触发标志
64        di_once = True
(3) Face Recognition
If a face is detected, the buzzer will be activated to emit a sound.
59        if di_once:
60            board.set_buzzer(1900, 0.3, 0.5, 1)
61            di_once = False
4.6 Face Recognition
4.6.1 Program Description
MediaPipe is a cross-platform machine learning framework developed by Google for real-time processing of multimedia data, including images and videos. It offers a variety of pre-trained models and libraries, one of which is a face detection model.
First, import the MediaPipe face detection model to capture real-time footage from the camera. Then, use OpenCV to process the image, such as converting the color space (for more details on Lab color space, refer to “OpenCV Vision Basic Course” for in-depth learning). The face detection model uses a minimum confidence threshold to determine if a face has been successfully detected.
Once a face is detected, the system identifies key facial regions. Each detected face is represented by a message containing a bounding box and six key points: right eye, left eye, nose tip, mouth center, right ear area, and left ear area.
Finally, the detected face is outlined with a bounding box, and the six key points are marked on the face.
4.6.2 Start and Close the Game
Note
The input of commands must strictly distinguish between uppercase and lowercase letters.
(1) Power on the device and access the Raspberry Pi desktop using VNC.
(2) Click the icon in the top left corner of the system desktop or press the shortcut “Ctrl+Alt+T “ to open the LX terminal.
(3) In the terminal, enter the following command to navigate to the directory where the program is located, then press Enter:
cd uhandpi/functions
(4) Enter the command and press Enter to start the program:
python3 face_detection.py
(5) To close the program, simply press “Ctrl+C” in the LX terminal. If it does not close, press it multiple times.
4.6.3 Program Outcome
Once the activity begins, the camera’s pan-tilt will rotate left and right. If no face is detected, the robotic arm will scan by rotating left and right. Upon detecting a face, the claw will move up and down to greet the user.
4.6.4 Program Brief Analysis
The source code of the program is saved in: /home/pi/uhandpi/functions/face_detection.py
Note
Before modifying the program, make sure to back up the original factory settings. Do not make changes directly in the source code file to avoid incorrect modifications that could cause the robot to malfunction and become irreparable!
Importing Parameter Modules
| Module Import | Purpose |
|---|---|
| import sys | Imports the Python sys module, which provides access to system-specific parameters and functions. |
| import cv2 | Imports the OpenCV library, which is used for image processing and computer vision tasks. |
| import time | Imports the Python time module, which provides functions for handling time-related tasks, such as delays. |
| import HiwonderSDK.Misc as Misc | Imports the Misc module from the Hiwonder SDK for handling recognized rectangular data. |
| import threading | Provides support for running tasks in multiple threads concurrently |
| import yaml_handle | Contains functions or tools for handling YAML format files |
| from ArmIK.Transform import * | Imports functions for robotic arm posture transformations |
| from ArmIK.ArmMoveIK import * | Provides functions for inverse kinematics solving and control for robotic arm movement |
| import HiwonderSDK.Board as Board | Imports the Board module from the Hiwonder SDK, which is used to control sensors and execute related actions |
Function Logic
Capture image data from the camera, then process the image by converting its color space. Next, use the MediaPipe library’s face detector to perform face detection. When a face is detected, the robotic hand will perform a “wave” gesture. If no face is detected, the robotic hand will move left and right to search for a face.
Program Logic and Code Analysis
(1) Initialization
① Importing Libraries
At this initialization step, necessary libraries are imported to facilitate future function calls within the program.
 4import sys
 5import cv2
 6import time
 7import signal
 8import threading
 9import mediapipe as mp
10from calibration.camera import Camera
② Setting Initial State
Set the initial state, which includes the initialization of the facial recognition module and the hardware initialization of the expansion board.
21mp_face_detection = mp.solutions.face_detection
22mp_drawing = mp.solutions.drawing_utils
23face_detection = mp_face_detection.FaceDetection() #阈值(threshold)
24
25target_detected = False
26servo_6 = 1500
27dx = 20
28
29# 初始位置(initial position)
30def init_move():
31    agc.runAction('15_5_12345')
32
33
34__isRunning = False
(2) Image Processing
① Color Space Conversion
The BGR image is converted to an RGB image.
123 img = cv2.cvtColor(img, cv2.COLOR_BGR2RGB)
The cvtColor() function is used to convert the color space of an image. Taking the code gray = cv2.cvtColor(frame_resize, cv2.COLOR_BGR2GRAY) as an example, the parameters within the parentheses are as follows:
First Parameter: frame_resize is the input image.
Second Parameter: cv2.COLOR_BGR2RGB specifies the conversion type, in this case, converting from BGR to grayscale.
② Invoke Face Detector
After completing the above image processing, input the image into the face detector for further processing.
112    results = face_detection.process(img)
113    img.flags.writeable = True
114
115    if __isRunning:
116        if results.detections:
117            for detection in results.detections:
118                scores = list(detection.score)
119                if scores and scores[0] > 0.8:
120                    mp_drawing.draw_detection(img, detection)
121                    target_detected = True
(3) Face Tracking
After completing image processing, if a face is detected, the robotic hand will perform a “waving” action. If no face is tracked, the robotic hand will rotate left and right to search for a face. The control of the robotic hand is achieved by calling the board.pwm_servo_set_position() function.
 68    while True:
 69        if __isRunning:
 70            if target_detected :
 71                time.sleep(1)
 72                data_1 = [2100, 950, 950, 950, 950]     #设置舵机运行角度(set servo running angle)
 73                data_2 = [950, 2100, 2100, 2100, 2100]
 74
 75                board.pwm_servo_set_position(0.4, [[1, data_1[0]], [2, data_1[1]], [3, data_1[2]],
 76                                 [4, data_1[3]], [5, data_1[4]]])
 77                time.sleep(0.4)
 78                board.pwm_servo_set_position(0.4, [[1, data_2[0]], [2, data_2[1]], [3, data_2[2]],
 79                                 [4, data_2[3]], [5, data_2[4]]])
 80                time.sleep(0.4)
 81                board.pwm_servo_set_position(0.4, [[1, data_1[0]], [2, data_1[1]], [3, data_1[2]],
 82                                 [4, data_1[3]], [5, data_1[4]]])
 83                time.sleep(0.4)
 84                board.pwm_servo_set_position(0.4, [[1, data_2[0]], [2, data_2[1]], [3, data_2[2]],
 85                                 [4, data_2[3]], [5, data_2[4]]])
 86                time.sleep(0.4)
 87                target_detected  = False
 88            else:
 89                servo_6 += dx
 90                if servo_6 >= 2500:
 91                    dx = -10
 92                    servo_6 = 2500
 93                if servo_6 <= 500:
 94                    dx = 10
 95                    servo_6 = 500
 96                board.pwm_servo_set_position(0.05, [[6, servo_6]])
 97                time.sleep(0.05)
 98
 99        else:
100            servo_6 = 1500
101            time.sleep(0.01)
Servo Control Using board.pwm_servo_set_position:
This function is used to control the servo motor. The parameters in the parentheses are as follows:
First Parameter: 0.05 specifies the duration of the action, measured in seconds.
Second Parameter: [[6, servo_6]] indicates that servo 6 will rotate by servo_6 pulse width units.
4.7 Scissors-Rock-Paper
4.7.1 Program Logic
Rock-paper-scissors is a common game, and the most important function of a bio-robot is to interact with us. In this section, we’ll implement this game using visual recognition.
In this lesson, we will use MediaPipe’s hand detection model to display the key points of the hand and the lines connecting these key points on the feedback screen.
First, import the hand detection model and then capture the real-time video from the camera. Then, performing operations such as flipping and changing color spaces on the image greatly reduces the need for data augmentation in the hand landmark model.
In addition, in our pipeline, we can also generate crops based on the hand landmarks recognized in the previous frame. We only call hand detection to reposition the hand when the landmark model no longer recognizes the presence of a hand.
Finally, detect the key points of the hands in the captured image and draw lines to connect them, then call the corresponding action group to complete the interaction.
4.7.2 Operation Steps
Note
Instructions must be entered with strict attention to case sensitivity and spacing.
(1) Power on the robot and use VNC Viewer to connect to the remote desktop.
(2) Click at upper left corner, or press “Ctrl+Alt+T” to open LX terminal.
(3) Enter the following command and press Enter into the directory where the game programs are stored.
cd uhandpi/functions
(4) Enter the below command and press Enter to start the game.
python3 rock_paper_scissors.py
(5) If want to quit this game, press “Ctrl+C” after the game program completes loading. If the game cannot be quit, please try again.
4.7.3 Program Outcome
When the camera detects a gesture, uHandPi will make a recognition judgment and provide feedback by displaying a corresponding gesture. For example, when the camera detects a “scissors” gesture, uHandPi will display a “rock” gesture in response.
4.7.4 Programming Analysis
The source code of this program is locate in : /home/pi/uhandpi/functions/rock_paper_scissors.py
Note
Before modifying the program, it’s crucial to create a backup of the original factory program. Avoid modifying parameters in the wrong way, which may cause the robot to malfunction and become irreparable!
Import parameter module
| Import module | Function |
|---|---|
| import sys | The Python "sys" module has been imported for accessing system-related functions and variables. |
| import cv2 | The OpenCV library has been imported for image processing and computer vision-related functionalities. |
| import time | The Python "time" module has been imported for time-related functionalities, such as delay operations. |
| import threading | Provides an environment for running multiple threads concurrently |
| import mediapipe as mp | The mediapipe library has been imported to recognize gesture. |
| from common.action_group_controller import ActionGroupController | Import action group execution library |
| from common.ros_robot_controller_sdk import Board | Import board library to control sensor |
| from common.transform import vector_2d_angle | Import a function to calculate the angle between two-dimensional vectors, which is used to calculate the angle between fingers. |
Function logic
Capture image information through the camera, then process the image, specifically by performing color space conversion. Then call face detection machine of the MediaPipe library to detect gesture. Based on the recognized gestures, calculate the degree of bending of each finger to determine the specific gesture. The robotic hand makes different gestures based on the recognized gesture results, thus achieving the interactive effect of “rock-paper-scissors” between humans and machines.
Program logic and related code analysis
(1) Initialization
① Import function library
In this initialization step, the first task is to import the required libraries for subsequent program calls. For details on the imports, refer to “4.7.4 Programming Analysis -> Import parameter module”.
 4import sys
 5import cv2
 6import time
 7import math
 8import signal
 9import threading
10import numpy as np
11import mediapipe as mp
12from calibration.camera import Camera
13from common.transform import vector_2d_angle
14
② Set initial state
Set initial state, including the initial position of servo, MediaPipe toolkit example for hand detection, etc.
24gesture = None
25mp_drawing = mp.solutions.drawing_utils
26hand_detector = mp.solutions.hands.Hands(
27            static_image_mode=False,
28            max_num_hands=1,
29            min_tracking_confidence=0.05,
30            min_detection_confidence=0.6
31        )
32
33
34# 初始位置(initial position)
35def init_move():
36    agc.runAction('15_5_12345')
The specific meanings of the example parameters for the hand_detector are as follows:
The first parameter, static_image_mode, is the processing mode for input images. The default value is “False”, indicating that the input image is treated as a video stream. After detecting the first image, only subsequent images are tracked for landmarks. Detection is performed again only if tracking fails. This detection mode helps reduce computational load and latency. When the value is “True”, the program detects all input images. This mode is suitable for detecting batches of static, unrelated images.
The second parameter, max_num_hands, is the maximum number of hands that can be detected, i.e., the maximum number of hands that can be recognized simultaneously.
The third parameter, min_tracking_confidence, is the minimum confidence value for the coordinate tracking model, with a range of 0 to 1. This parameter is not effective when the static_image_mode parameter is set toTrue.
The fourth parameter, min_detection_confidence, is the minimum confidence value for the hand detection model, with a range of 0 to 1. If the probability of hand detection is higher than this value, it is considered a successful detection.
(2) Image processing
① Image pre-processing
Resizing and Gaussian blur processing of the image.
168    frame_resize = cv2.resize(img_copy, size, interpolation=cv2.INTER_NEAREST)
169    frame_gb = cv2.GaussianBlur(frame_resize, (3, 3), 3)
cv2.resize(img_copy, size, interpolation=cv2.INTER_NEAREST) is an operation to resize the image.
The first parameter img_copy is the image to be resized.
The second parameter size is the target size.
The third parameter interpolation is the interpolation method, which is used to determine the pixel interpolation algorithm used for resizing.
cv2.GaussianBlur(frame_resize, (3, 3), 3) applies Gaussian blur to the image.
The first parameter frame_resize is the image to be blurred.
The second parameter (3, 3) is the size of the Gaussian kernel, indicating that the width and height of the kernel are both 3.
The third parameter 3 is the standard deviation of the Gaussian kernel, used to control the degree of blur.
② Color space conversion
Convert the BGR image to LAB image.
171 frame_rgb = cv2.cvtColor(frame_gb, cv2.COLOR_BGR2RGB)
③ Adjust gesture detection machine
After completing the above image processing, input the image into the gesture detector for further processing.
70def get_hand_landmarks(img, landmarks):
71    """
72    将landmarks从medipipe的归一化输出转为像素坐标(convert landmarks from normalized output of Mediapipe to pixel coordinates)
73    :param img: 像素坐标对应的图片(the image corresponding to pixel coordinates)
74    :param landmarks: 归一化的关键点(normalized keypoints)
75    :return:
76    """
77    h, w, _ = img.shape
78    landmarks = [(lm.x * w, lm.y * h) for lm in landmarks]
79    return np.array(landmarks)
(3) Gesture recognition
After the image processing is completed, the robotic hand will perform different gestures based on the recognized gesture results. The execution of the action group by the robotic hand is achieved through calling agc.runAction().
131def move():
132    global __isRunning, gesture
133    global _stop
134
135    while True:
136        if __isRunning:
137            if gesture == 'scissors' :  # 检测到剪刀,运行握拳动作组(scissor gesture is detected, run the fist action group)
138                agc.runAction('0_0_0')
139
140            elif gesture == 'rock' :  # 检测到石头,运行张开动作组(rock gesture is detected, run the opening action group)
141                agc.runAction('15_5_12345')
142
143            elif gesture == 'paper' :  # 检测到张开,运行剪刀动作组(opening gesture is detected, run scissor action group)
144                agc.runAction('6_2_23')
145
146            else :
147                pass
148            #_stop = True
149        else:
150            if _stop:
151                init_move()  # 回到初始位置(return the initial position)
152                #_stop = False
153                time.sleep(1.5)
154            time.sleep(0.01)
4.8 Gesture Recognition
4.8.1 Program Description
In this lesson, the MediaPipe hand detection model is used to display key points of the hand and the connections between them on the feedback screen.
First, import the hand detection model, then capture the real-time image from the camera.
Then, performing operations such as flipping the image and converting color spaces greatly reduces the need for data augmentation in the hand landmark model.
In addition, in our pipeline, we can also generate crops based on the hand landmarks recognized in the previous frame. Hand detection is only invoked to reposition the hand when the landmark model no longer detects the presence of a hand.
Finally, detect the key points of the hands in the captured image and draw lines to connect them, then call the corresponding action group to complete the interaction.
4.8.2 Start and Close the Game
Note
Instructions must be entered with strict attention to case sensitivity and spacing.
(1) Boot up uHandPi, and then login Raspberry Pi desktop remotely through VNC.
(2) Click at upper left corner, or press “Ctrl+Alt+T “ to open LX terminal.
(3) Enter the following command and press Enter into the directory where the game programs are stored.
cd uhandpi/functions
(4) Enter the command below and press Enter to start the game.
python3 gesture_recognition.py
(5) If want to quit this game, press “Ctrl+C” after the game program completes loading. If the game cannot be quit, please try again.
4.8.3 Program Outcome
Note
Maintaining an internet connection at all times is necessary to ensure the functionality remains unaffected.
Place your hand within the camera’s field of view. When the camera recognizes a gesture, uHandPi will mimic the corresponding action.
The following table lists gestures with added feedback actions:
| No. | Gesture | Figure |
|---|---|---|
| 1 | One | 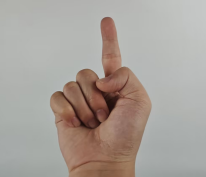 |
| 2 | Two | 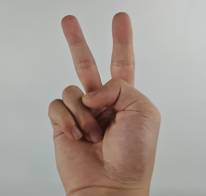 |
| 3 | Three | 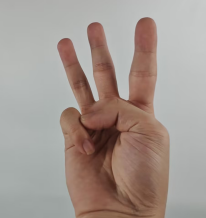 |
| 4 | Four | 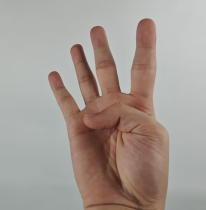 |
| 5 | Five | 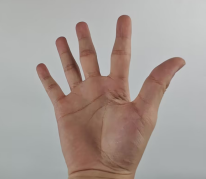 |
| 6 | Six | 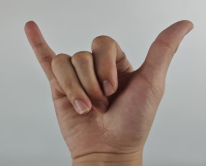 |
| 7 | Fist |  |
| 8 | OK | 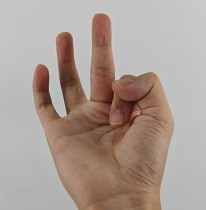 |
| 9 | Gun | 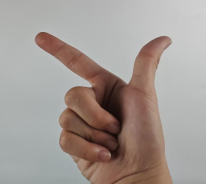 |
| 10 | Rock | 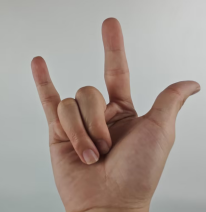 |
| 11 | hand_heart | 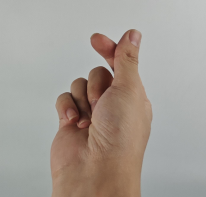 |
4.8.4 Program Analysis
The source code of this program is located in: /home/pi/uhandpi/functions/gesture_recognition.py
Note
Before modifying the program, it’s crucial to create a backup of the original factory program. Avoid modifying parameters in the wrong way, which may cause the robot to malfunction and become irreparable!!!
Import parameter module
| Import module | Function |
|---|---|
| import sys | The Python "sys" module has been imported for accessing system-related functions and variables. |
| import cv2 | The OpenCV library has been imported for image processing and computer vision-related functionalities. |
| import time | The Python "time" module has been imported for time-related functionalities, such as delay operations. |
| import threading | Provides an environment for running multiple threads concurrently |
| import mediapipe as mp | The mediapipe library has been imported for gesture recognition |
| from common.action_group_controller import ActionGroupController | Import action group execution library |
| from common.ros_robot_controller_sdk import Board | The board library is imported to control sensor. |
| from common.transform import vector_2d_angle | Import a function to calculate the angle between two 2D vectors for calculating the angle between fingers. |
Function logic
Capture image information through the camera, then process the image, specifically by performing color space conversion. Then call face detection machine of the MediaPipe library to detect gesture.
Based on the recognized gestures, calculate the bending degree of each finger to determine the specific gesture. The robotic hand will then perform different gestures according to the recognized gesture results, thereby achieving a “rock-paper-scissors” human-machine interaction effect.
Program logic and related code analysis
(1) Initialization
① Import function library
In this initialization step, the first task is to import the required libraries for subsequent program calls. For details on the imports, refer to “4.8.4 Function Extension -> Import parameter module”.
 4import sys
 5import cv2
 6import time
 7import math
 8import signal
 9import threading
10import numpy as np
11import mediapipe as mp
12from calibration.camera import Camera
13from common.transform import vector_2d_angle
② Set initial state
Set initial state, including the initial position of servo, MediaPipe toolkit example for hand detection, etc.
16# 手势识别(gesture recognition)
17board = None
18agc =None
19
20if sys.version_info.major == 2:
21    print('Please run this program with python3!')
22    sys.exit(0)
23
24gesture = None
25mp_drawing = mp.solutions.drawing_utils
26hand_detector = mp.solutions.hands.Hands(
27            static_image_mode=False,
28            max_num_hands=1,
29            min_tracking_confidence=0.05,
30            min_detection_confidence=0.6
31        )
The specific meanings of the example parameters for the hand_detector are as follows:
The first parameter, static_image_mode, is the processing mode for input images.
The default value is “False”, indicating that the input image is treated as a video stream. After detecting the first image, only subsequent images are tracked for landmarks. Detection is performed again only if tracking fails. This detection mode helps reduce computational load and latency. When the value is “True”, the program detects all input images. This mode is suitable for detecting batches of static, unrelated images.
The second parameter max_num_hands is the maximum detectable quantity, which means the maximum number of hands that can be recognized at the same time.
The third parameter, min_tracking_confidence, is the minimum confidence value for the coordinate tracking model, with a range of 0 to 1. This parameter is not effective when the “static_image_mode” parameter is set to “True”.
The fourth parameter, min_detection_confidence, is the minimum confidence value for the hand detection model, with a range of 0 to 1. If the probability of hand detection is higher than this value, it is considered a successful detection.
(2) Image processing
① Image pre-processing
Resizing and Gaussian blur processing of the image.
217    frame_resize = cv2.resize(img_copy, size, interpolation=cv2.INTER_NEAREST)
218    frame_gb = cv2.GaussianBlur(frame_resize, (3, 3), 3)
cv2.resize(img_copy, size, interpolation=cv2.INTER_NEAREST) is an operation to resize the image.
The first parameter img_copy is the image to be resized.
The second parameter size is the target size.
The third parameter interpolation is the interpolation method, which is used to determine the pixel interpolation algorithm used for resizing.
cv2.GaussianBlur(frame_resize, (3, 3), 3) applies Gaussian blur to the image.
The first parameter frame_resize is the image to be blurred.
The second parameter (3, 3) is the size of the Gaussian kernel, indicating that the width and height of the kernel are both 3.
The third parameter 3 is the standard deviation of the Gaussian kernel, used to control the degree of blur.
② Color space conversion
Convert the BGR image to LAB image.
220 frame_rgb = cv2.cvtColor(frame_gb, cv2.COLOR_BGR2RGB)
③ Adjust gesture detection machine
After completing the above image processing, input the image into the gesture detector for further processing.
222    gesture = "none"
223    results = hand_detector.process(frame_rgb)
224    result_image = frame_rgb.copy()
225    if results is not None and results.multi_hand_landmarks:
226
227        for hand_landmarks in results.multi_hand_landmarks:
228            mp_drawing.draw_landmarks(
229                result_image,
230                hand_landmarks,
231                mp.solutions.hands.HAND_CONNECTIONS)
232            landmarks = get_hand_landmarks(img_copy, hand_landmarks.landmark)
233            angle_list = (hand_angle(landmarks))
234            gesture = (h_gesture(angle_list))
235            cv2.putText(result_image, gesture, (10, img.shape[0] - 10), cv2.FONT_HERSHEY_SIMPLEX, 1, (255, 255, 0), 2)
④ Gesture recognition
After the image processing is completed, the robotic hand will perform different gestures based on the recognized gesture results. The execution of the action group by the robotic hand is achieved through calling agc.runAction().
155# 机器人移动逻辑处理(robot movement logic processing)
156def move():
157    global __isRunning, gesture
158    global _stop
159    while True:
160        if __isRunning:
161            if gesture == 'fist' :     #根据识别结果调用对应的动作组(call the corresponding action group based on recognition result)
162                agc.runAction('0_0_0')
163
164            elif gesture == 'gun' :
165                agc.runAction('21_gun')
166
167            elif gesture == 'rock' :
168                agc.runAction('24_rock')
169
170            elif gesture == 'ok' :
171                agc.runAction('23_ok')
172
173            elif gesture == 'hand_heart' :
174                agc.runAction('22_hand_heart')
175
176            elif gesture == 'one' :
177                agc.runAction('2_1_2')
178
179            elif gesture == 'two' :
180                agc.runAction('6_2_23')
181
182            elif gesture == 'three' :
183                agc.runAction('11_3_234')
184
185            elif gesture == 'four' :
186                agc.runAction('14_4_2345')
187
188            elif gesture == 'five' :
189                agc.runAction('15_5_12345')
190
191            elif gesture == 'six' :
192                agc.runAction('5_2_15')