2. Arduino Development Tutorial
2.1 Preparation
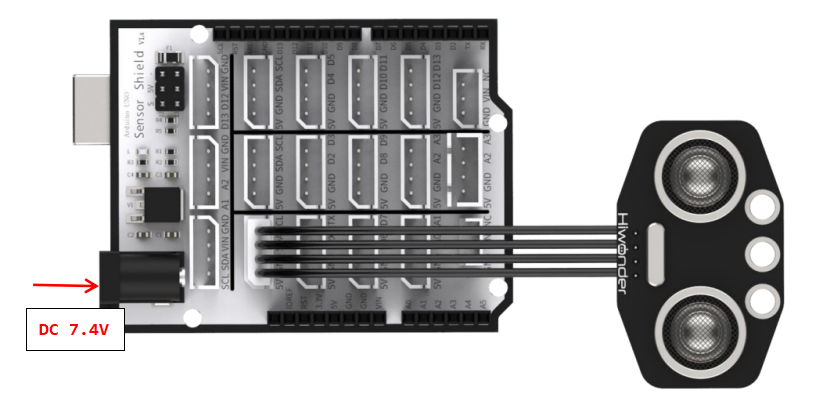
2.1.1 Wiring Instructions
In this section, the example connection uses a 4-pin cable connected to ports A2 and A3 on the Arduino expansion board, as shown below:
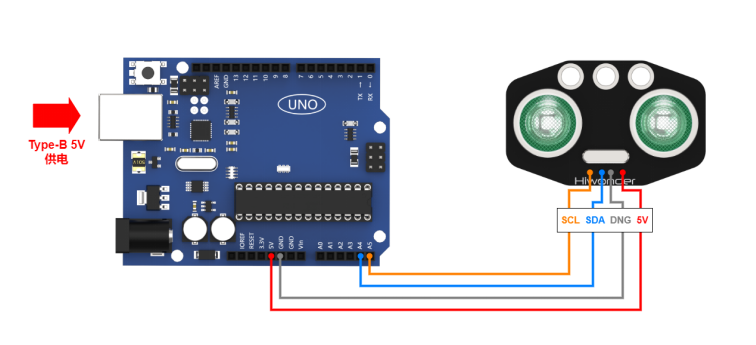
If you do not have an Arduino expansion board, you can use Dupont wires to connect directly to the Arduino development board. The connection diagram is shown below:
Note
If using our lithium battery, connect the battery adapter wires to the DC port with red to+ and black to -.
If the adapter wires are not connected to a lithium battery, do not connect them directly to the battery wires, to avoid short circuits caused by reversing the positive and negative poles.
2.1.2 Environment Configuration
Install the Arduino IDE on your computer. The installation package can be found under: “Software Installation Packages”.
For detailed instructions on using the Arduino IDE, please refer to the corresponding directory for learning resources.
2.2 Test Example
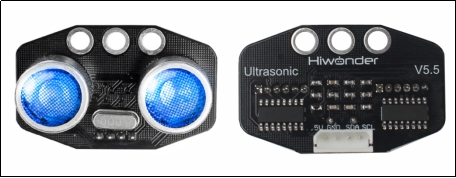
This example demonstrates how the glowy ultrasonic sensor displays measured values in the terminal window and changes the LED colors based on the detected distance.
2.2.1 Program Download
(1) Connect the Arduino UNO development board with the expansion board to your computer via a USB cable. Open the Arduino IDE, then click “File→New” and import the code from the same directory as this section.
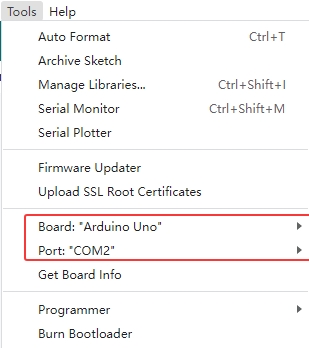
(2) Select the correct board type and port(the ports below are for illustration only-use the actual connection), then compile and upload the program.
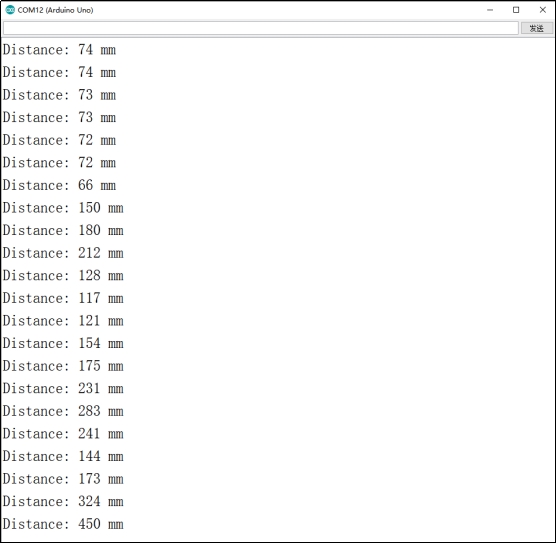
(3) After the code is successfully uploaded, open the Serial Monitor  , set the baud rate to 9600, and observe the results.
2.2.2 Program Outcome
We use the illuminated ultrasonic sensor to measure the distance to an object. The two RGB LEDs provide a visual indication of the distance:
(1) Too close: the LEDs flash red
(2) Moderate distance: the LEDs stay blue
(3) Too far: the LEDs turn green
2.2.3 Brief Analysis of the Example Program
Library Import
#include "Ultrasound.h"
The ultrasonic sensor library is imported. Since the library is located in the same directory as the program, it is included using double quotes to indicate a local file import.
Serial Initialization
Ultrasound ultrasound;  //Instantiate the ultrasonic sensor class
int Filter_Value;

void setup() {
  // put your setup code here, to run once:
  Serial.begin(9600);
}
An instance of the ultrasonic sensor class is created, and the serial port is initialized with a baud rate of 9600.
Filtering Function
#define FILTER_N 3                //Recursive average filter
int filter_buf[FILTER_N + 1];
int Filter() {
  int i;
  int filter_sum = 0;
  filter_buf[FILTER_N] = ultrasound.GetDistance();     //Read distance value from ultrasonic sensor
  for(i = 0; i < FILTER_N; i++) {
    filter_buf[i] = filter_buf[i + 1];               // Shift all values to the left, discarding the lowest
    filter_sum += filter_buf[i];
  }
  return (int)(filter_sum / FILTER_N);
}
A recursive averaging filter is applied to the ultrasonic distance readings, discarding lower-order noise. This helps reduce deviations caused by the instability of the ultrasonic waves.
Main Function
void loop() {
  // put your main code here, to run repeatedly:
  static uint32_t Time = 0;
  static uint8_t step = 0;
  int s;
  int distance = Filter();         // Get the filtered distance value
  Serial.print("Distance: ");Serial.print(distance);Serial.println(" mm"); //Print the distance in mm to the Serial Monitor

  if (distance > 0 && distance <= 80){
      ultrasound.Breathing(1, 0, 0, 1, 0, 0);       //Breathing light mode, 0.1s cycle, red color
   }

  else if (distance > 80 && distance <= 180){
      s = map(distance,80,180,0,255);
      ultrasound.Color((255-s), 0, 0, (255-s), 0, 0); //Red gradient
   }

   else if (distance > 180 && distance <= 320){
      s = map(distance,180,320,0,255);
      ultrasound.Color(0, 0, s, 0, 0, s);            //Blue gradient
   }

   else if (distance > 320 && distance <= 500){
      s = map(distance,320,500,0,255);
      ultrasound.Color(0, s, 255-s, 0, s, 255-s);            //Green gradient
   }
  else if (distance > 500){
      ultrasound.Color(0, 255, 0, 0, 255, 0);        //Green
   }
}
In the main program, the filtered ultrasonic distance value is stored in the variable distance and printed to the Serial Monitor.
(1) If the distance is “<= 80 mm”, it is considered too close. The RGB LEDs are set to a breathing mode with a 0.1 s cycle in red, producing a flashing red effect.
(2) For distances between “80-180 mm”, the RGB shows a red gradient.
(3) For distances between “180-320 mm”, the RGB shows a blue gradient.
(4) For distances between “320-500 mm”, the RGB shows a green gradient.
(5) For distances “> 500 mm”, the RGB remains steadily green.