15 Group Control Course
15.1 Wireless Controller Control
15.1.1 Getting Ready
Step 1: Plug the controller receiver into one of USB ports of TonyPi.
Note
Note: The controller receiver must be inserted before the robot is turned on.
Step 2: Prepare two AAA batteries. Take off the back cover of the handle and insert them into the battery slot. Please pay attention to the direction of the positive and negative poles.

15.1.2 Device Connection
If you do not connect the robot within 30 seconds after turning on the handle switch, or if you do not operate the handle within 5 minutes after connecting it, the handle will enter
sleep mode. If you need to turn on the handle again, press the “START” button.
Step 1: Turn on the robot.
Step 2: Switch on the handle, and then the two LED lights (red and green) on handle will flash simultaneously.
Step 3: Wait for a few seconds, pair the handle with the robot. After pairing, the
green light will keep on.
15.1.3 Mode Introduction
The handle has two modes: single green light mode and green and red lights mode (The red and green lights will turn on simultaneously ).
Single green light mode: all the buttons can be used.
Red and green lights mode: the four buttons “↑ 、↓、←、→” are locked and can not be used. The function of the remaining buttons is the same as that of the green and red lights mode.
Two modes switching method: press “MODE” button to switch the mode from the green light mode to another mode, and press the button again to switch to the green light mode.
15.1.4 Button Instruction
The corresponding relation between the button and the action is as the following table:
| Button | Function |
|---|---|
| START | the robot returns to the initial posture |
| L1 | right tilt and lift the left foot |
| R1 | left tilt and lift right foot |
| ↑ | move forward |
| ↓ | move backward |
| ← | move to left |
| → | move to right |
| △ | wave |
| × | bow |
 |
twist waist |
| ○ | right-footed shot |
| Push up the left slider | move forward |
| Push down the left slider | move backward |
| Push the left slider to left | move to left |
| select+L1 | Dance 1 |
| select+L2 | Dance 2 |
| select+R1 | Dance 3 |
| select+R2 | Dance 4 |
| select+△ | Dance 5 |
| select+ |
Dance 6 |
| select+○ | Dance 7 |
| select+start | Activate athlete mode |
15.2 Group Control
15.2.1 Getting Started
Prepare at least two TonyPi Pro robots. In this lesson, two TonyPi Pro robots are used for demonstrating.
Set up the development environment. Refer to “Remote Desktop Tool Installation and Connection \ Remote Tool Installation and Connection” to download and install the VNC remote connection tool.
15.2.2 Introduction
By configuring the master and slave robots on the same network, the master can send action commands to the slave robots through the group control program, enabling control of the slave robots.
15.2.3 Group Control Setup
There are two ways to perform group control: LAN mode and master-slave mode.
LAN Mode
1. Network Configuration
First, connect all robots that need group control to the same local network using a Wi-Fi router with a strong signal.
Open the command line terminal and navigate to the Wi-Fi configuration directory. Enter the following command and press Enter.
cd hiwonder-toolbox

Open the Wi-Fi configuration file using the vi editor by entering:
sudo vim wifi_conf.py

Press the i key to enter edit mode.
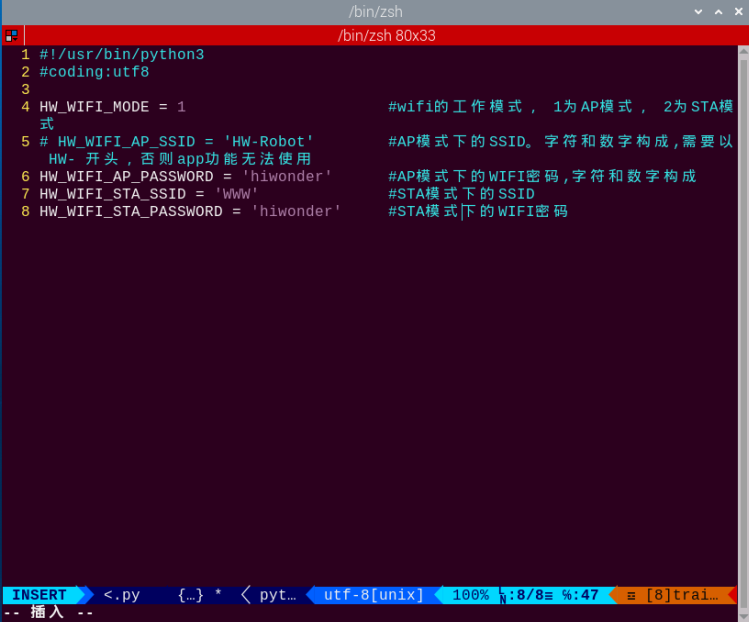
Modify the value of HW_WIFI_MODE to 2, and change the values of WIFI_SSID and PASSWORD fields to match your Wi-Fi network name and password.

Note
The password must be at least 8 characters long.
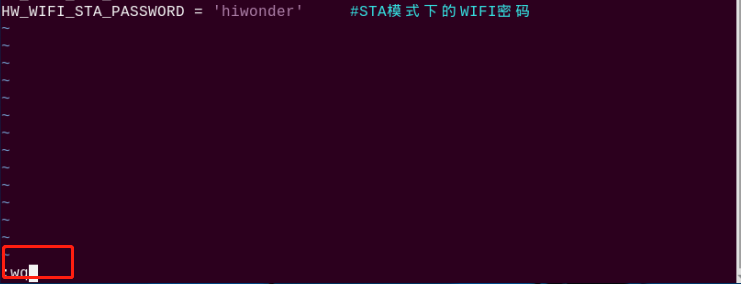
After modifying, press Esc to exit edit mode, then save and exit by entering:
:wq
Finally, reboot the device by entering the following command. Do not skip this step.
sudo reboot
Repeat the above steps for all robots, ensuring they are all configured on the same local network.
2. IP Address Configuration
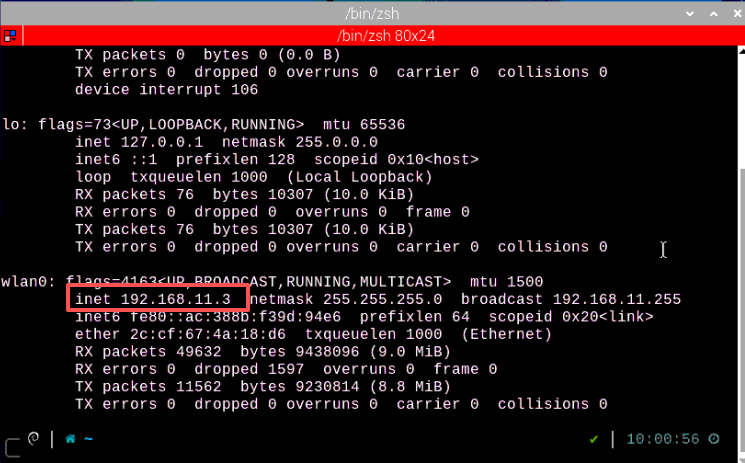
On any TonyPi Pro, open the command line terminal and enter the following command to check the device’s IP address. Remember this IP address, as it will be used as the server IP for forwarding:
ifconfig
Insert the wireless controller’s receiver into this TonyPi Pro, which will act as the master device.
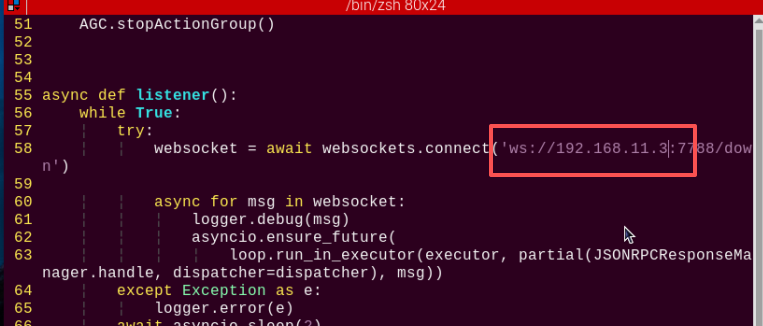
Edit the local forwarding address in the wireless controller’s control program by entering:
vim ~/TonyPi/Joystick.py
Next, remotely connect to the other robots that need to be controlled, and configure the client IP address by entering:
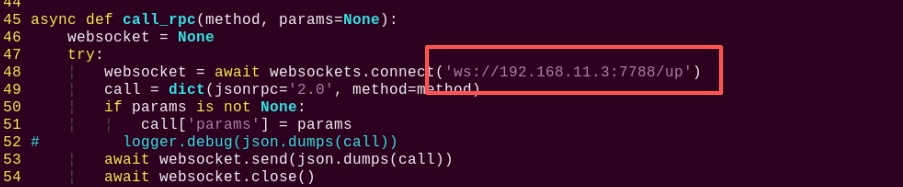
vim ~/TonyPi/Extend/multi_control/multi_control_client.py
Modify the relevant section to the server IP address you checked. After changing it, press Esc and enter :wq to save and exit.
Finally, reboot the device by entering the following command. Do not skip this step.
sudo reboot
Repeat the above IP configuration steps for all other robots.
3. Group Control
Note
Note: When using group control, first power on the robot with the wireless controller receiver, then start the other robots.
Place all robots on a flat, open surface, keeping a reasonable distance between each robot.
During group control, only single commands can be sent. To perform actions such as continuously moving forward, press the controller buttons multiple times instead of holding the stick.
Master-Slave Mode
1. Master Robot Configuration
First, power on one robot to serve as the master and establish a remote desktop connection. In this example, the robot with the hotspot named HW-F199CEEE is used.

Note
Remember the master robot’s hotspot name, as it will be used in the following steps.
Open the command line terminal and navigate to the Wi-Fi configuration directory. Enter the following command and press Enter.
cd hiwonder-toolbox
Open the Wi-Fi configuration file using the vi editor by entering:
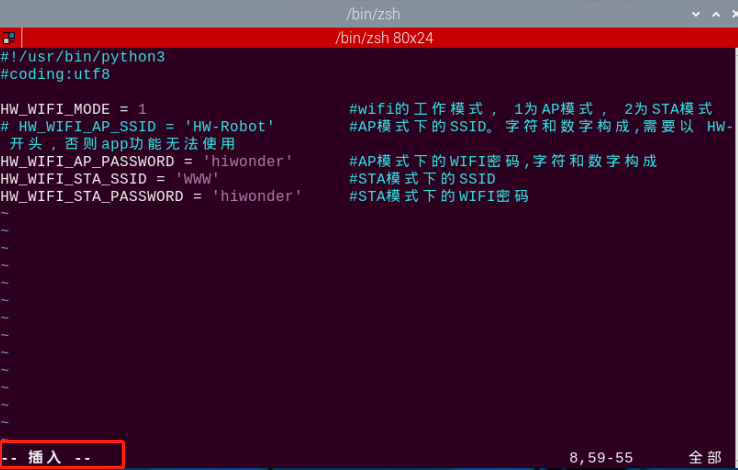
sudo vim wifi_conf.py
Press the i key to enter edit mode.
Change the master hotspot’s Wi-Fi password to 123456789 and then uncomment the corresponding line. As shown in the figure below:

Note
The password must be at least 8 characters long.
After modifying, press Esc to exit edit mode, then save and exit by entering:
:wq
Finally, reboot the device by entering the following command. Do not skip this step.
sudo reboot
2. Slave Robot Configuration
Note
This example demonstrates the configuration using a single slave robot. The same method can be applied to multiple slave robots.
Open the command line terminal and navigate to the Wi-Fi configuration directory. Enter the following command and press Enter.
cd hiwonder-toolbox
Open the Wi-Fi configuration file using the vi editor by entering:
sudo vim wifi_conf.py
Press the i key to enter edit mode.
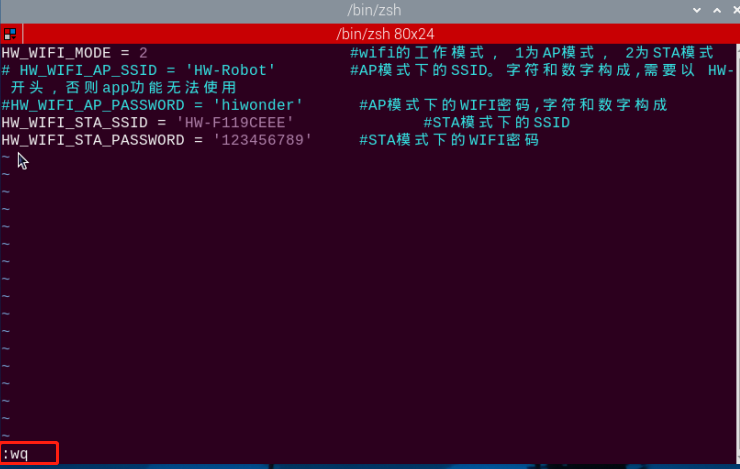
Set the hotspot name and password to match the master robot, using the default ID HW-F119CEEE in this lesson, then uncomment the corresponding lines in the code. As shown in the figure below:

After modifying, press Esc to exit edit mode, then save and exit by entering:
:wq
Finally, reboot the device by entering the following command. Do not skip this step.
sudo reboot
3. Group Control
Note
When using group control, slave robots must be powered on only after the master robot is fully operational.c
Place all robots on a flat, open surface, keeping a reasonable distance between each robot.
Insert the PS2 wireless controller’s receiver into the master robot’s USB port and turn it on to control the robot group.
During group control, only single commands can be sent. To perform actions such as continuously moving forward, press the controller buttons multiple times instead of holding the stick.
15.2.4 Project Outcome
After the program starts, the slave robots execute the same set of actions simultaneously with the master robot.