3. Raspberry Pi Development Tutorial
3.1 Getting Started
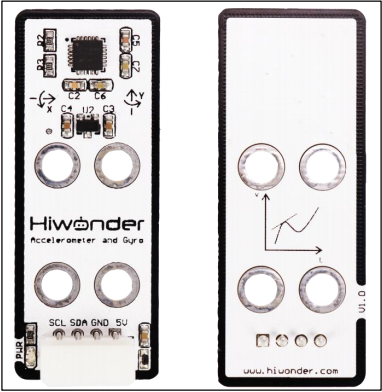
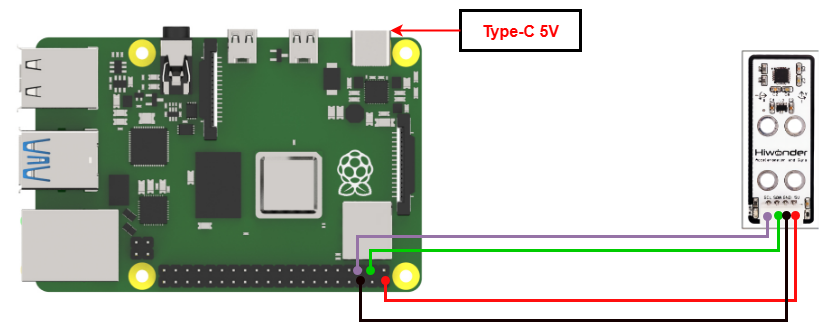
3.1.1 Wiring Instruction
Connect the accelerometer’s 5V, GND, SDA, and SCL pins to the corresponding pins on the Raspberry Pi when wiring.
Note
When using Hiwonder’s lithium battery, connect the battery cable with the red wire to the positive (+) terminal and the black wire to the negative (–) terminal of the DC port.
If the battery is not connected to the cables, do not connect the cable ends directly together. Doing so may cause a short circuit and damage the system.
Before powering on, ensure that no metal objects are touching the controller. Otherwise, the exposed pins at the bottom of the board may cause a short circuit and damage the controller.
3.1.2 Environment Configuration
Install VNC software on PC. You can find it under “Appendix -> Remote Connection Software”. For the detailed operations of VNC, please refer to the same directory.
Drag the program and SDK library files into the Raspberry Pi system image, the drag-and-drop action here is for illustration only.
Note
Make sure the library files are placed in the same directory as the program.
Open the terminal and enter the command to change to the program directory: sudo chmod a+x Sensor_Demo/.
sudo chmod a+x Sensor_Demo/
3.2 Test Case
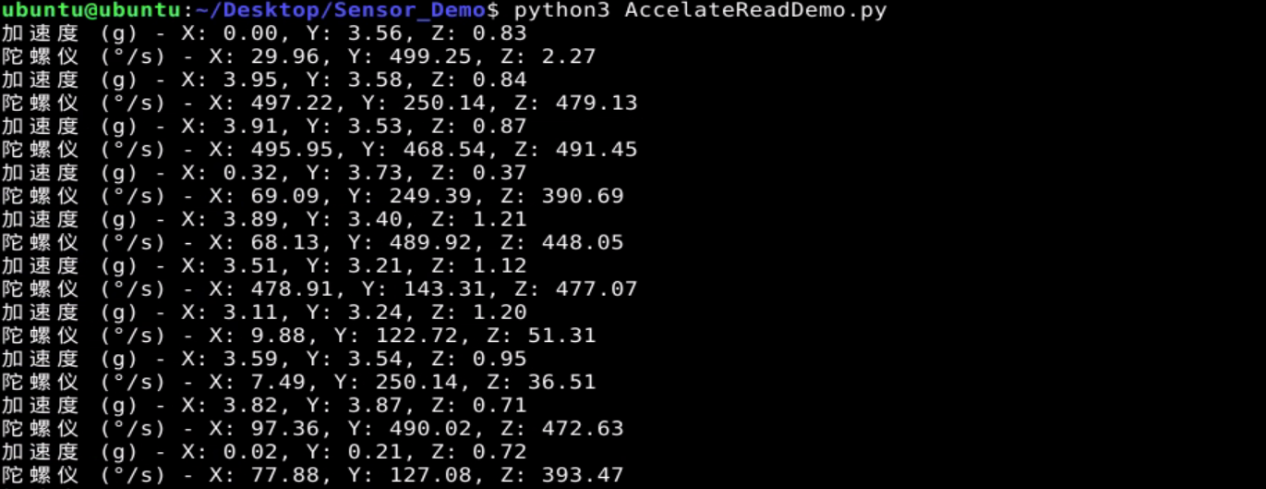
This example displays the acceleration sensor’s readings in the Raspberry Pi terminal window.
3.2.1 Program Download
Open a new terminal and enter the following command to navigate to the program directory:
“cd Desktop/Sensor_Demo/” and press Enter.
cd Desktop/Sensor_Demo/
Run the program by entering:
python3 AccelateReadDemo.py
3.2.2 Project Outcome
You can adjust its orientation to test the three-axis angular velocity and acceleration, which can be viewed in the terminal.
3.2.3 Program Brief Analysis
Import Libraries
import smbus
import math
import time
Imported the required libraries: smbus, math, and time. The smbus library is used for IIC communication, math provides functions for mathematical operations, and time supSplies time-related functions.
Serial Port Initialization
# Set I2C bus number, usually 1 (设置I2C总线号,通常为1)
I2C_BUS = 1

# Set MPU6050 I2C address (设置MPU6050的I2C地址)
MPU6050_ADDR = 0x68

# Register addresses (寄存器地址)
MPU6050_ACCEL_XOUT_H = 0x3B
MPU6050_PWR_MGMT_1 = 0x6B

# Initialize I2C bus (初始化I2C总线)
bus = smbus.SMBus(I2C_BUS)

# Enable MPU6050 (启用MPU6050)
bus.write_byte_data(MPU6050_ADDR, MPU6050_PWR_MGMT_1, 0)
After importing the libraries, set the IIC bus No. to 1 and the MPU6050 address to 0x68. Configure the registers to read the X-axis acceleration and control the sensor’s power mode and clock.
Then initialize the IIC bus through the smbus.SMBus(I2C_BUS) function to facilitate subsequent reading of sensor data.
Start the MPU6050 using bus.write_byte_data(MPU6050_ADDR, MPU6050_PWR_MGMT_1, 0).
Register Address Data Reading
def read_word(reg):
    high = bus.read_byte_data(MPU6050_ADDR, reg)
    low = bus.read_byte_data(MPU6050_ADDR, reg + 1)
    value = (high << 8) | low
    return value
Read the high 8 bits of a register using high = bus.read_byte_data(MPU6050_ADDR, reg), then read the low 8 bits using low = bus.read_byte_data(MPU6050_ADDR, reg).
Combine the two bytes and return the resulting value.
Sensor Data Reading
def read_sensor_data():
    accel_x = read_word(MPU6050_ACCEL_XOUT_H)
    accel_y = read_word(MPU6050_ACCEL_XOUT_H + 2)
    accel_z = read_word(MPU6050_ACCEL_XOUT_H + 4)
    gyro_x = read_word(MPU6050_ACCEL_XOUT_H + 8)
    gyro_y = read_word(MPU6050_ACCEL_XOUT_H + 10)
    gyro_z = read_word(MPU6050_ACCEL_XOUT_H + 12)

    return accel_x, accel_y, accel_z, gyro_x, gyro_y, gyro_z
Call the read_word function, use MPU6050_ACCEL_XOUT_H as the register address, and return the obtained value to accel_x, which corresponds to the data of the acceleration sensor x-axis.
The contents of accel_y, accel_z, gyro_x, gyro_y, and gyro_z are similar to accel_x, representing the data of the y-axis and z-axis of the acceleration sensor and the xyz-axis of the gyroscope sensor, respectively.
Main Function
def main():
    try:
        while True:
            accel_x, accel_y, accel_z, gyro_x, gyro_y, gyro_z = read_sensor_data()

            # Data processing and unit conversion according to the MPU6050 datasheet (根据MPU6050的数据手册,进行数据处理和单位转换)

            accel_x_scaled = accel_x / 16384.0
            accel_y_scaled = accel_y / 16384.0
            accel_z_scaled = accel_z / 16384.0
            gyro_x_scaled = gyro_x / 131.0
            gyro_y_scaled = gyro_y / 131.0
            gyro_z_scaled = gyro_z / 131.0

            #  Filtering (滤波)
            print(f"加速度 (g) - X: {accel_x_scaled:.2f}, Y: {accel_y_scaled:.2f}, Z: {accel_z_scaled:.2f}")
            print(f"陀螺仪 (°/s) - X: {gyro_x_scaled:.2f}, Y: {gyro_y_scaled:.2f}, Z: {gyro_z_scaled:.2f}")

            time.sleep(0.1)  #Update data every second (每秒更新一次数据)

    except KeyboardInterrupt:
        pass
Call the read_sensor_data function to obtain the data of the sensor acceleration and gyroscope three axes, and assign them to six variables.
Divide the obtained data by the corresponding constant to reassign the values after converting units.
Print out the converted data and keep the last two decimal places.