3. Robot Motion Control Course
3.1 Introduction to PC Software
3.1.1 Software Installation
(1) Open the installation program located in the folder: Appendix->PC Software Installation Package.
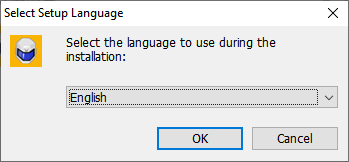
(2) Choose the language and click “OK”.
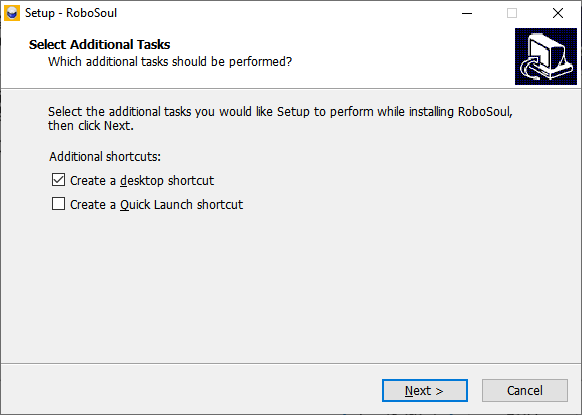
(3) “Create desktop shortcut” is automatically checked by default, and then click “Next”.
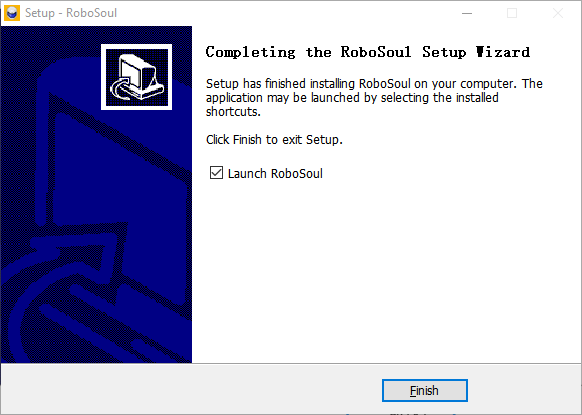
(4) Wait for the installation to complete, then click “Finish” on the pop-up window.
3.1.2 Device Connection
(1) Turn on the robot and connect the robot controller to your computer using a USB cable.
(2) Double-click the RoboSoul PC software  to launch it. Once the device powers on, the software will automatically connect. A successful connection is indicated when the eye lights on the robot’s head illuminate on the main interface.
3.1.3 Function
Note
Upon connection, the system will automatically recognize the device and install the necessary driver.
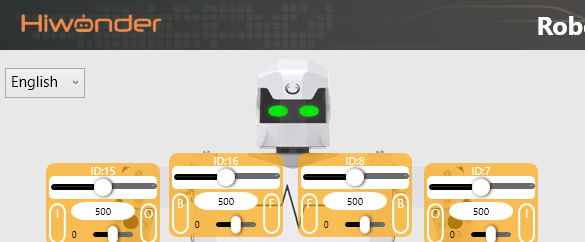
The PC control software interface is divided into five functional areas: ① Device Connection Status, ② Servo Control Panel, ③ Action Detail List, ④ Action Group Settings, ⑤ Servo Configuration Area. See the figure below for reference.

(1) Device Connection Status
| Icon | Function |
|---|---|
 |
Displays the current connection status of the device. When successfully connected, the robot's "eyes" will light up. If not connected or disconnected, the eyes will be off. |
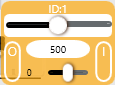
(2) Servo Control Panel
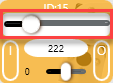
The servo control area displays the icons of the selected servos. By adjusting the corresponding slider values, you can directly control the position and adjust the deviation of each servo.
| Icon | Function |
|---|---|
 |
Indicates the servo ID number, for example, 1 is the servo's ID here. |
 |
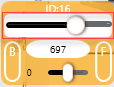
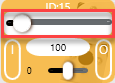
Adjust the servo position, with a range from 0 to 1000. |
 |
Adjust the servo deviation, with a range from -100 to 100. |
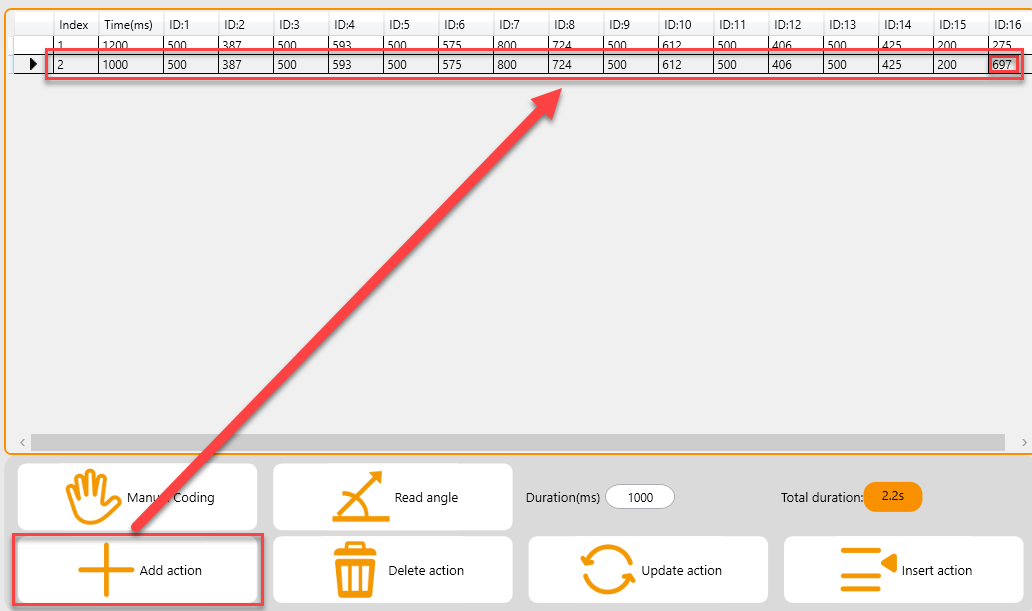
(3) Action Detail List
This section displays the details of the current action group, including the execution time for each action and the values of all involved servos.

| Icon | Function |
|---|---|
 |
Indicates the action group number. A single action group can hold up to 1020 actions, which corresponds to maximum action ID of 1020, exceeding this limit may cause errors. |
|
Indicates the execution time for the corresponding action. |
|
Displays the servo's value in the current action. You can double-click a value  to directly modify it. to directly modify it. |
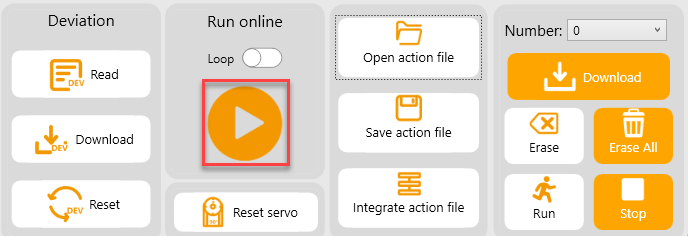
(4) Action Group Settings
Note
Action groups 1 to 4 are encrypted and cannot be modified. Please do not download actions to groups 1-4.
| Icon | Function |
|---|---|
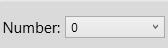 |
Dropdown menu to select Action group number. Allows selection of an action group from 0 to 230. Action Group 0 is set by default for action of Stand at attention. |
 |
Download the current list of actions to the robot, which will overwrite the original actions in the selected action group. |
 |
Deletes all action files in the selected action group. |
 |
Use with caution! Click to delete all data in groups 0 to 230. |
 |
Execute the selected action group once. |
 |
Stop the currently running action group. |
 |
Add the current servo values from the Servo Control Area as a new action to the last row of the Action Details List. |
 |
Delete the selected action from the Action Details List. |
 |
Replace the selected angle values in the Action Details List. The angle values will be replaced with those in the left side of Servo Control Area, and the duration will be replaced by the value in "Duration(ms)". |
 |
Insert a new action above the selected action. The inserted action will use the servo values from the left side of Servo Control Area and the duration set in "Duration(ms)". |
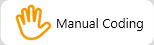 |
Click this button will make the robot's joints relax, allowing you to manually pose the robot into the desired position. |
 |
Read the current servo angle values from the robot's physical pose. Must be used in conjunction with the "Manual" button. |
 |
Click and select an action group file to load its data into the Action Details List. The path to the action group files we provide is located in Appendix->Action Group File (High Speed Gait. |
 |
Save the actions currently in the Action Details List to a specified location. |
 |
Import an action file from Appendix-> Action Group File (High Speed Gait and appends it to the end of the Action Detail List. |
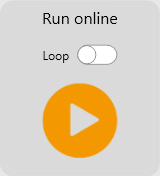 |
Click to run the actions in Action Details List once. If "Loop" is checked, the robot will repeat the sequence. |
 |
Click to return all servos to the central position (value 500). Please support the robot with one hand when using this feature to prevent it from falling over. |
(4) Servo Configuration Area
Note
The following function buttons are intended for robot debugging purposes and are for reference only.
| Icon | Function |
|---|---|
 |
Read the saved servo deviation values from the robot's controller. |
 |
Download the adjusted deviation values to the robot. |
 |
Click to clear the software's deviation data, which will not affect the deviation data stored in the controller. |
3.2 Action Group Execution
This section explains how to execute action groups using the PC software and how to download them to the robot’s controller.
3.2.1 Open Action File
(1) Power on the robot, double-click to launch the PC software  .
.
(2) Once the robot is powered on, the software will automatically attempt to connect. When the connection is successful, the robot’s “eyes” on the interface will light up green.
Note
Upon connection, the system will automatically recognize the device and install the necessary driver.

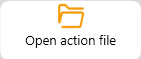
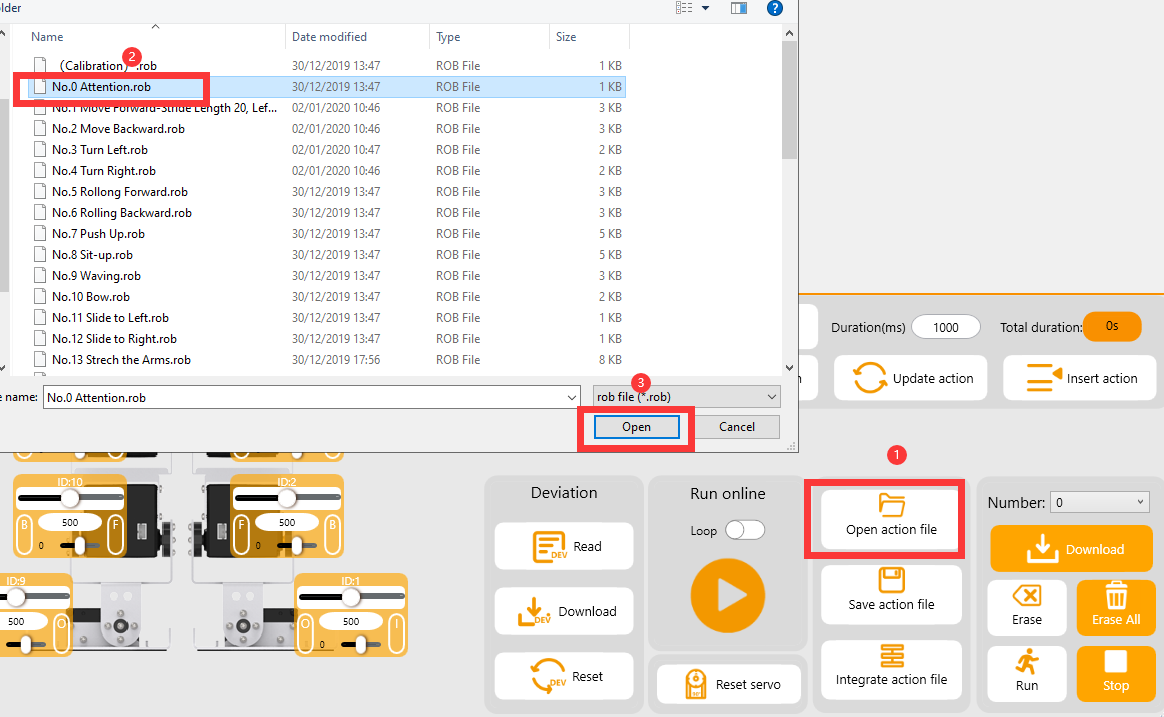
(3) Click “Open action file”.
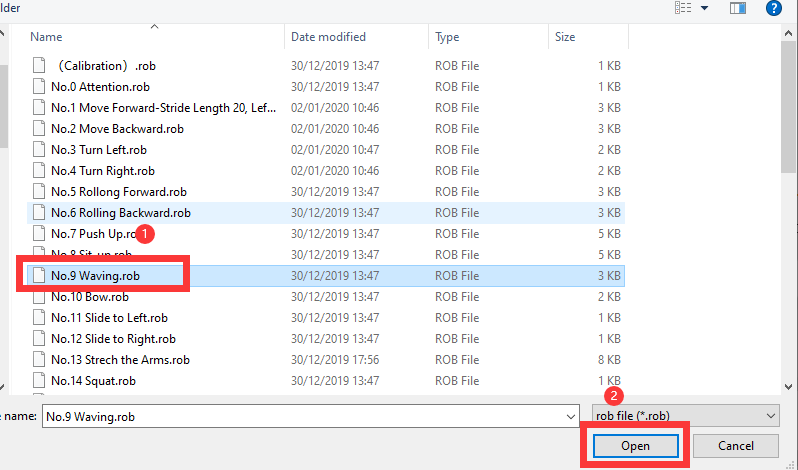
(4) Navigate to the path:Appendix->Action Group File (High Speed Gait), and select the file named “No.9 Waving”, then click “Open”
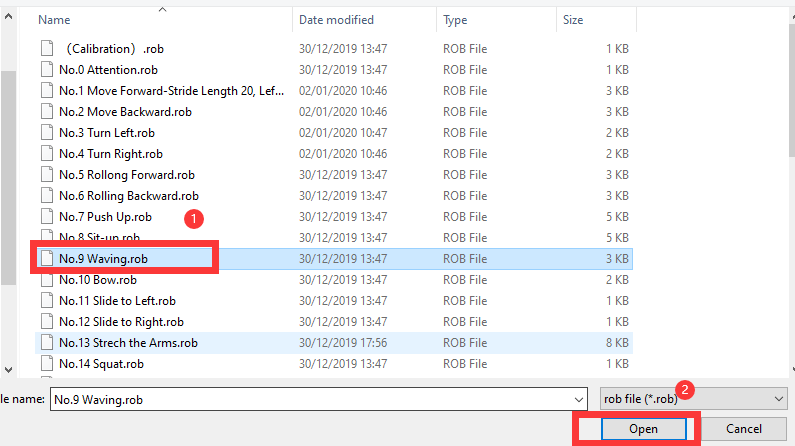
(5) You will now see the loaded file listed in the Action Details List.

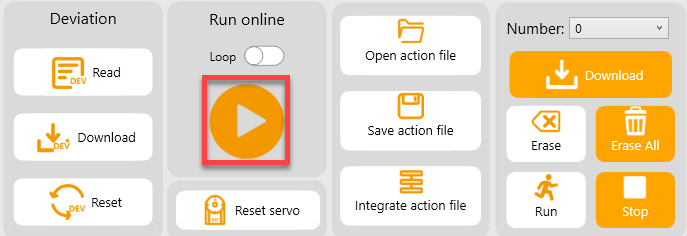
3.2.2 Run the Action Group Online
Click “Run online” to execute the selected action group.
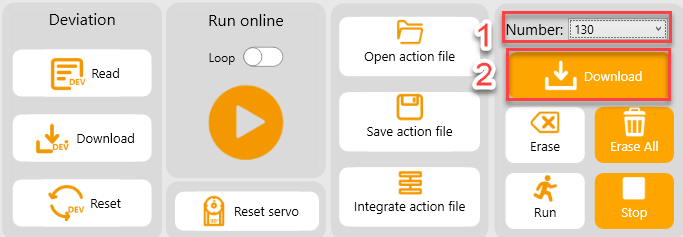
3.2.3 Download the Action Group
If you want the robot to run this action offline or call it from a program later, you must download the action group to the robot’s controller.
(1) Click the dropdown menu next to the Action Group button to select the Action group number.
Note
Some action groups between 0 and 102 are preloaded. To avoid overwriting existing data, select a number greater than 102. In this example, choose 130 and click “Download”.
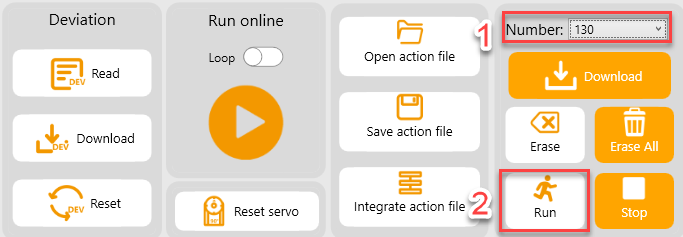
(2) Once the download is complete, a confirmation window will pop up. Click “OK” to close it.
(3) To execute the downloaded action group, select its number and click “Run”.
3.3 Action Group Editing
3.3.1 Objective
In this section, you will learn to create a waving action group consisting of 6 actions that enable the robot to perform a greeting gesture.
3.3.2 Implementation
Action Design
(1) Click “Open action file” in the Action Group Settings area. Open action group No.0 located under the path: Appendix->Action Group File (High Speed Gait).
(2) Now, you already have your first action — “No.0 Attention”. Next, connect the robot to the computer via a USB cable, then click the button  to preview the standing posture.
(3) According to the servo ID layout on the left panel, slide the control bar for Servo 16 to the right — you will see the robot’s right arm lift upward.
(4) Click “Add action” to add this raised-arm movement to the action list on the right.
(5) Now, let’s make the arm swing inward. Slide the control bar for Servo 15 to the left, then click “Add action” to record the movement.
(6) Next, let’s make the arm swing outward. Using the same method as before, adjust the servo control bar and add the action.
(7) Let’s repeat the inward–outward swing one more time — simply continue adding the corresponding actions as above.
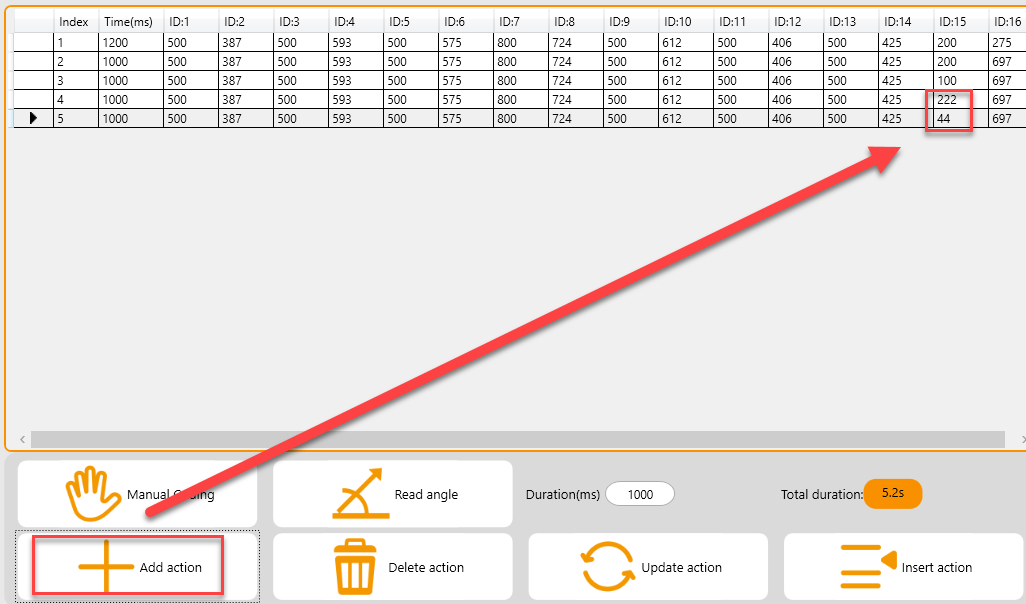
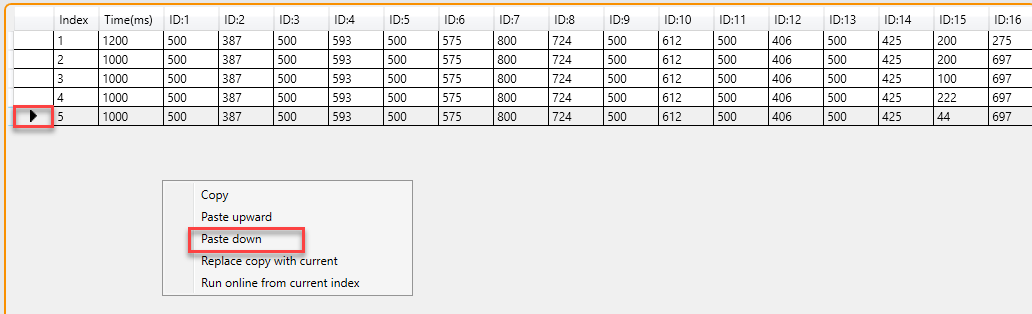
(8) Finally, after waving, let’s have the robot lower its arm and return to the Attention posture. To copy Action 1, you need to right-click on Action 1, choose “Copy”, and select Action 5, then right-click to choose “Paste Down”.


Download the Action Group
(1) After completing the actions, save them locally for future testing or modification.
(2) Click “Save action file”, enter the desired file name and number in the popup window, and click “Save”.
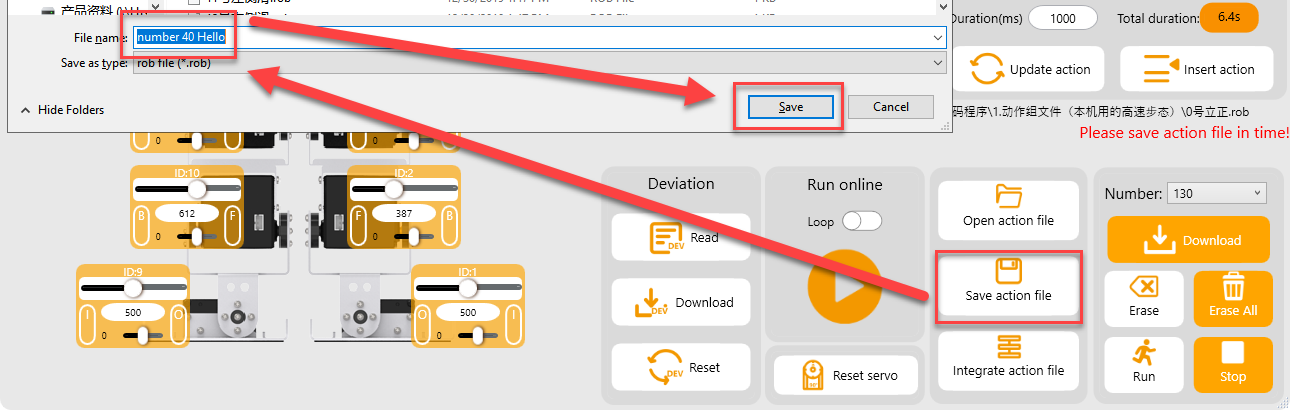
(3) Next, download the saved actions to the corresponding action groups. On the right side of the interface, select action group number 40, then click “Download”.
Note
Once the download is complete, the robot will emit a beep sound, and a dialog box will appear confirming “Download Complete”. Click OK to close the dialog.
3.4 Action File Integration
3.4.1 Objective
In this section, you will learn how to use the action file integration feature to combine multiple action groups into one.
3.4.2 Implementation
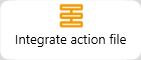
(1) Launch the PC Control Software, connect to the hardware via the serial port, then click the “Integrate action file” button in the “Action Group Settings” section. Open Action Group 9 under the directory : Appendix-> Action Group File (High Speed Gait).
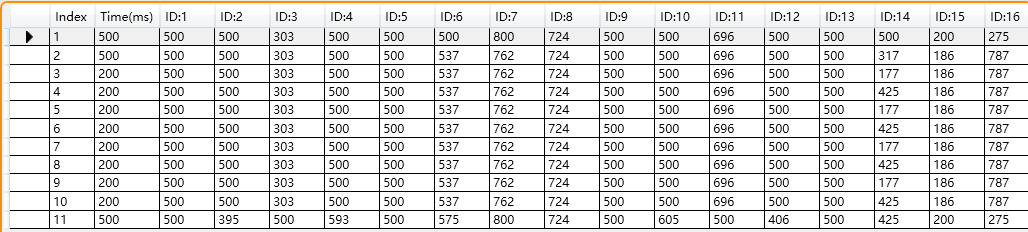
(2) The parameters of Action Group 9 are displayed in the Action Details List.
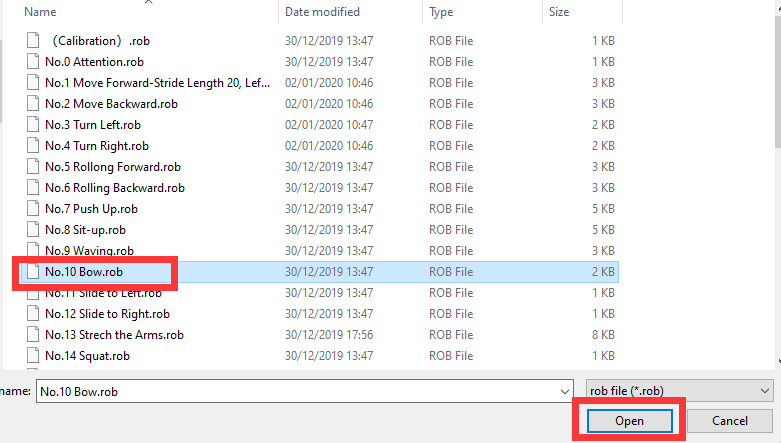
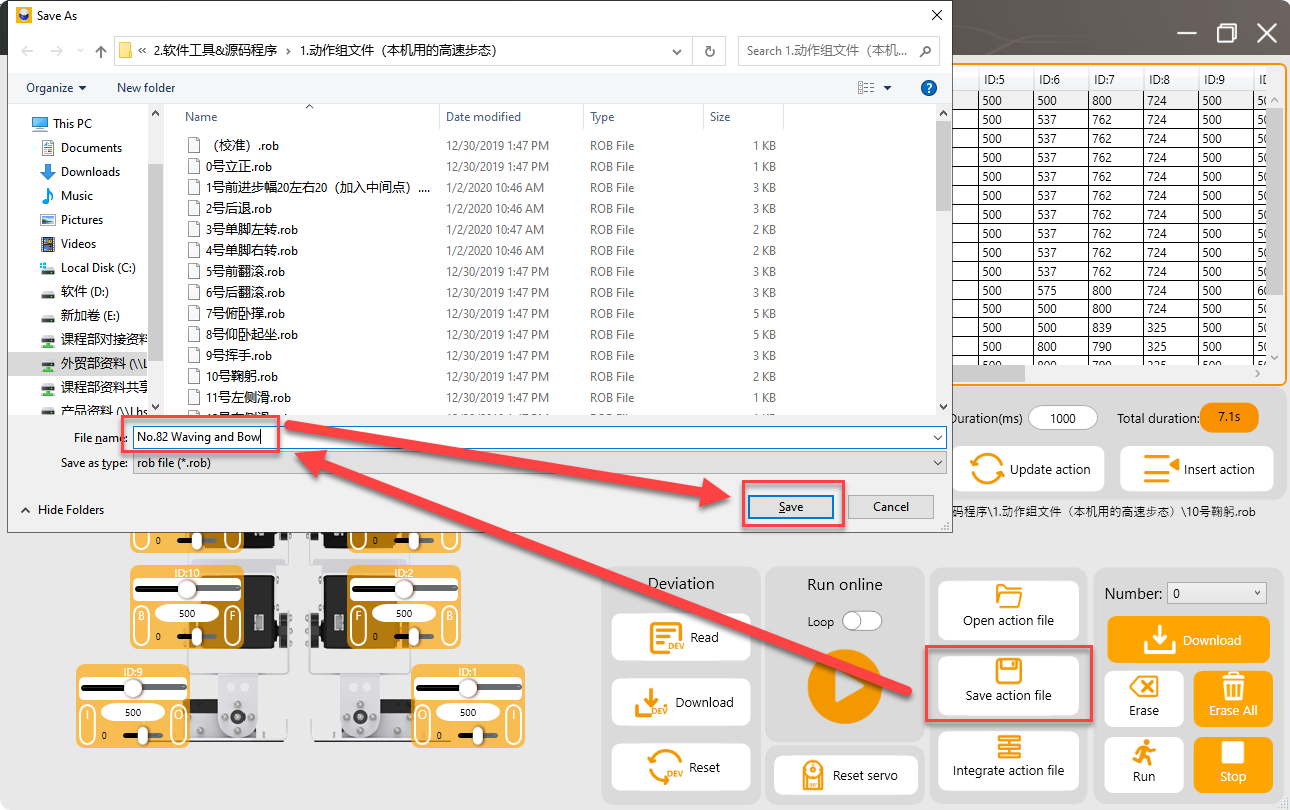
(3) Click “Integrate action file” again, and this time select Action Group 10 to append it to the current list.
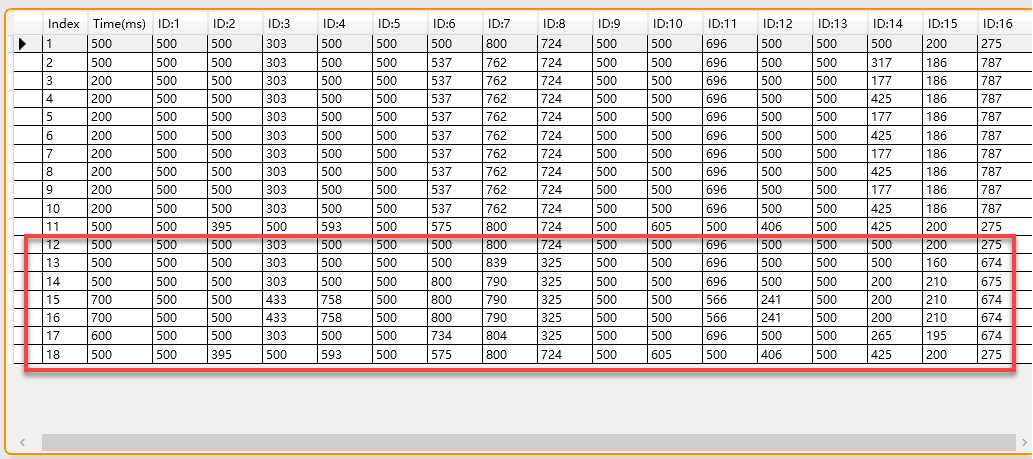
(4) You can click “Run online” to test the newly integrated action group in real time.
(5) To save the integrated action group for future debugging, click “Save action file”. The file is named No.82 Waving and Bow in this example.
3.5 Offline Running
3.5.1 Objective
Enable the robot to run actions automatically via the onboard button, without relying on a computer or mobile device.
3.5.2 Implementation
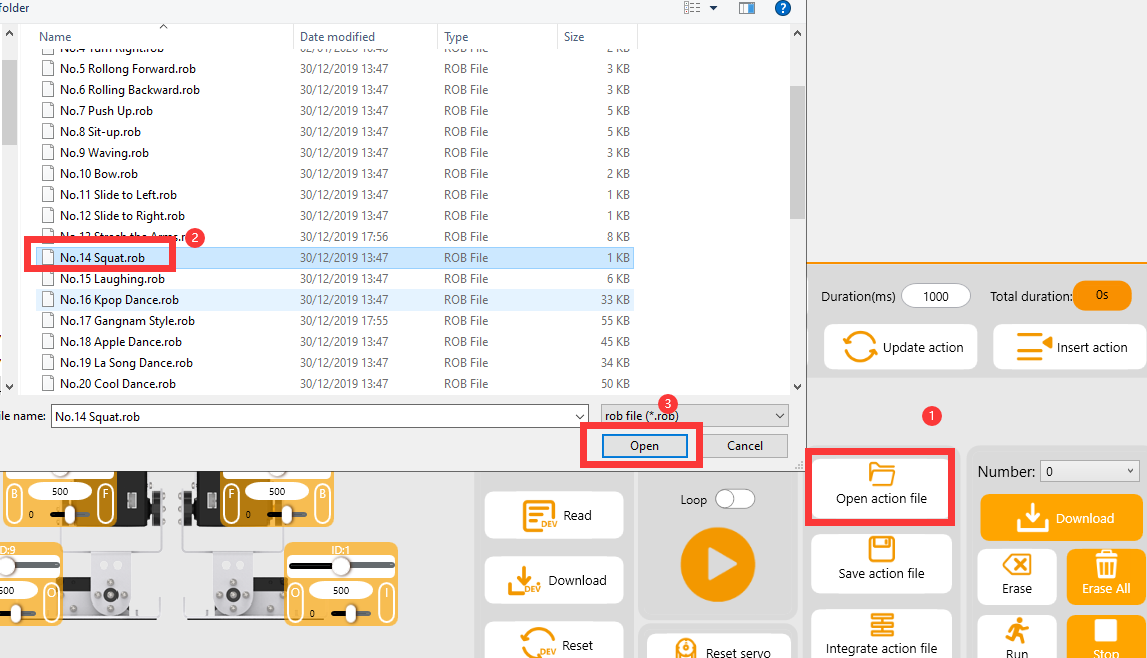
(1) Launch the PC Software, then open any action group file from Appendix->Action Group File (High Speed Gait). For example, open action group No.15 Laughing.
(2) On the right side of the interface, select action group number 100, then click “Download”. By default, the robot will execute Action Group 100 in offline mode.
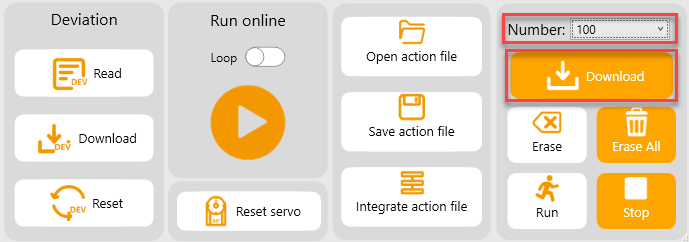
(3) Once the download is complete, the robot will emit a short beep to indicate success. A confirmation dialog will also appear in the PC software. Click “OK” to close the dialog.
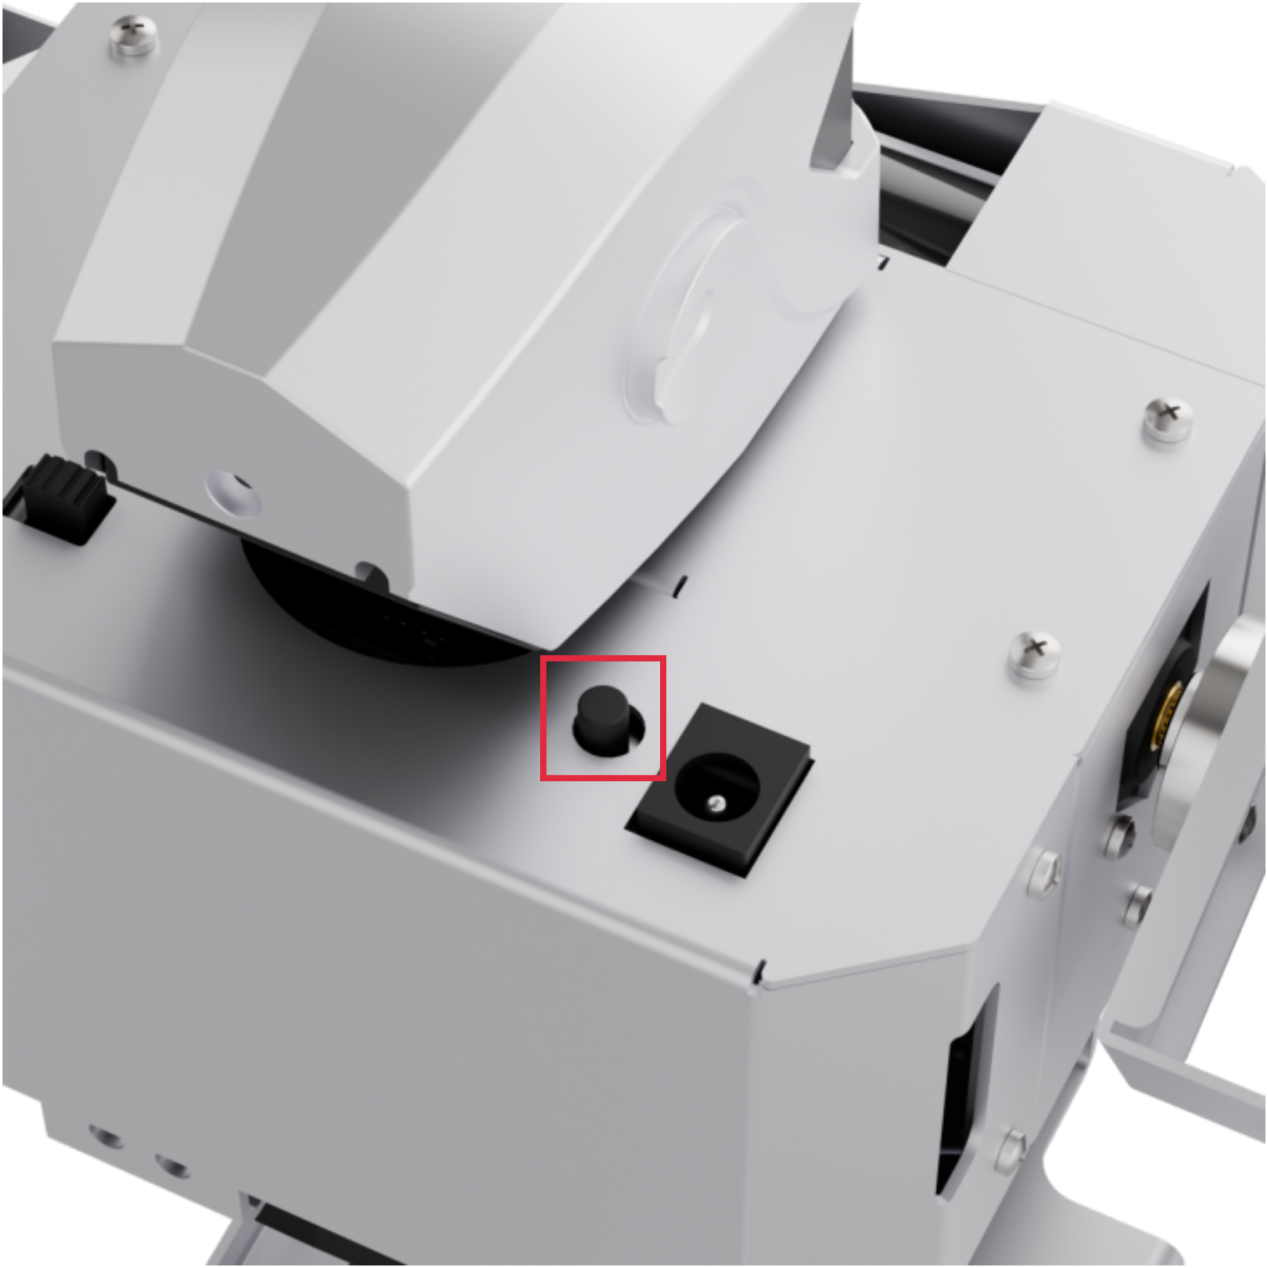
(4) To run the action group once in offline mode, briefly press the spring-loaded offline button located at the back right of the robot’s head. The robot will execute the action stored in Action Group 100 one time.
(5) Press and hold the button for 3 seconds to enable repeating the action indefinitely. While looping, pressing the button briefly will switch back to single-run mode.
3.6 APP Custom Control
3.6.1 Objective
In this section, you will learn to use the custom action feature in the mobile app to display the waving action group created in 3.3 Action Group Editing.
3.6.2 Implementation
Preparations
(1) Ensure the robot is fully charged. When powered on, it should not trigger any low battery alerts.
(2) Make sure Bluetooth and location services are enabled on your phone.
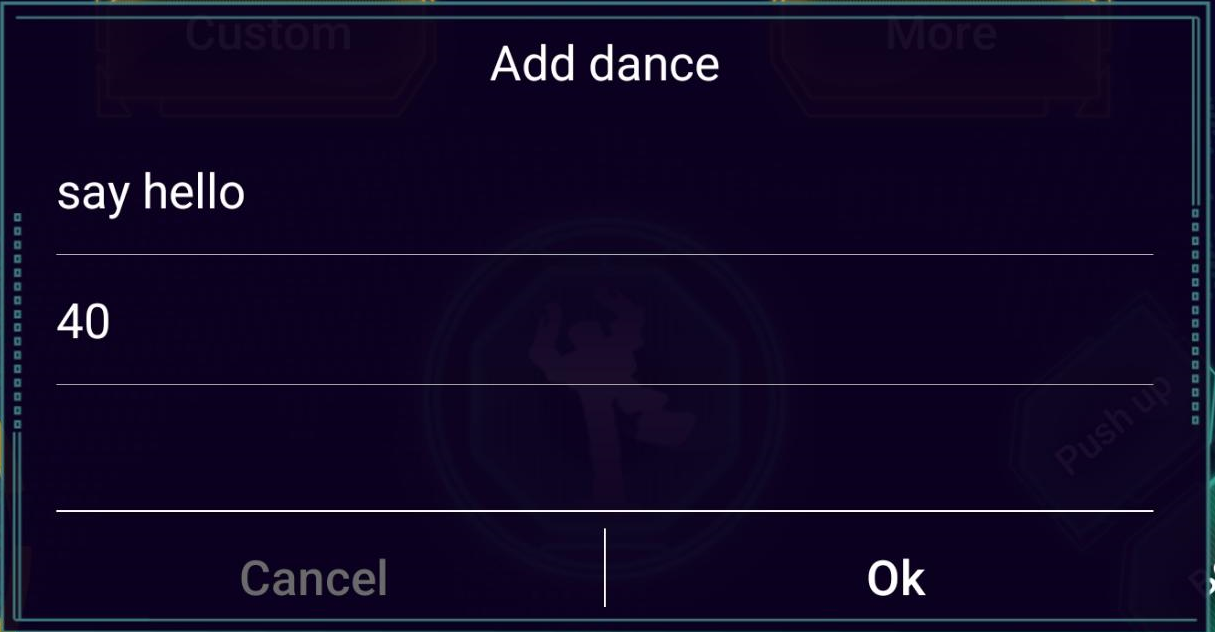
(3) Confirm that the created Action Group 40 has been successfully downloaded to the robot. A confirmation message will appear in the PC software upon successful download.
Operation Steps
(1) Turn on the robot and launch the “Wonderbot” app on your phone.

(2) Connect the device according to the instructions in 2. Remote Control->2.2 APP Installation and Connection.
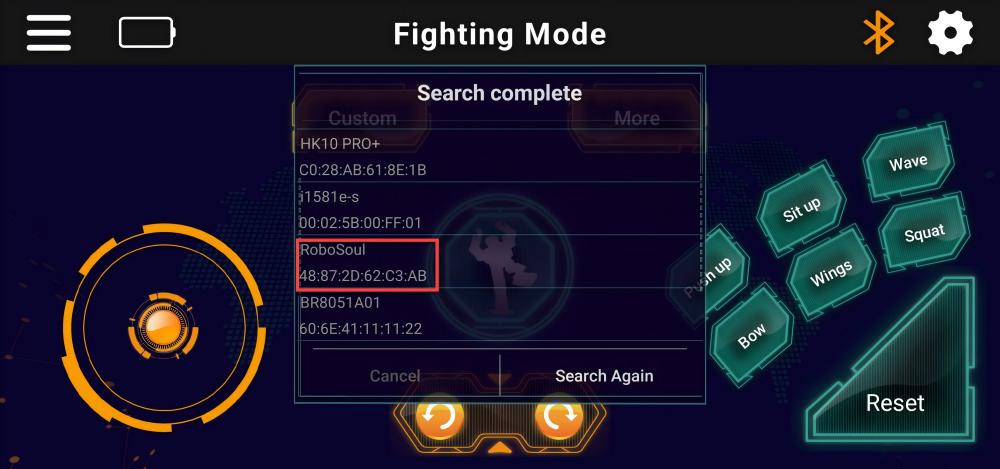
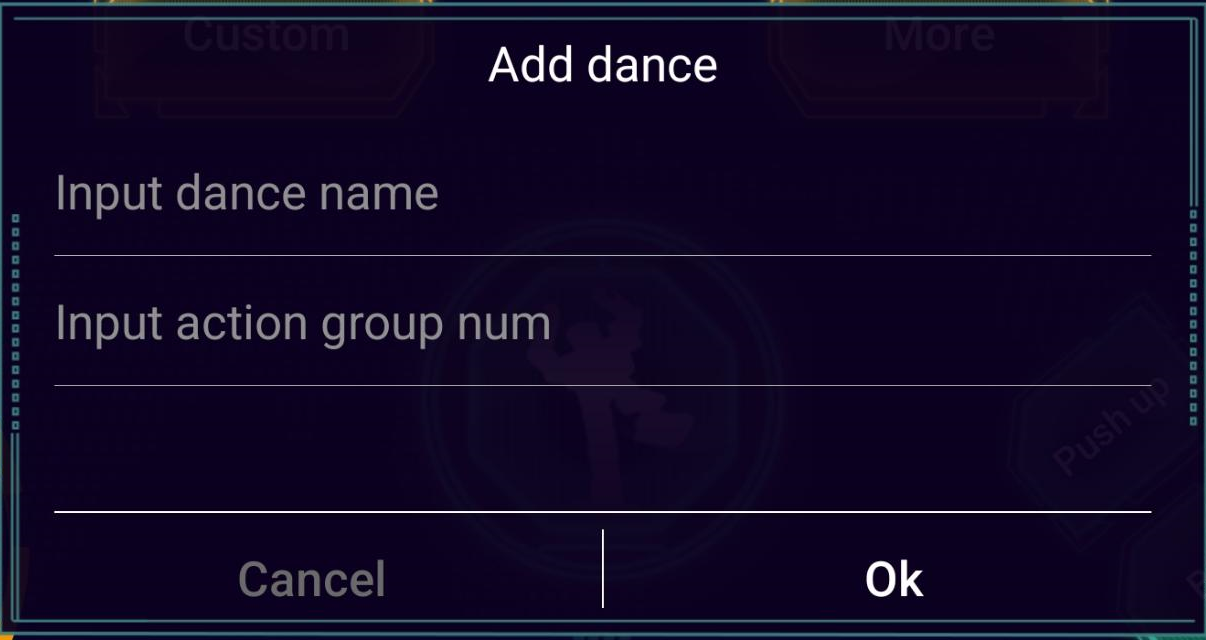
(3) Tap “Custom” 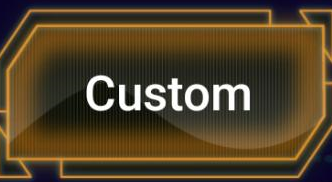 in the interface and then tap “Add” in the popup window.
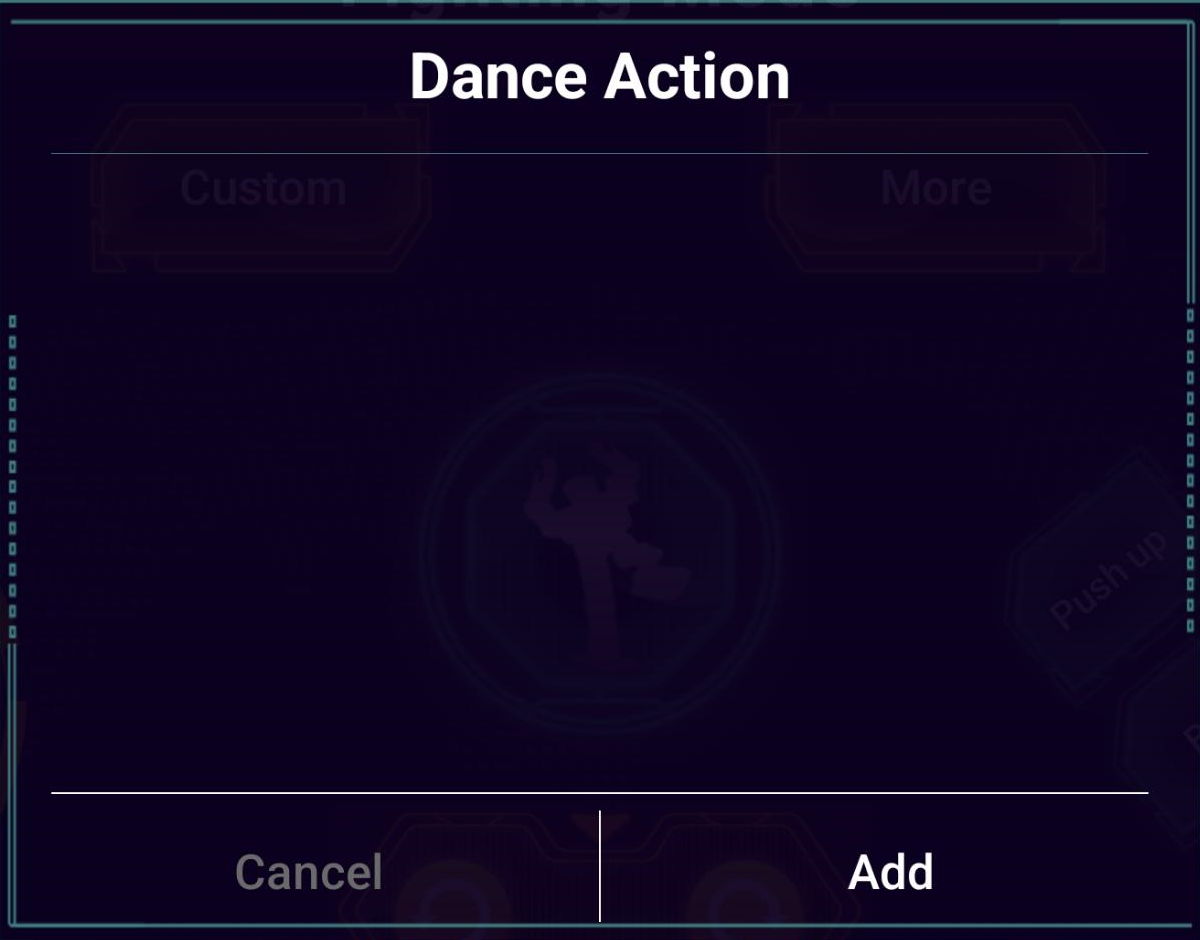
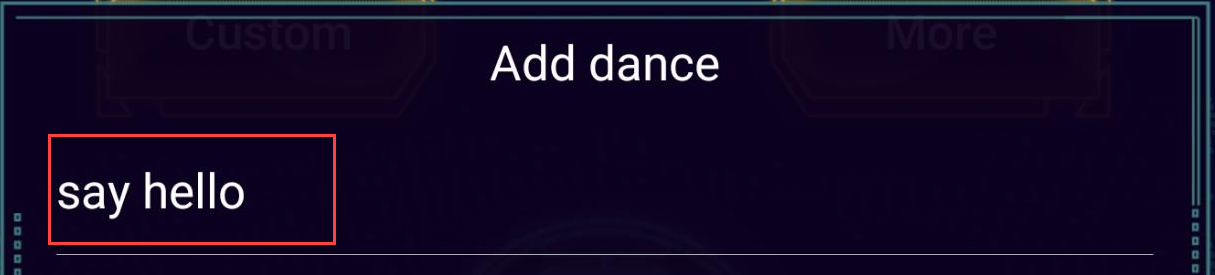
(4) In the form that appears, enter an action group name and action group number.
Note
The name can be anything you like, but the action group number must be entered correctly or the action will not work.
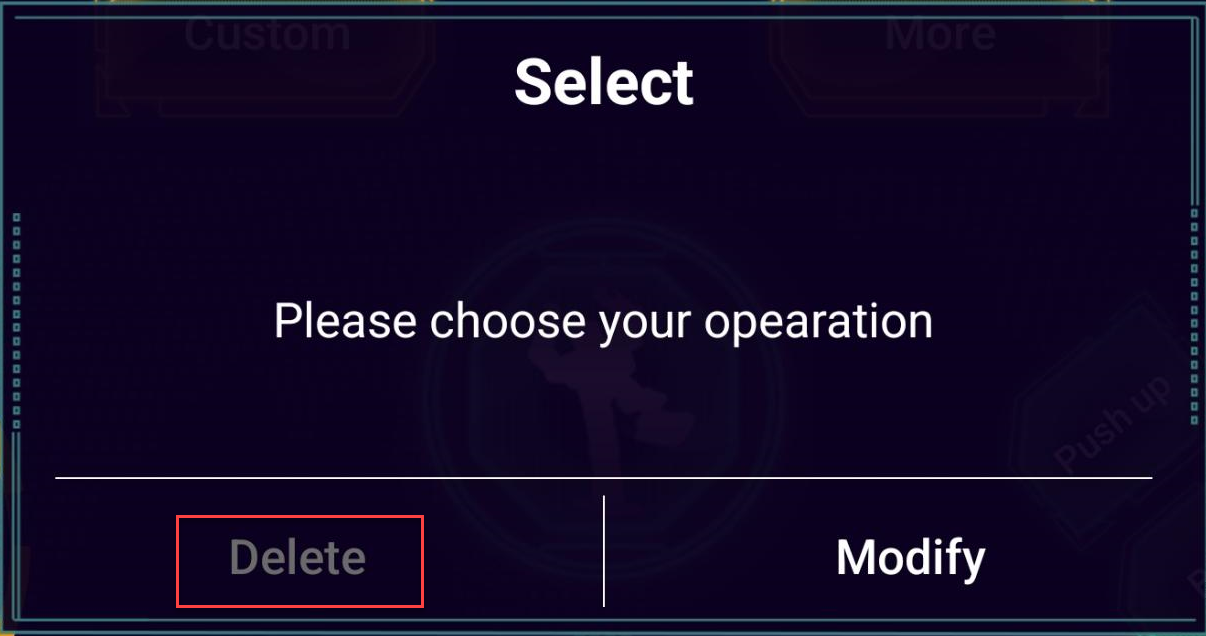
(5) Once added, tap the custom action button to execute the action once.
(6) To delete a custom action, long-press the action button, then tap “Delete” in the pop-up menu.