5. Action Editing Course
5.1 Introduction to PC Software
5.1.1 Open PC Software
Use Desktop Icon to Open PC Software (Beginner)
(1) Double click on  to open PC software.
Note
This method is recommended for robotics beginners.
Use Command line to Open PC Software
(1) Click  or press “Ctrl+Alt+T” to open the command line terminal.
(2) Execute the command below to open PC software.
python3 Pug_PC_Software/ActionGroups/main.py
5.1.2 Interface Layout
The interface consists of servo control area, action data list, action setting area and deviation setting area.
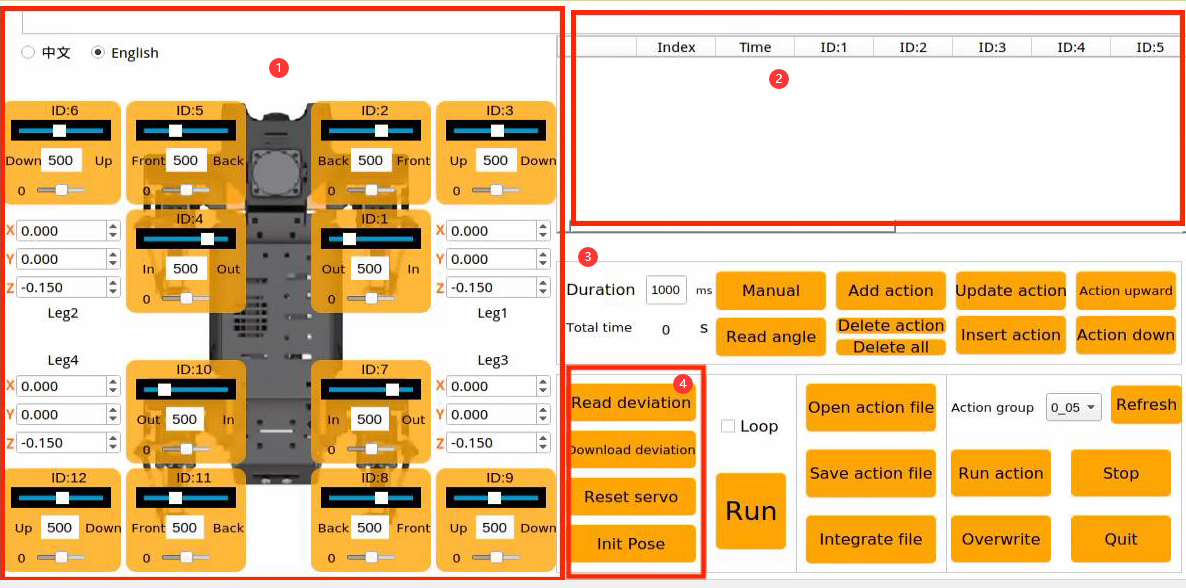
Servo Control Area
Adjust the value of corresponding servo to adjust the posture of ROSPug.
| Icon | Function |
|---|---|
 |
Change the language |
 |
Servo ID number |
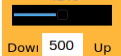 |
Apply to adjust servo angle with a range from 500 to 2500. |
 |
Apply to adjust servo deviation, with a range from -100 to 100. |
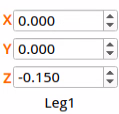 |
Coordinates of the leg's foot end along the x, y, and z axes, in meters. |
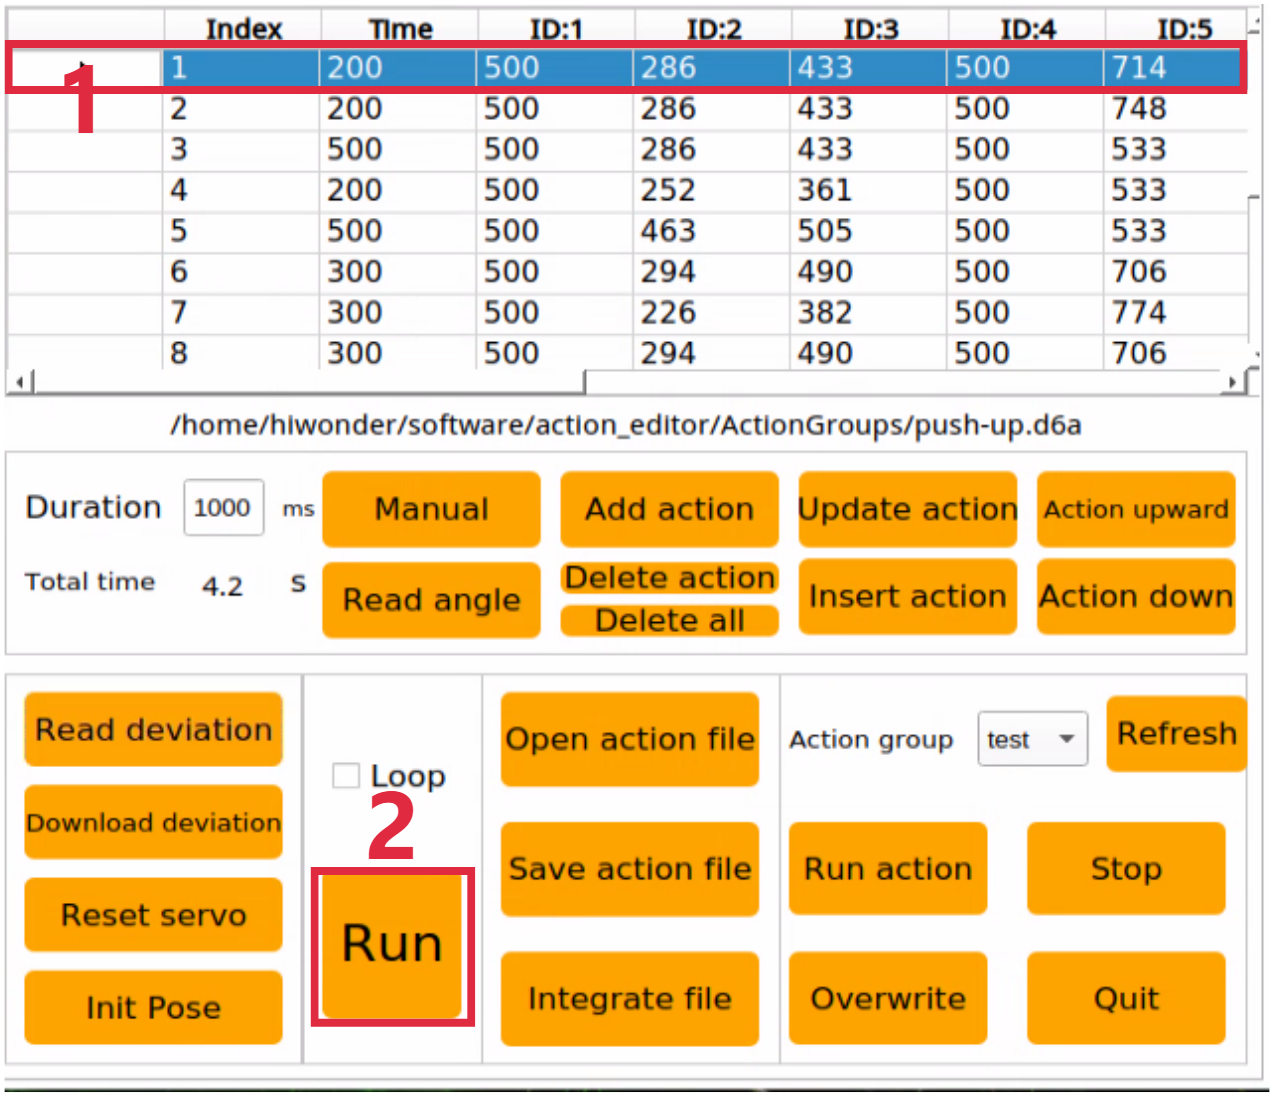
Action Data List
We can view the action duration and servo parameters in the list.

| Icon | Function |
|---|---|
 |
Action Number |
 |
Action duration |
 |
The angle value for corresponding servo ID. It is allowed to double click to modify the value |
 |
Run the selected action |
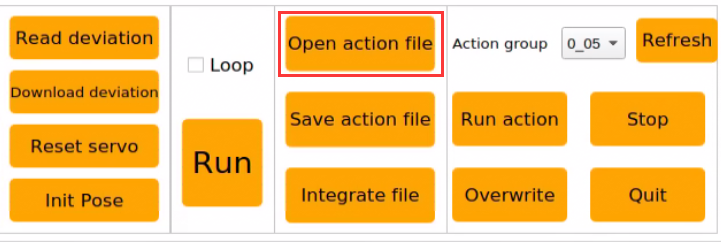
Action Setting Area
| Icon | Function |
|---|---|
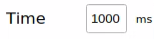 |
The time required to run a single action. It can be directly modified in the box. |
 |
The time required to run a complete action group. |
 |
After clicking, you can manually adjust the servo rotation angle. |
 |
Read the current angle of the servo |
 |
Add the current servo values from the control area as an action to the last line of the action details list. |
 |
Replace the action selected in action data list with the current servo values in servo control area, and time will also be changed to the set time. |
 |
Insert an action before the selected action. Servo parameters are the values in servo control area. |
 |
Swap the position of a selected action with its previous action. |
 |
Delete a selected action in action data list. |
 |
Delete all the actions in action action data list. |
 |
Swap the position of a selected action with its next action. |
 |
Run all actions in action data list once. "loop" represents running the action in a loop |
 |
Open a required action group file. |
 |
Store the actions in action data list in a designated position. |
 |
After opening an action group through "Open action file", clicking "Integrate action file" to open another action group allows you link them together. |
 |
Display the stored action group in PC software. |
 |
Refresh the selected action group. |
 |
Run the selected action group. |
 |
Stop the currently running action group. |
 |
Overwrite the selected action group. |
 |
Exit the host computer's control interface. |
Note
All action group files are stored in “home/Pug_PC_Software/ActionGroups”.
Deviation Setting Area
(ROSPug has been adjusted deviation before shipment. This section is just for reference)
| Icon | Function |
|---|---|
 |
Read the deviation value for each servo. (It is necessary to read deviation before adjusting deviation) |
 |
Store the deviation adjusted in ROSPug. |
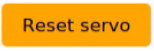 |
Reset all servo values in servo control area to 1500. |
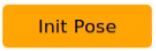 |
Restore the robot dog to standing pose |
5.2 Action Editing
5.2.1 Realization Purpose
The ROSPug robot dog’s software enables you to control the robot to perform a variety of actions. By combining these actions, you can create a sequence of movements known as an action set.
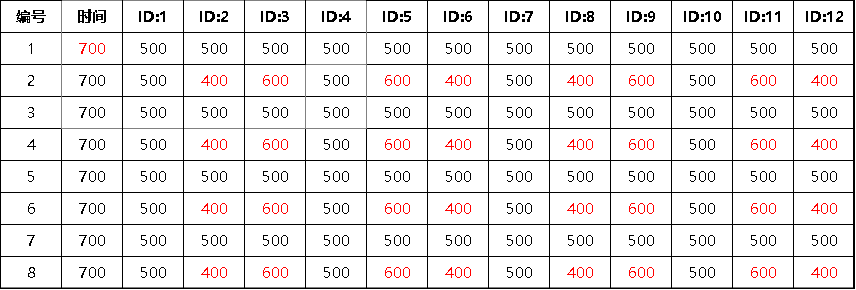
In this section, we will configure an action set for the ROSPug robot dog to perform a “push-up.” This action set includes 8 distinct actions, categorized into two phases: “Down” and “Up”.
5.2.2 Edit Action
(1) Click  to open PC software.
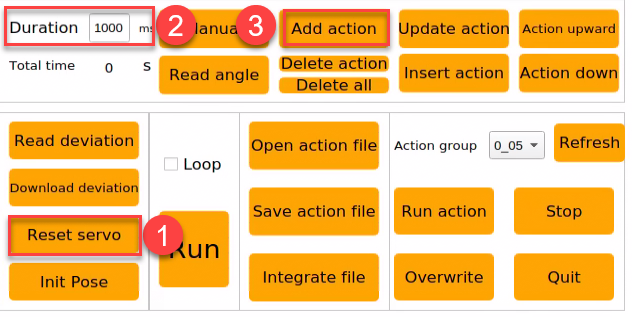
(2) Step 1: Click “Reset servo” in deviation area to have ROSPug restored to its initial posture, the “down” action, with a duration of 700ms, and then click “Add action” in action editing area to add the action to the action list.
The specific parameters of action can be viewed in action data list.

Note
Each action edited needs to add it to the action list.
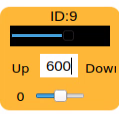
(3) Step 2: Double click the text box of No.9 servo or drag its upper slider to adjust the servo parameter to 600.
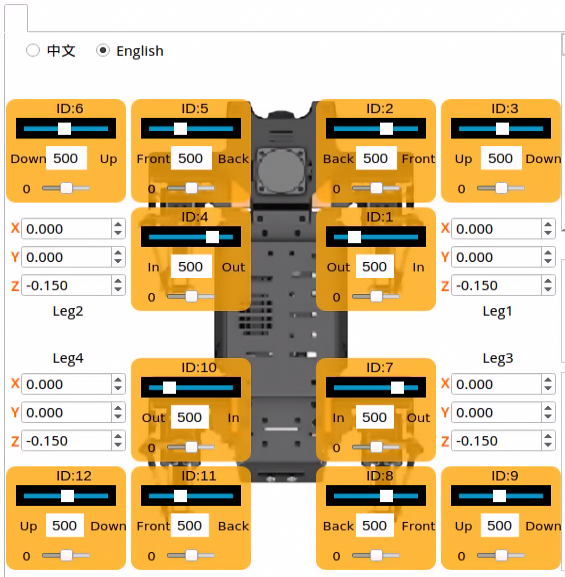
(4) Step 3: Modify the parameters of other servos according to the following picture to make ROSPug in the “stand-up” position, then add this action to the action list.
(5) Step 4: Click “Reset servo” to execute the “Down” action. At this point, you can find that there are three actions in action list.

(6) Step 5: From the action list, select the action numbered 2, which is the “Stand Up” action added in Step 3. Click the button to make the robot dog perform the “Stand Up” action. Then, click “Add Action” to include this action in the list. The action list will now contain 4 actions: actions 1 and 3 are “Lie Down,” while actions 2 and 4 are “Stand Up.”


(7) Repeat Step 4 and 5 actions to add two more sets of “Down” and “Stand-up” actions. Then the action list will have 8 independent actions in total, which indicates this action group has been completed. Select No.1 action and click “Run”. ROSPug will perform “Push-up” action group.
The following table displays all the servo parameters of this action group:
Note
The red value represent the time or servo parameters that require adjustment in each step.
5.2.3 Save Action
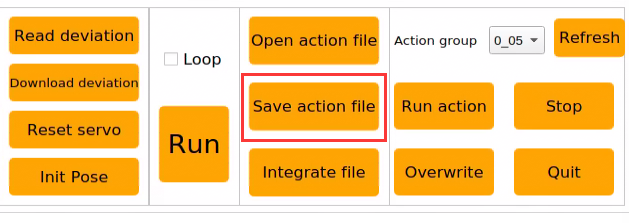
(1) To facilitate the debug and management, you can click “Save action file” to save action group.
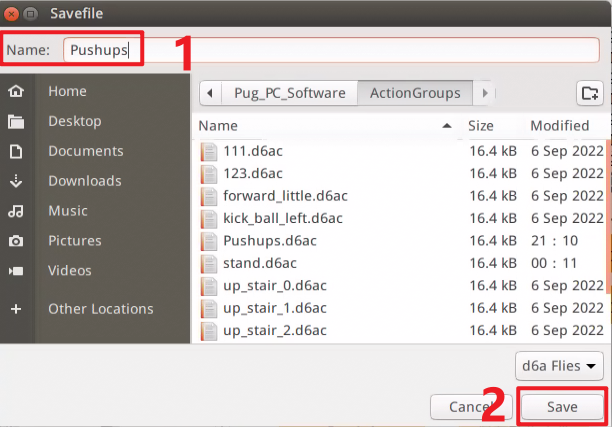
(2) Save the action group in “home/Pug_PC_Software/ActionGroups” and name it as “Pushups”, then click “Save”.
5.3 Import And Export Action
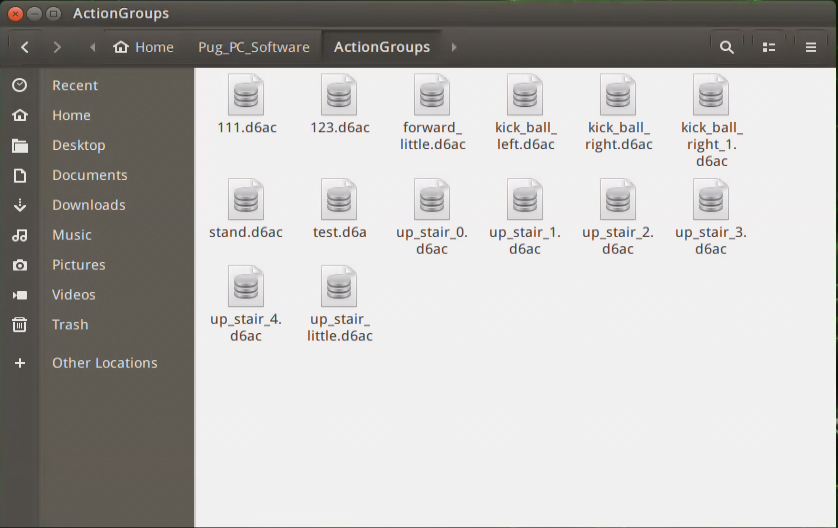
ROSPug contains some specific action groups by default. The action group files are stored in “home/Pug_PC_Software/ActionGroups”.
5.3.1 Export Action Group
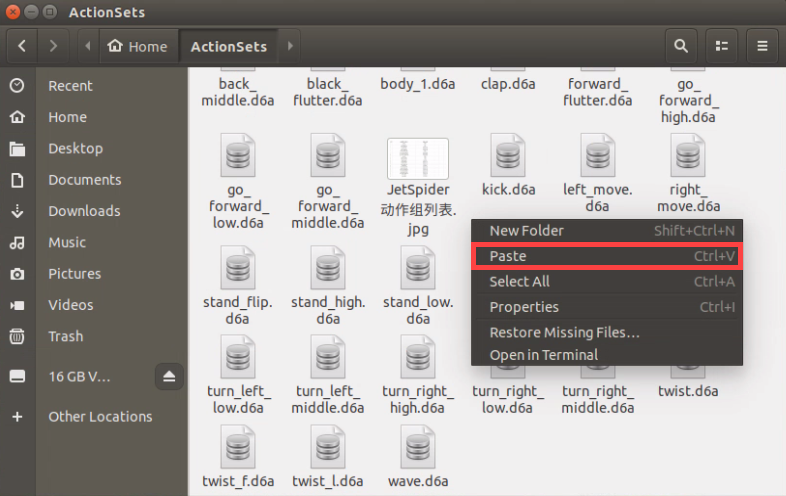
(1) Turn on ROSPug, and then connect it to NoMachine and insert a U disk to any USB port on ROSPug.
(2) Click  in system status bar to open the file manager.
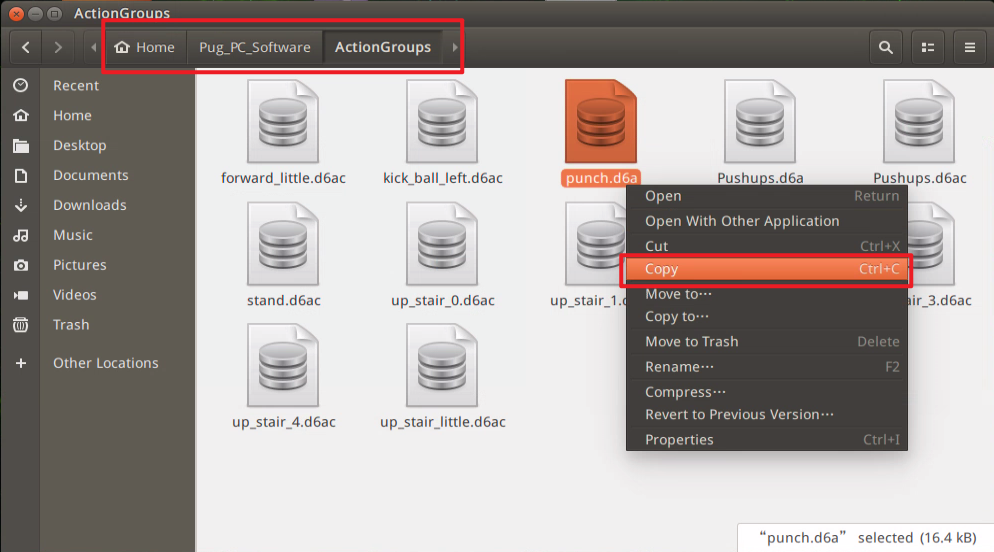
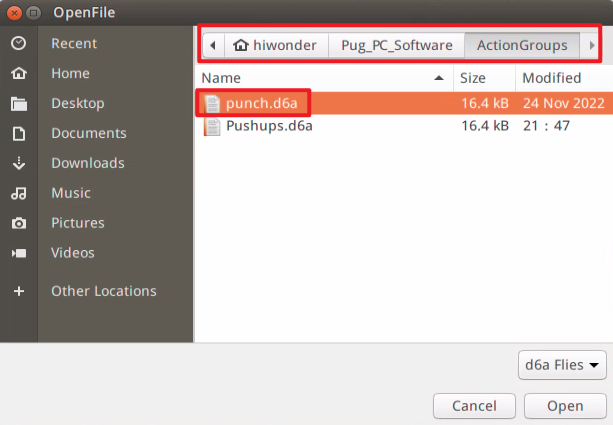
(3) Come to directory “home/Pug_PC_Software/ActionGroups”, then right click to copy the required action group. Or you can press “Ctrl+C” to copy the action group. In this case, we will select “punch.d6a” as example.
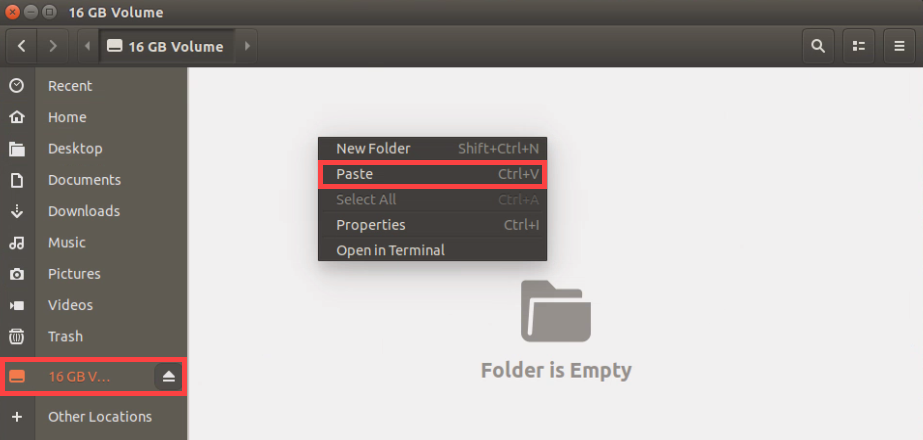
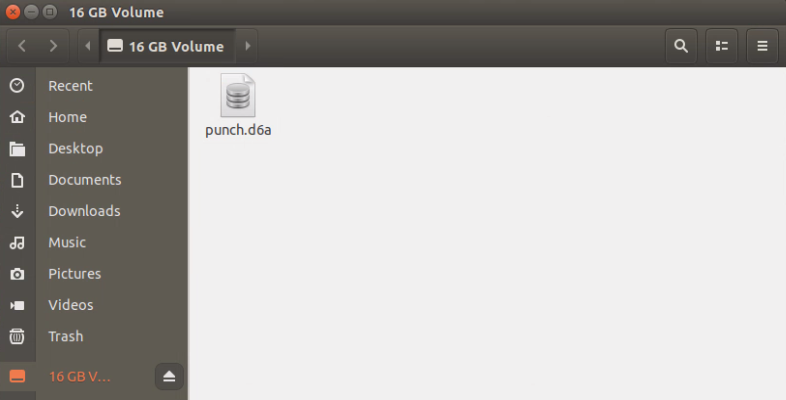
(4) Switch to the directory of U disk, and then right click or press “Ctrl+V” to paste the action group file.
5.3.2 Import Action Group
(1) Turn on ROSPug, and then connect it to NoMachine remote and insert a U disk to any USB port on ROSPug.
(2) Insert the U disk that stores action group files to any USB port, then system will pop up a file manager window.
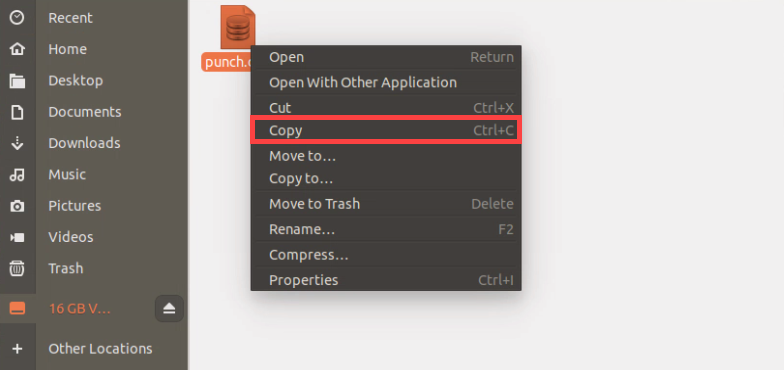
(3) Right click action group file to select “copy” or press “Ctrl+C” to copy the action group file.
(4) Switch to the directory “home/Pug_PC_Software/ActionGroups”. Right click in a blank space, select “Paste” option or press “Ctrl+V” to the action group file, thus completing the import of the action group.
(5) Double click  to open PC software.
(6) Click “Open action file”, then you can view the imported action group file “punch.d6a”.
5.4 APP Custom Control
5.4.1 Program Outcome
In the previous lesson, 5.2 Action Editing, we learned how to edit the action group “Pushups”. In this lesson, we will use the custom function of the mobile app to execute this action group.
5.4.2 Preparation
(1) Turn on ROSPug, and then connect it to NoMachine remote desktop.
(2) Click  in system status bar to open the file manager.
(3) Enter directory “home/Pug_PC_Software/ActionGroups” to check the name of all existing action groups.
5.4.3 Operation Steps
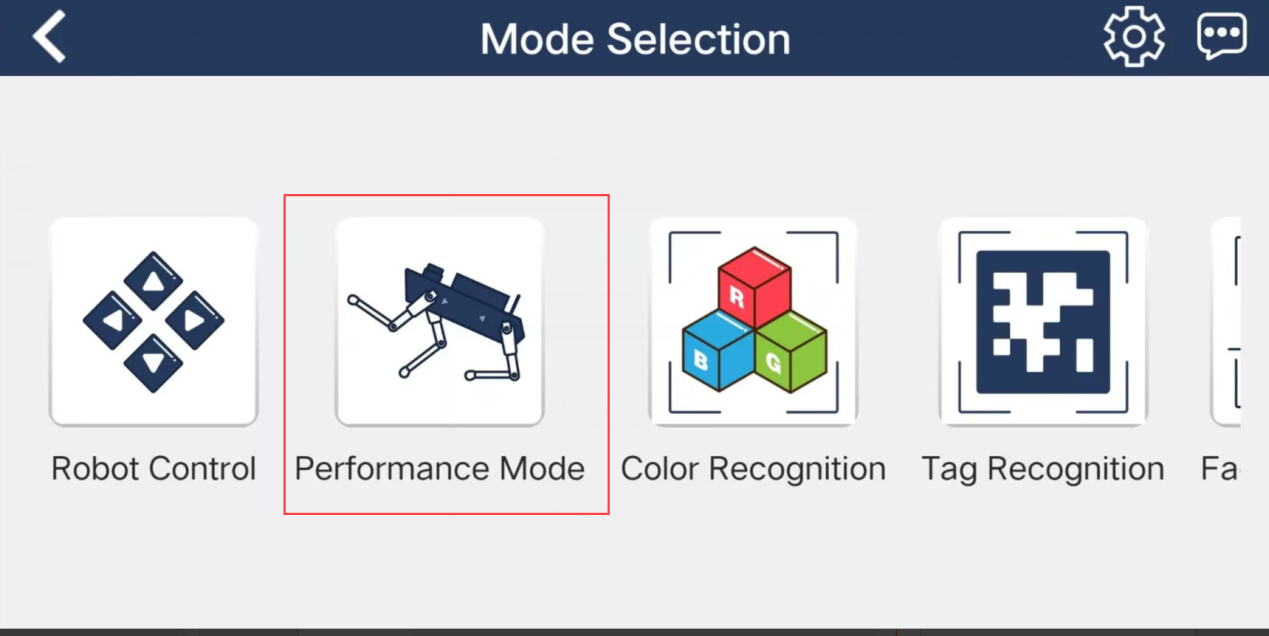
(1) Open “WonderROS”, then connect ROSPug and enter “Performance Mode”.
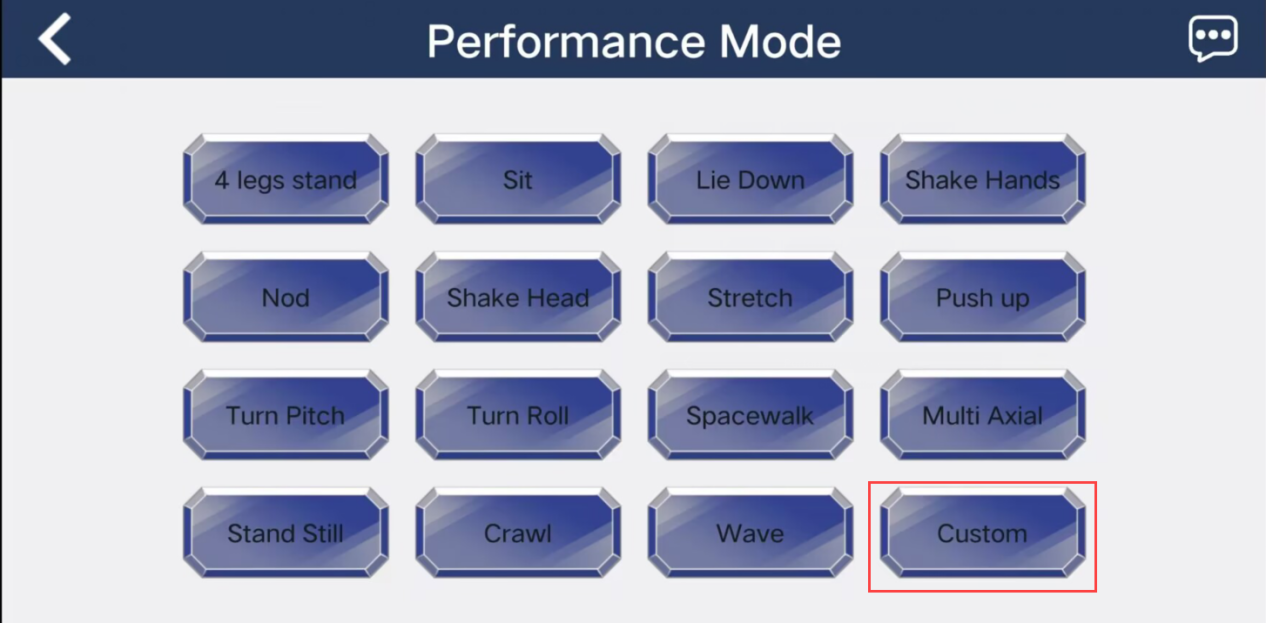
(2) Click “Custom” key.
(3) Click “Add” key to add custom action.
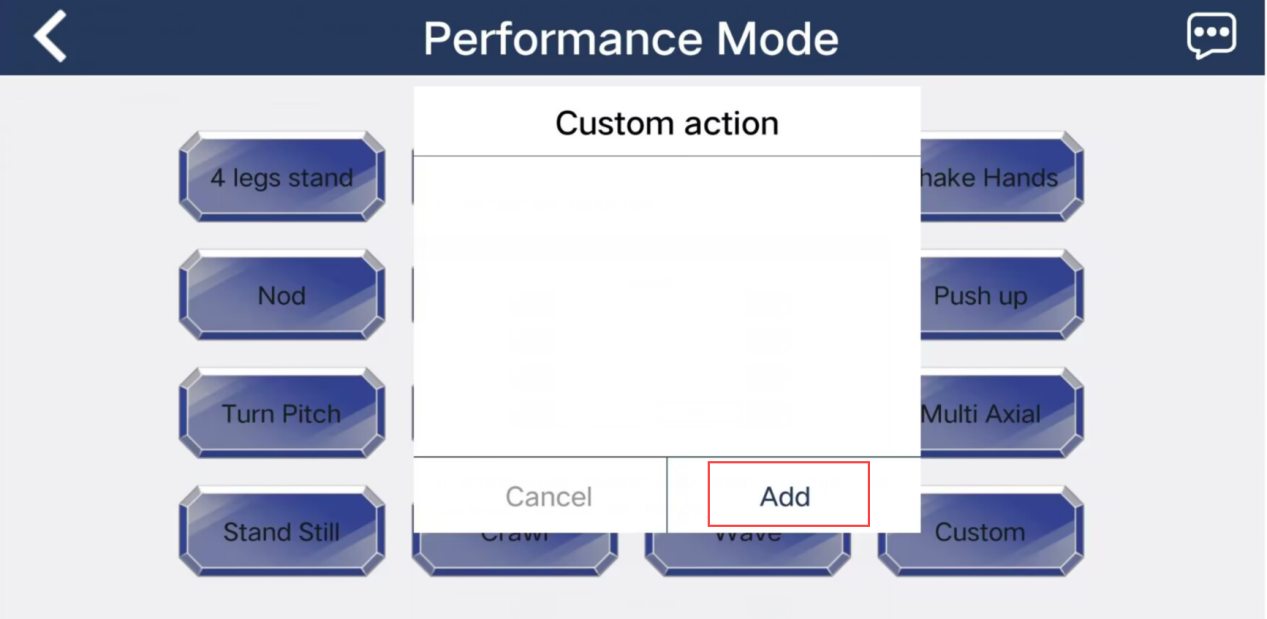
(4) Fill in the required action information, then click “OK”.


Note
You can freely fill in the “Action name”, but the “Action File Name” should be filled in accordance with the existing action group. For the specific action group names, please refer to 5.4.2 Preparation.
(5) Click the “Custom” key and select the custom action, then ROSPug will perform this action.

(6) If you want to modify an action group, you can long press its name, and then click “Modify” in pop-up window.
