5. AI Vision Course
5.1 Face Detection
5.1.1 Experiment Overview
This section uses a program to demonstrate the face detection feature of the K230 board.
5.1.2 Preparation
Module Connection
Connect the K230 development board to your PC using a Type-C data cable, as shown below:

Double-click to open CanMV IDE K230.

Click the connection button in the bottom-left corner.

Upon successful connection, the icon in the bottom-left corner of CanMV IDE will change to the one shown below.

If the connection takes more than 10 seconds, it indicates a connection failure. Click the Cancel button, and a pop-up window will appear. Click OK and recheck the connection.

Note
Connection Failure Causes and Solutions:
Cable is not a data cable: Some Type-C cables are charging-only cables without data transfer capability. Please use a Type-C cable with data transfer functionality. The factory-supplied cable is a Type-C data cable.
Other K230 firmware was flashed: Re-flash the factory firmware, then reconnect.
5.1.3 Program Execution and Download
Display Mode Configuration:
The program can use the select_display="" parameter to choose the display mode: HDMI, LCD, or IDE virtual.

The K230 program supports two operation modes: online execution and offline execution.
Online Execution:
In this mode, after connecting, drag the program face_detection.py into CanMV IDE K230’s code editing area. Then, click the run button in the bottom-left corner  , and the program will run online, as shown below:
Note
Programs run using this method will be lost upon disconnection or power-off and will not be saved on the development board.

Offline Execution:
After connecting, drag the program face_detection.py into CanMV IDE K230’s code editing area. Click Tools on the toolbar and select Save open script to CanMV Board (as main.py) as shown below:

Then click Yes.

Once the file is written, click OK to confirm and complete saving the MicroPython file to the K230 development board.

With this method, the K230 development board will automatically run the MicroPython file upon power-up without connection, enabling offline execution.
5.1.4 Program Outcome
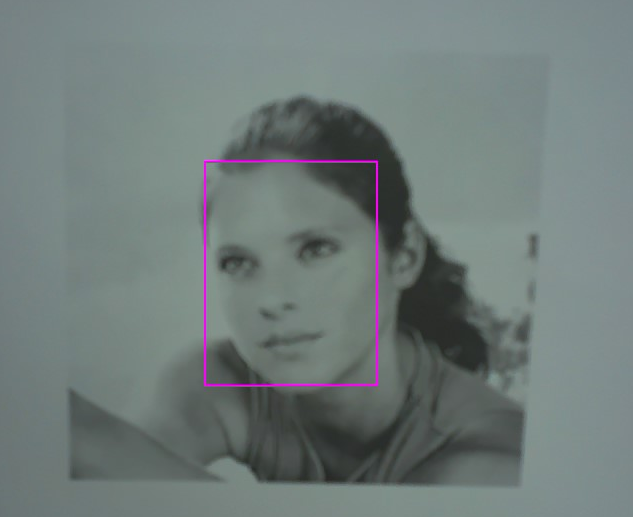
In the transmitted video feed, perform real-time face detection and highlight the detected faces with a purple box.
5.1.5 Program Analysis
Import Required Libraries
from libs.PipeLine import PipeLine
from libs.AIBase import AIBase
from libs.AI2D import Ai2d
from libs.Utils import *
from media.display import Display
import os, sys, ujson, gc, math
from media.media import *
import nncase_runtime as nn
import ulab.numpy as np
import image
import aidemo
FaceDetectionApp Class
class FaceDetectionApp(AIBase):
    def __init__(self, kmodel_path, model_input_size, anchors,
                 confidence_threshold=0.5, nms_threshold=0.2,
                 rgb888p_size=[224, 224], display_size=[1920, 1080], debug_mode=0):
        super().__init__(kmodel_path, model_input_size, rgb888p_size, debug_mode)
        self.kmodel_path = kmodel_path
        self.model_input_size = model_input_size
        self.confidence_threshold = confidence_threshold
        self.nms_threshold = nms_threshold
        self.anchors = anchors
        self.rgb888p_size = [ALIGN_UP(rgb888p_size[0],16), rgb888p_size[1]]
        self.display_size = [ALIGN_UP(display_size[0],16), display_size[1]]
        self.debug_mode = debug_mode
        self.ai2d = Ai2d(debug_mode)
        self.ai2d.set_ai2d_dtype(
            nn.ai2d_format.NCHW_FMT,
            nn.ai2d_format.NCHW_FMT,
            np.uint8, np.uint8)
Initializes model path, input size, anchors, thresholds, display resolution, etc.
model_input_size: The input dimensions required by the model.anchors: Stores bounding box information.confidence_threshold,nms_threshold: Parameters used for post-processing.rgb888p_size,display_size: Input image dimensions and display resolution.debug_mode: Whether to enable debug mode.
Image Preprocessing
    def config_preprocess(self, input_image_size=None):
        with ScopedTiming("set preprocess config", self.debug_mode > 0):
            ai2d_input_size = input_image_size if input_image_size else self.rgb888p_size
            top, bottom, left, right,_ = letterbox_pad_param(self.rgb888p_size, self.model_input_size)
            self.ai2d.pad([0,0,0,0, top, bottom, left, right], 0, [104,117,123])
            self.ai2d.resize(nn.interp_method.tf_bilinear, nn.interp_mode.half_pixel)
            self.ai2d.build(
                [1,3,ai2d_input_size[1], ai2d_input_size[0]],
                [1,3,self.model_input_size[1], self.model_input_size[0]])
Padding: Fills the image to the target size while maintaining the aspect ratio.
Resizing: Uses bilinear interpolation to adjust the image size to match the model’s input requirements.
Image Post-Processing
    def postprocess(self, results):
        with ScopedTiming("postprocess", self.debug_mode > 0):
            post_ret = aidemo.face_det_post_process(
                self.confidence_threshold,
                self.nms_threshold,
                self.model_input_size[1],
                self.anchors,
                self.rgb888p_size,
                results)
            if len(post_ret) == 0:
                return post_ret
            else:
                return post_ret[0]
Confidence Filtering: Retains only face boxes with confidence above the threshold.
Non-Maximum Suppression (NMS): Removes detection boxes with high overlap.
5.1.6 Draw Detection Results
    def draw_result(self, pl, dets):
        with ScopedTiming("display_draw", self.debug_mode > 0):
            if dets:
                pl.osd_img.clear()
                for det in dets:
                    x,y,w,h = map(lambda x:int(round(x,0)), det[:4])
                    x = x * self.display_size[0] // self.rgb888p_size[0]
                    y = y * self.display_size[1] // self.rgb888p_size[1]
                    w = w * self.display_size[0] // self.rgb888p_size[0]
                    h = h * self.display_size[1] // self.rgb888p_size[1]
                    pl.osd_img.draw_rectangle(x, y, w, h, color=(255,255,0,255), thickness=2)
            else:
                pl.osd_img.clear()
Draws the detected face boxes on the image, using rectangles to outline faces and clearing old boxes.
5.2 Facial Landmark Detection
5.2.1 Experiment Overview
This section covers the facial landmark detection feature of the K230 development board through a programming example.
5.2.2 Preparation
Module Connection
Connect the K230 development board to your PC using a Type-C data cable, as shown below:

Double-click to open CanMV IDE K230.

Click the connection button in the bottom-left corner.

Upon successful connection, the icon in the bottom-left corner of CanMV IDE will change to the one shown below.

If the connection takes more than 10 seconds, it indicates a connection failure. Click the Cancel button, and a pop-up window will appear. Click OK and recheck the connection.

Note
Connection Failure Causes and Solutions:
Cable is not a data cable: Some Type-C cables are charging-only cables without data transfer capability. Please use a Type-C cable with data transfer functionality. The factory-supplied cable is a Type-C data cable.
Other K230 firmware was flashed: Re-flash the factory firmware, then reconnect.
5.2.3 Program Execution and Download
Display Mode Configuration:
The program can use the select_display="" parameter to choose the display mode: HDMI, LCD, or IDE virtual.

The K230 program supports two operation modes: online execution and offline execution.
Online Execution:
In this mode, after connecting, drag the program face_landmark.py into CanMV IDE K230’s code editing area. Then, click the run button in the bottom-left corner  , and the program will run online, as shown below:
Note
Programs run using this method will be lost upon disconnection or power-off and will not be saved on the development board.

Offline Execution:
After connecting, drag the program face_landmark.py into CanMV IDE K230’s code editing area. Click Tools on the toolbar and select Save open script to CanMV Board (as main.py) as shown below:

Then click Yes.

Once the file is written, click OK to confirm and complete saving the MicroPython file to the K230 development board.

With this method, the K230 development board will automatically run the MicroPython file upon power-up without connection, enabling offline execution.
5.2.4 Program Outcome
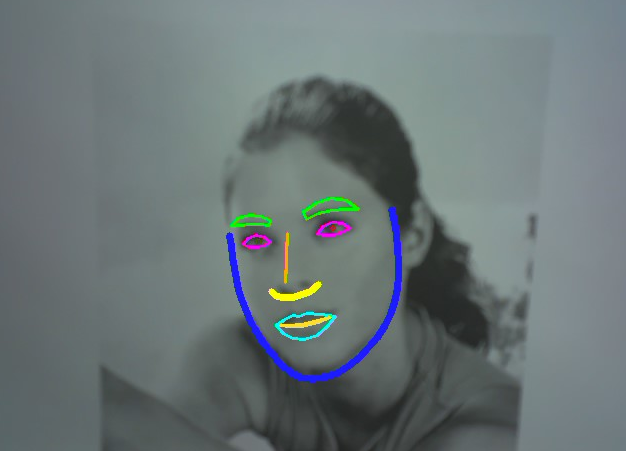
In the transmitted video feed, first detect the face positions in the image, then identify the key points of each face, such as eyes, eyebrows, mouth, etc., and finally draw the detection boxes and key points on the screen.
5.2.5 Program Analysis
Import Required Libraries
from libs.PipeLine import PipeLine
from libs.AIBase import AIBase
from libs.AI2D import Ai2d
from libs.Utils import *
import os, sys, ujson, gc, math
from media.media import *
from media.display import Display
import nncase_runtime as nn
import ulab.numpy as np
import image
import aidemo
Face Detection
class FaceDetApp(AIBase):
    def __init__(self, kmodel_path, model_input_size, anchors,
                 confidence_threshold=0.25, nms_threshold=0.3,
                 rgb888p_size=[1280,720], display_size=[1920,1080], debug_mode=0):
        super().__init__(kmodel_path, model_input_size, rgb888p_size, debug_mode)
        self.kmodel_path = kmodel_path
        self.model_input_size = model_input_size
        self.confidence_threshold = confidence_threshold
        self.nms_threshold = nms_threshold
        self.anchors = anchors
        self.rgb888p_size = [ALIGN_UP(rgb888p_size[0], 16), rgb888p_size[1]]
        self.display_size = [ALIGN_UP(display_size[0], 16), display_size[1]]
        self.debug_mode = debug_mode
        self.ai2d = Ai2d(debug_mode)
        self.ai2d.set_ai2d_dtype(nn.ai2d_format.NCHW_FMT,
                                nn.ai2d_format.NCHW_FMT,
                                np.uint8,
                                np.uint8)
FaceDetApp: Loads the face detection model and performs face detection.kmodel_path: Path to the face detection model.model_input_size: The required input image dimensions for this model.anchors: Anchor boxes. Object detection models typically use anchor boxes of different scales to match real-world objects.confidence_threshold: Confidence threshold. A face will only be considered a valid face if the model’s predicted face box confidence exceeds this threshold.nms_threshold: Non-maximum suppression threshold, which is used to eliminate overlapping detection boxes. It removes duplicate boxes that have an overlap greater than the set threshold.
Image Preprocessing
    def config_preprocess(self, input_image_size=None):
        with ScopedTiming("set preprocess config", self.debug_mode > 0):
            ai2d_input_size = input_image_size if input_image_size else self.rgb888p_size
            top, bottom, left, right, _ = letterbox_pad_param(self.rgb888p_size, self.model_input_size)
            self.ai2d.pad([0, 0, 0, 0, top, bottom, left, right], 0, [104, 117, 123])
            self.ai2d.resize(nn.interp_method.tf_bilinear, nn.interp_mode.half_pixel)
            self.ai2d.build([1,3,ai2d_input_size[1],ai2d_input_size[0]],
                            [1,3,self.model_input_size[1],self.model_input_size[0]])
The purpose of image preprocessing is to convert the raw input image into a format suitable for the model. Operations include resizing, color conversion, normalization, and data augmentation.
letterbox_pad_param: Calculates the necessary padding based on the input image dimensions and the model’s input dimensions, ensuring the image is scaled proportionally and padded to the target size.self.ai2d.pad: Pads the image with the color [104, 117, 123]. It adjusts the input size during image preprocessing to prevent errors in the model caused by inconsistent image dimensions.self.ai2d.resize: Resizes the image to fit the model’s input dimensions.
Returning Valid Boxes
    def postprocess(self, results):
        with ScopedTiming("postprocess", self.debug_mode > 0):
            res = aidemo.face_det_post_process(
                self.confidence_threshold,
                self.nms_threshold,
                self.model_input_size[0],
                self.anchors,
                self.rgb888p_size,
                results)
            if len(res) == 0:
                return res
            else:
                return res[0]
postprocess: Post-process the model’s output. Use the confidence threshold and NMS algorithm to filter the detection boxes and return the valid ones.
Facial Landmark Recognition
class FaceLandMarkApp(AIBase):
    def __init__(self, kmodel_path, model_input_size,
                 rgb888p_size=[1920,1080], display_size=[1920,1080], debug_mode=0):
        super().__init__(kmodel_path, model_input_size, rgb888p_size, debug_mode)
        self.kmodel_path = kmodel_path
        self.model_input_size = model_input_size
        self.rgb888p_size = [ALIGN_UP(rgb888p_size[0], 16), rgb888p_size[1]]
        self.display_size = [ALIGN_UP(display_size[0], 16), display_size[1]]
        self.debug_mode = debug_mode
        self.matrix_dst = None
        self.ai2d = Ai2d(debug_mode)
        self.ai2d.set_ai2d_dtype(nn.ai2d_format.NCHW_FMT,
                                nn.ai2d_format.NCHW_FMT,
                                np.uint8,
                                np.uint8)
Responsible for loading and configuring the facial keypoint detection model, and setting the affine transformation matrix.
kmodel_path: Path to the facial landmark recognition model.model_input_size: Input dimensions for the landmark recognition model.rgb888p_size: Resolution of the input image.display_size: Dimensions of the display image.
Image Drawing
    def draw_result(self, pl, dets, landmark_res):
        pl.osd_img.clear()
        if dets:
            draw_img_np = np.zeros((self.display_size[1], self.display_size[0], 4), dtype=np.uint8)
            draw_img = image.Image(self.display_size[0], self.display_size[1], image.ARGB8888,
                                   alloc=image.ALLOC_REF, data=draw_img_np)
            for pred in landmark_res:
                for sub_part_index in range(len(self.dict_kp_seq)):
                    sub_part = self.dict_kp_seq[sub_part_index]
                    face_sub_part_point_set = []
                    for kp_index in range(len(sub_part)):
                        real_kp_index = sub_part[kp_index]
                        x, y = pred[real_kp_index*2], pred[real_kp_index*2+1]
                        x = int(x * self.display_size[0] // self.rgb888p_size[0])
                        y = int(y * self.display_size[1] // self.rgb888p_size[1])
                        face_sub_part_point_set.append((x, y))
                    if sub_part_index in (9, 6):
                        color = np.array(self.color_list_for_osd_kp[sub_part_index], dtype=np.uint8)
                        face_sub_part_point_set = np.array(face_sub_part_point_set)
                        aidemo.polylines(draw_img_np, face_sub_part_point_set, False, color, 5, 8, 0)
                    elif sub_part_index == 4:
                        color = self.color_list_for_osd_kp[sub_part_index]
                        for kp in face_sub_part_point_set:
                            draw_img.draw_circle(kp[0], kp[1], 2, color, 1)
                    else:
                        color = np.array(self.color_list_for_osd_kp[sub_part_index], dtype=np.uint8)
                        face_sub_part_point_set = np.array(face_sub_part_point_set)
                        aidemo.contours(draw_img_np, face_sub_part_point_set, -1, color, 2, 8)
            pl.osd_img.copy_from(draw_img)
Draw the face box and facial keypoints on the image.
pl: Image display pipeline.dets: Array of face boxes.landmark_res: Array of landmark results.
5.3 3D Face Mesh
5.3.1 Experiment Overview
This section explores the 3D face mesh rendering technology on the K230 development board through programming practice. When a face is detected, dense feature points outline the entire facial contour, presenting the face contour as a precise mesh structure. It supports simultaneous processing of single and multiple faces.
5.3.2 Preparation
Module Connection
Connect the K230 development board to your PC using a Type-C data cable, as shown below:

Double-click to open CanMV IDE K230.

Click the connection button in the bottom-left corner.

Upon successful connection, the icon in the bottom-left corner of CanMV IDE will change to the one shown below.

If the connection takes more than 10 seconds, it indicates a connection failure. Click the Cancel button, and a pop-up window will appear. Click OK and recheck the connection.

Note
Connection Failure Causes and Solutions:
Cable is not a data cable: Some Type-C cables are charging-only cables without data transfer capability. Please use a Type-C cable with data transfer functionality. The factory-supplied cable is a Type-C data cable.
Other K230 firmware was flashed: Re-flash the factory firmware, then reconnect.
5.3.3 Program Execution and Download
Display Mode Configuration:
The program can use the select_display="" parameter to choose the display mode: HDMI, LCD, or IDE virtual.

The K230 program supports two operation modes: online execution and offline execution.
Online Execution:
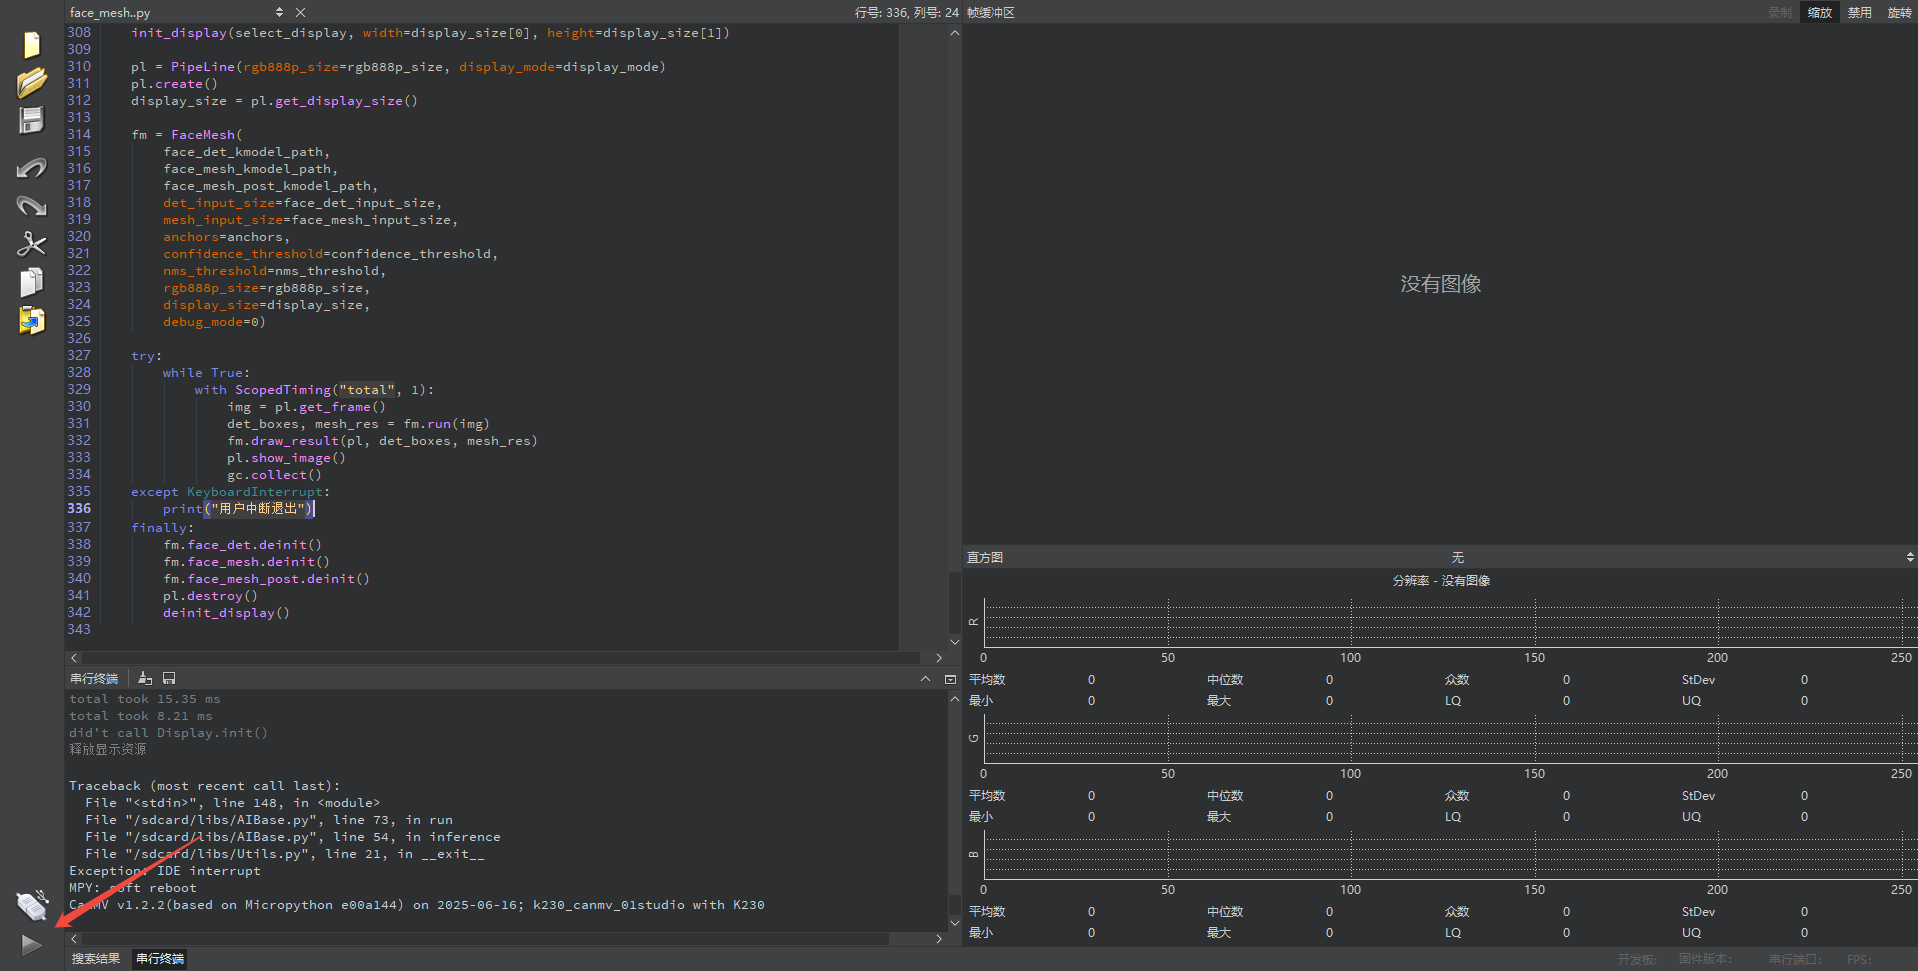
In this mode, after connecting, drag the program face_mesh.py into CanMV IDE K230’s code editing area. Then, click the run button in the bottom-left corner  , and the program will run online, as shown below:
Note
Programs run using this method will be lost upon disconnection or power-off and will not be saved on the development board.
Offline Execution:
After connecting, drag the program face_mesh.py into CanMV IDE K230’s code editing area. Click Tools on the toolbar and select Save open script to CanMV Board (as main.py) as shown below:

Then click Yes.

Once the file is written, click OK to confirm and complete saving the MicroPython file to the K230 development board.

With this method, the K230 development board will automatically run the MicroPython file upon power-up without connection, enabling offline execution.
5.3.4 Program Outcome
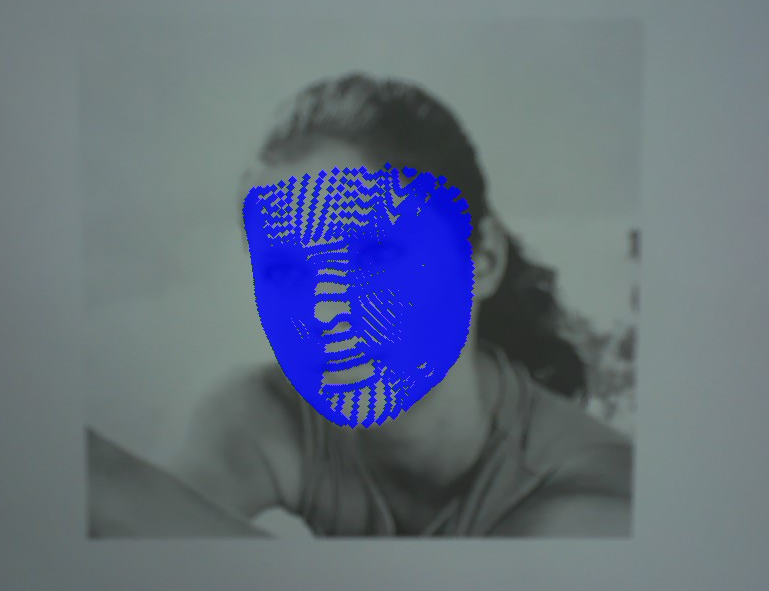
In the return feed, the program overlays a 3D mesh effect on any faces detected by the camera, supporting both single and multiple faces.
5.3.5 Program Analysis
Import Required Libraries
from libs.PipeLine import PipeLine
from libs.AIBase import AIBase
from libs.AI2D import Ai2d
from libs.Utils import *
import os
import sys
import ujson
import gc
import math
from media.media import *
from media.display import Display
import nncase_runtime as nn
import ulab.numpy as np
import image
import aidemo
Face Detection
class FaceDetApp(AIBase):
    def __init__(self, kmodel_path, model_input_size, anchors,
                 confidence_threshold=0.25, nms_threshold=0.3,
                 rgb888p_size=[1280,720], display_size=[1920,1080],
                 debug_mode=0):
        super().__init__(kmodel_path, model_input_size, rgb888p_size, debug_mode)
        self.kmodel_path = kmodel_path
        self.model_input_size = model_input_size
        self.confidence_threshold = confidence_threshold
        self.nms_threshold = nms_threshold
        self.anchors = anchors
        self.rgb888p_size = [ALIGN_UP(rgb888p_size[0],16), rgb888p_size[1]]
        self.display_size = [ALIGN_UP(display_size[0],16), display_size[1]]
        self.debug_mode = debug_mode
        self.ai2d = Ai2d(debug_mode)
        self.ai2d.set_ai2d_dtype(
            nn.ai2d_format.NCHW_FMT,
            nn.ai2d_format.NCHW_FMT,
            np.uint8,
            np.uint8)
FaceDetApp loads and runs the face detection model. After receiving an input image, it outputs the positions of the detected bounding boxes.
kmodel_path: Path to the face detection model.model_input_size: Input size of the face detection model.anchors: Anchor boxes used for bounding box prediction.confidence_threshold: Confidence threshold for filtering low-confidence detection boxes.nms_threshold: Non-Maximum Suppression threshold for removing redundant overlapping boxes.rgb888p_size: Size of the input image.display_size: Display size of the output image.
Image Preprocessing
    def config_preprocess(self, input_image_size=None):
        with ScopedTiming("set preprocess config", self.debug_mode > 0):
            ai2d_input_size = input_image_size if input_image_size else self.rgb888p_size
            top, bottom, left, right, _ = letterbox_pad_param(self.rgb888p_size, self.model_input_size)
            self.ai2d.pad([0,0,0,0, top, bottom, left, right], 0, [104,117,123])
            self.ai2d.resize(nn.interp_method.tf_bilinear, nn.interp_mode.half_pixel)
            self.ai2d.build(
                [1,3,ai2d_input_size[1], ai2d_input_size[0]],
                [1,3,self.model_input_size[1], self.model_input_size[0]])
Image preprocessing steps including padding and scaling to ensure the input image meets model requirements.
input_image_size: Size of the input image.
Face Mesh Landmark Recognition
class FaceMeshApp(AIBase):
    def __init__(self, kmodel_path, model_input_size,
                 rgb888p_size=[1920,1080], display_size=[1920,1080],
                 debug_mode=0):
        super().__init__(kmodel_path, model_input_size, rgb888p_size, debug_mode)
        self.kmodel_path = kmodel_path
        self.model_input_size = model_input_size
        self.rgb888p_size = [ALIGN_UP(rgb888p_size[0],16), rgb888p_size[1]]
        self.display_size = [ALIGN_UP(display_size[0],16), display_size[1]]
        self.debug_mode = debug_mode
        self.param_mean = np.array([
The FaceMeshApp class extracts facial landmarks from face detection boxes and generates facial mesh through the network model.
kmodel_path: Path to the face mesh recognition model.model_input_size: Input size of the mesh model.rgb888p_size: Resolution of the input image.display_size: Resolution of the display image.debug_mode: Debug mode, 0 for off, 1 for on.
Image Post-processing and Affine Transformation
class FaceMeshPostApp(AIBase):
    def __init__(self, kmodel_path, model_input_size,
                 rgb888p_size=[1920,1080], display_size=[1920,1080],
                 debug_mode=0):
        super().__init__(kmodel_path, model_input_size, rgb888p_size, debug_mode)
        self.kmodel_path = kmodel_path
        self.model_input_size = model_input_size
        self.rgb888p_size = [ALIGN_UP(rgb888p_size[0],16), rgb888p_size[1]]
        self.display_size = [ALIGN_UP(display_size[0],16), display_size[1]]
        self.debug_mode = debug_mode
        self.ai2d = Ai2d(debug_mode)
        self.ai2d.set_ai2d_dtype(
            nn.ai2d_format.NCHW_FMT,
            nn.ai2d_format.NCHW_FMT,
            np.uint8,
            np.uint8)
FaceMeshPostApp receives mesh landmarks from FaceMeshApp and performs coordinate transformation and display.
kmodel_path: Path to the post-processing model.model_input_size: Input size of the post-processing model.rgb888p_size: Input image resolution.display_size: Display device resolution.debug_mode: Debug mode.
Detect Faces and Output Landmark Mesh
class FaceMesh:
    def __init__(self, face_det_kmodel, face_mesh_kmodel, mesh_post_kmodel,
                 det_input_size, mesh_input_size, anchors,
                 confidence_threshold=0.25, nms_threshold=0.3,
                 rgb888p_size=[1920,1080], display_size=[1920,1080],
                 debug_mode=0):
        self.face_det_kmodel = face_det_kmodel
        self.face_mesh_kmodel = face_mesh_kmodel
        self.mesh_post_kmodel = mesh_post_kmodel
        self.det_input_size = det_input_size
        self.mesh_input_size = mesh_input_size
        self.anchors = anchors
        self.confidence_threshold = confidence_threshold
        self.nms_threshold = nms_threshold
        self.rgb888p_size = [ALIGN_UP(rgb888p_size[0],16), rgb888p_size[1]]
        self.display_size = [ALIGN_UP(display_size[0],16), display_size[1]]
        self.debug_mode = debug_mode
FaceMesh is responsible for linking multiple models, including face detection, facial mesh recognition, and mesh post-processing, to execute the complete face recognition and mesh rendering process. The run() method detects faces from the input image and outputs the corresponding keypoint mesh.
face_det_kmodel: Path to face detection model.face_mesh_kmodel: Path to facial mesh recognition model.mesh_post_kmodel: Path to facial mesh post-processing model.det_input_size: Face detection model input size.mesh_input_size: Facial mesh recognition model input size.anchors: Anchor boxes for detection box prediction.confidence_threshold: Confidence threshold.nms_threshold: Non-Maximum Suppression threshold.
5.4 Face Pose Detection
5.4.1 Experiment Overview
This section demonstrates face pose estimation on the K230 development board, depicting facial orientation with 3D rectangular boxes after face detection.
5.4.2 Preparation
Module Connection
Connect the K230 development board to your PC using a Type-C data cable, as shown below:

Double-click to open CanMV IDE K230.

Click the connection button in the lower left corner.

Upon successful connection, the icon in the lower left corner of CanMV IDE will change to the following:

If the connection takes more than 10 seconds, it indicates a connection failure. Click the Cancel button, and a pop-up window will appear. Click OK and recheck the connection.

Note
Connection Failure Causes and Solutions:
Cable is not a data cable: Some Type-C cables are charging-only cables without data transfer capability. Please use a Type-C cable with data transfer functionality. The factory-supplied cable is a Type-C data cable.
Other K230 firmware was flashed: Re-flash the factory firmware, then reconnect.
5.4.3 Program Execution and Download
Display Mode Configuration:
The program can use the select_display="" parameter to choose the display mode: HDMI, LCD, or IDE virtual.

The K230 program supports two operation modes: online execution and offline execution.
Online Execution:
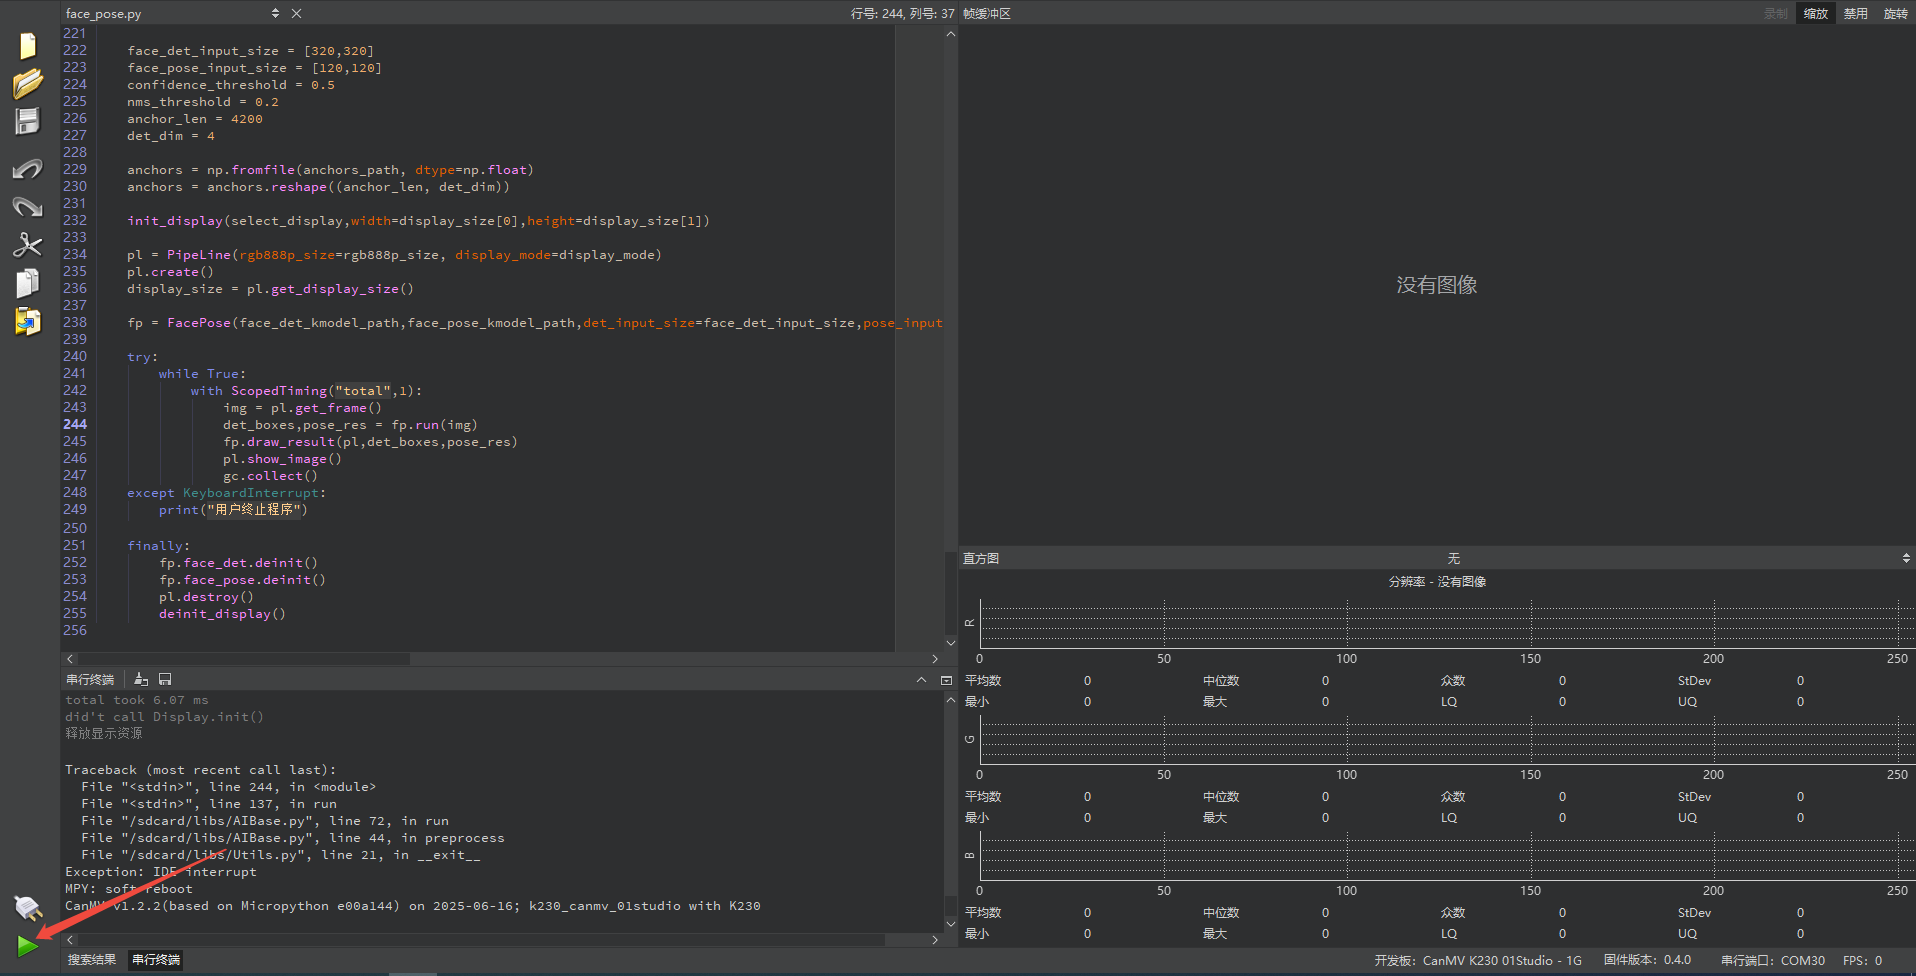
In this mode, after connecting, drag the program face_pose.py into CanMV IDE K230’s code editing area. Then, click the run button in the bottom-left corner  , and the program will run online, as shown below:
Note
Programs run using this method will be lost upon disconnection or power-off and will not be saved on the development board.
Offline Execution:
After connecting, drag the program face_pose.py into CanMV IDE K230’s code editing area. Click Tools on the toolbar and select Save open script to CanMV Board (as main.py) as shown below:

Then click Yes.

Once the file is written, click OK to confirm and complete saving the MicroPython file to the K230 development board.

With this method, the K230 development board will automatically run the MicroPython file upon power-up without connection, enabling offline execution.
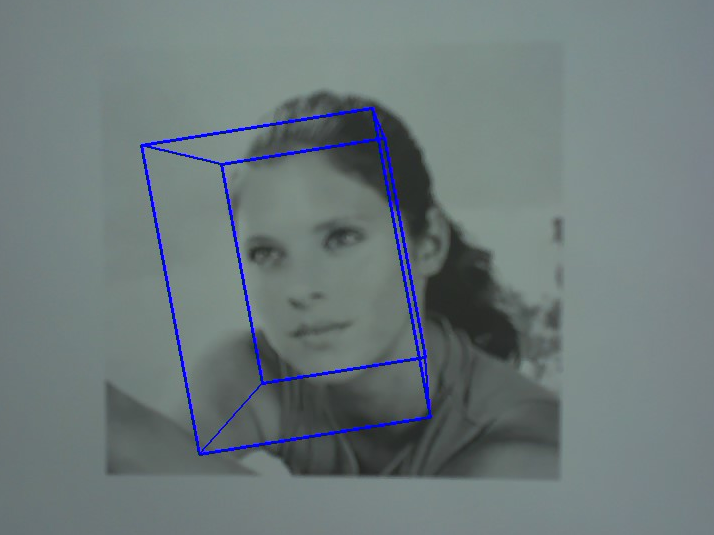
5.4.4 Program Outcome
In the returned video feed, the faces captured by the camera are rendered with 3D rectangular boxes to indicate their orientation.
5.4.5 Program Analysis
Import Required Libraries
from libs.PipeLine import PipeLine
from libs.AIBase import AIBase
from libs.AI2D import Ai2d
from libs.Utils import *
import os, sys, ujson, gc, math
from media.media import *
from media.display import Display
import nncase_runtime as nn
import ulab.numpy as np
import image
import aidemo
Face Detection
class FaceDetApp(AIBase):
    def __init__(self,kmodel_path,model_input_size,anchors,confidence_threshold=0.25,nms_threshold=0.3,rgb888p_size=[1280,720],display_size=[1920,1080],debug_mode=0):
        super().__init__(kmodel_path,model_input_size,rgb888p_size,debug_mode)
        self.kmodel_path=kmodel_path
        self.model_input_size=model_input_size
        self.confidence_threshold=confidence_threshold
        self.nms_threshold=nms_threshold
        self.anchors=anchors
        self.rgb888p_size=[ALIGN_UP(rgb888p_size[0],16),rgb888p_size[1]]
        self.display_size=[ALIGN_UP(display_size[0],16),display_size[1]]
        self.debug_mode=debug_mode
        self.ai2d=Ai2d(debug_mode)
        self.ai2d.set_ai2d_dtype(nn.ai2d_format.NCHW_FMT,nn.ai2d_format.NCHW_FMT,np.uint8,np.uint8)
FaceDetApp loads the face detection model, performs preprocessing and inference on input images, and outputs detection boxes.
kmodel_path: Path to the face detection model.model_input_size: Input size of the face detection model.anchors: Anchor boxes for bounding box prediction.confidence_threshold: Confidence threshold for filtering out low-confidence detection boxes.nms_threshold: Non-Maximum Suppression (NMS) threshold for removing overlapping boxes.rgb888p_size: Resolution of the input image.display_size: Size of the output display image.
Image Preprocessing
    def config_preprocess(self,input_image_size=None):
        with ScopedTiming("set preprocess config",self.debug_mode > 0):
            ai2d_input_size=input_image_size if input_image_size else self.rgb888p_size
            top,bottom,left,right,_=letterbox_pad_param(self.rgb888p_size,self.model_input_size)
            self.ai2d.pad([0,0,0,0,top,bottom,left,right],0,[104,117,123])
            self.ai2d.resize(nn.interp_method.tf_bilinear,nn.interp_mode.half_pixel)
            self.ai2d.build([1,3,ai2d_input_size[1],ai2d_input_size[0]],[1,3,self.model_input_size[1],self.model_input_size[0]])
Configure image preprocessing, including padding, scaling, and resizing to match the model’s input dimensions. Post-process the detection results to filter and retain valid bounding boxes.
input_image_size: Size of the input image.results: Model output results containing detection boxes.
Face Pose Estimation and Affine Transformation
class FacePoseApp(AIBase):
    def __init__(self,kmodel_path,model_input_size,rgb888p_size=[1920,1080],display_size=[1920,1080],debug_mode=0):
        super().__init__(kmodel_path,model_input_size,rgb888p_size,debug_mode)
        self.kmodel_path=kmodel_path
        self.model_input_size=model_input_size
        self.rgb888p_size=[ALIGN_UP(rgb888p_size[0],16),rgb888p_size[1]]
        self.display_size=[ALIGN_UP(display_size[0],16),display_size[1]]
        self.debug_mode=debug_mode
        self.ai2d=Ai2d(debug_mode)
        self.ai2d.set_ai2d_dtype(nn.ai2d_format.NCHW_FMT,nn.ai2d_format.NCHW_FMT,np.uint8,np.uint8)

    def config_preprocess(self,det,input_image_size=None):
        with ScopedTiming("set preprocess config",self.debug_mode > 0):
            ai2d_input_size=input_image_size if input_image_size else self.rgb888p_size
            matrix_dst = self.get_affine_matrix(det)
            self.ai2d.affine(nn.interp_method.cv2_bilinear,0,0,127,1,matrix_dst)
            self.ai2d.build([1,3,ai2d_input_size[1],ai2d_input_size[0]],[1,3,self.model_input_size[1],self.model_input_size[0]])

    def postprocess(self,results):
        with ScopedTiming("postprocess",self.debug_mode > 0):
            R,eular = self.get_euler(results[0][0])
            return R,eular
FacePoseApp estimates the face pose based on detected face bounding boxes, producing rotation matrices and Euler angles. It then calculates an affine transformation matrix using the detected bounding boxes to crop and resize the image. Finally, the rotation matrices from the pose estimation are converted into Euler angles for pitch, yaw, and roll.
Get Face Boxes and Perform Pose Estimation
class FacePose:
    def __init__(self,face_det_kmodel,face_pose_kmodel,det_input_size,pose_input_size,anchors,confidence_threshold=0.25,nms_threshold=0.3,rgb888p_size=[1280,720],display_size=[1920,1080],debug_mode=0):
        self.face_det_kmodel=face_det_kmodel
        self.face_pose_kmodel=face_pose_kmodel
        self.det_input_size=det_input_size
        self.pose_input_size=pose_input_size
        self.anchors=anchors
        self.confidence_threshold=confidence_threshold
        self.nms_threshold=nms_threshold
        self.rgb888p_size=[ALIGN_UP(rgb888p_size[0],16),rgb888p_size[1]]
        self.display_size=[ALIGN_UP(display_size[0],16),display_size[1]]
        self.debug_mode=debug_mode
        self.face_det=FaceDetApp(self.face_det_kmodel,model_input_size=self.det_input_size,anchors=self.anchors,confidence_threshold=self.confidence_threshold,nms_threshold=self.nms_threshold,rgb888p_size=self.rgb888p_size,display_size=self.display_size,debug_mode=debug_mode)
        self.face_pose=FacePoseApp(self.face_pose_kmodel,model_input_size=self.pose_input_size,rgb888p_size=self.rgb888p_size,display_size=self.display_size)
        self.face_det.config_preprocess()
FacePose combines face detection and pose functionality to obtain face boxes from images and then perform pose estimation.
face_det_kmodel: Path to face detection model.face_pose_kmodel: Path to face pose estimation model.det_input_size: Face detection model input size.pose_input_size: Pose estimation model input size.anchors: Anchor boxes.confidence_threshold: Confidence threshold.nms_threshold: Non-Maximum Suppression threshold.rgb888p_size: Input image size.display_size: Display image size.
5.5 Face Registration
5.5.1 Experiment Overview
This section demonstrates face registration on the K230 development board, performing feature extraction and registration on specific images to enable differentiation of different faces.
5.5.2 Preparation
Module Connection
Connect the K230 development board to your PC using a Type-C data cable, as shown below:

Double-click to open CanMV IDE K230.

Click the connection button in the lower left corner.

Upon successful connection, the icon in the lower left corner of CanMV IDE will change to the following:

If the connection takes more than 10 seconds, it indicates a connection failure. Click the Cancel button, and a pop-up window will appear. Click OK and recheck the connection.

Note
Connection Failure Causes and Solutions:
Cable is not a data cable: Some Type-C cables are charging-only cables without data transfer capability. Please use a Type-C cable with data transfer functionality. The factory-supplied cable is a Type-C data cable.
Other K230 firmware was flashed: Re-flash the factory firmware, then reconnect.
5.5.3 Program Execution and Download
Display Mode Configuration:
The program can use the select_display="" parameter to choose the display mode: HDMI, LCD, or IDE virtual.

The K230 program supports two operation modes: online execution and offline execution.
Online Execution:
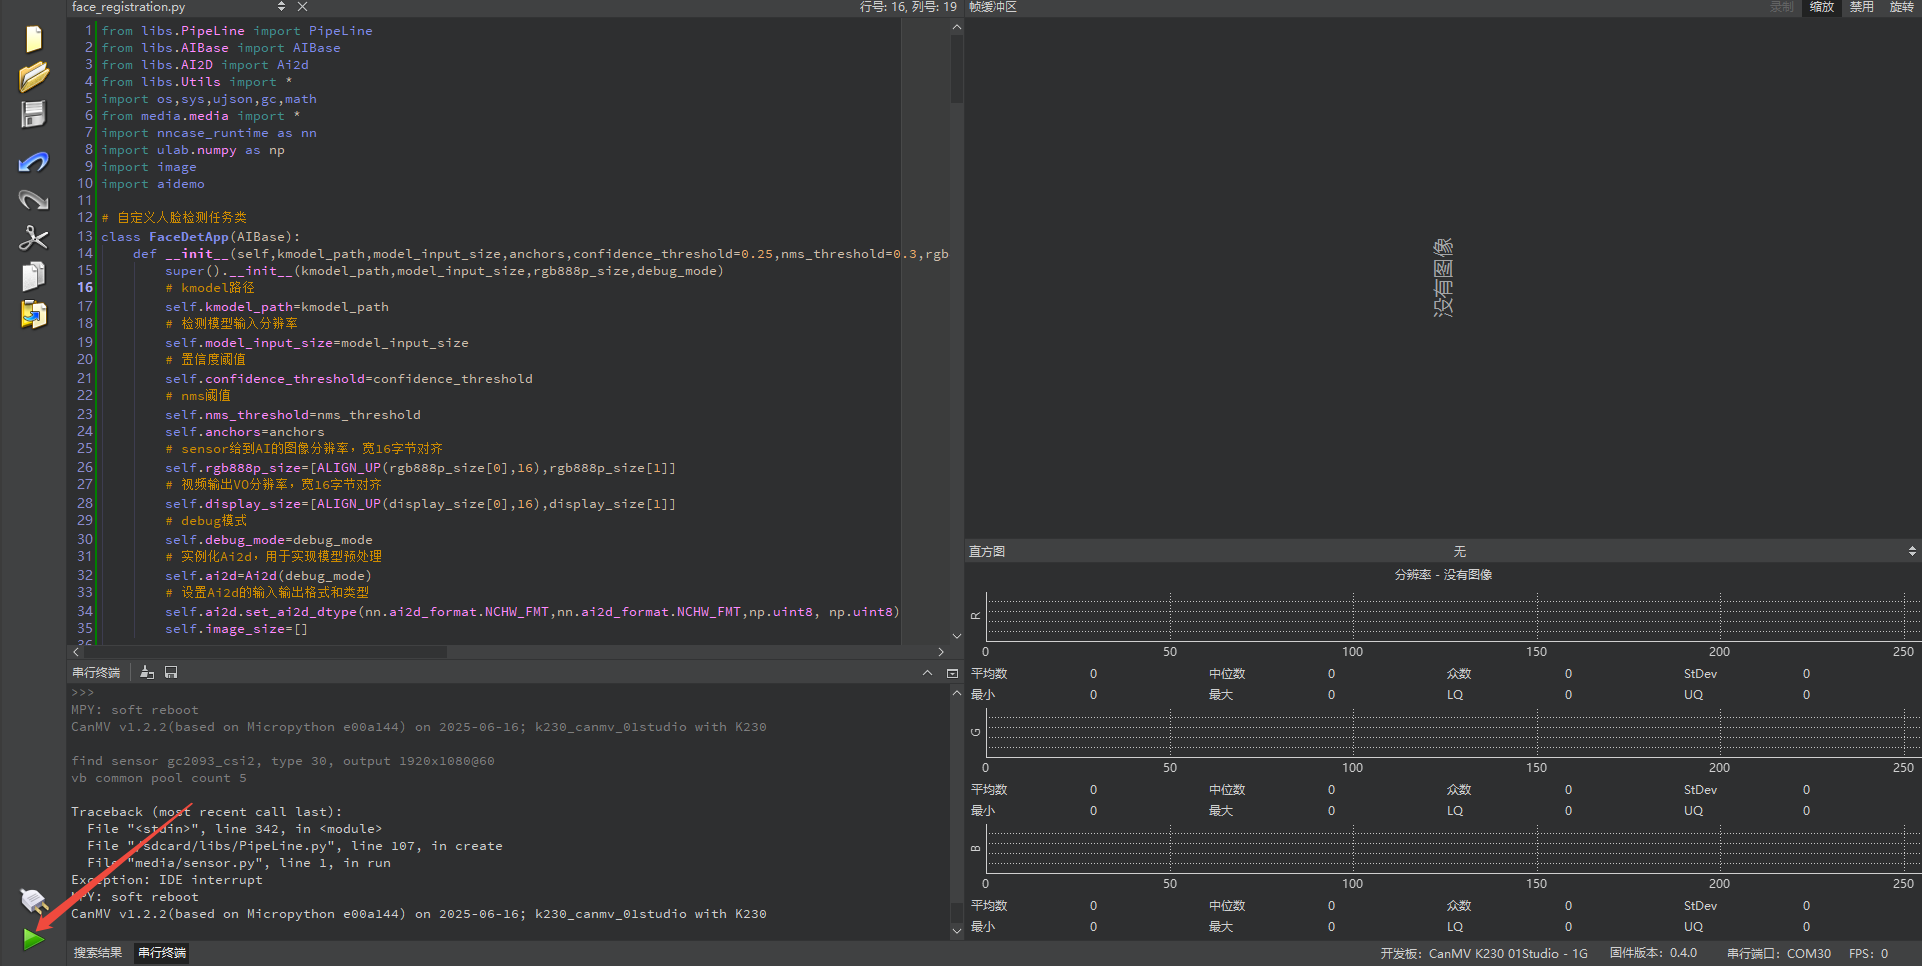
After connecting, drag the program face_registration.py into the CanMV IDE K230 code editor area, then click the run button  in the lower left corner to run the program online, as shown below:
Note
Programs run using this method will be lost upon disconnection or power-off and will not be saved on the development board.
Offline Execution:
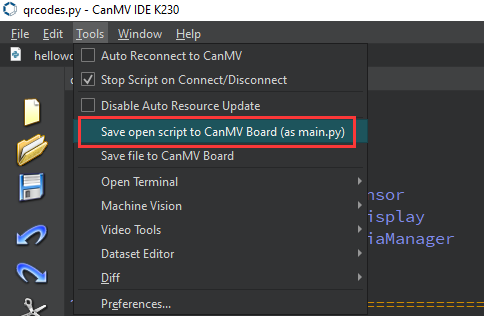
After connecting, drag the program face_registration.py into the CanMV IDE K230 code editor area, click Tools in the toolbar, and select Save open script to CanMV Board (as main.py), as shown below:
Click Yes.

Once the file is written, click OK to confirm and complete saving the MicroPython file to the K230 development board.

With this method, the K230 development board will automatically run the MicroPython file upon power-up without connection, enabling offline execution.
5.5.4 Program Outcome
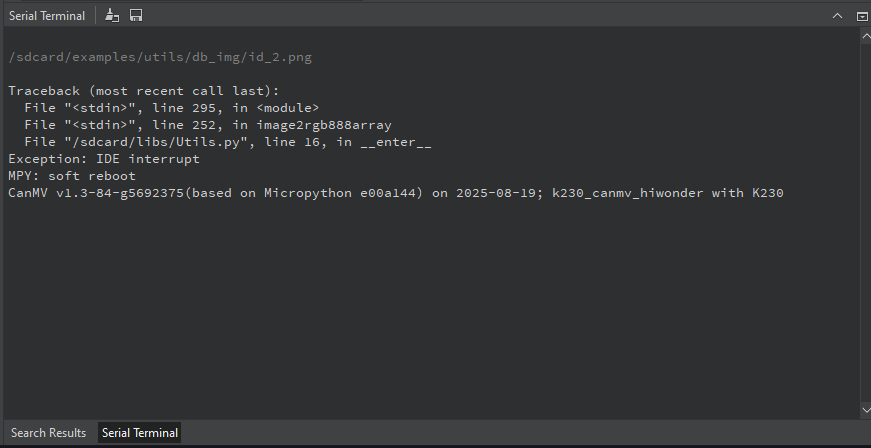
After running, the face registration code will recognize the face images in the directory of CanMV/sdcard/examples/utils/db_img/. Two face images are included by default, and you can also add your own face images for recognition.

After running, two face databases will appear in the /sdcard/examples/utils/db/ directory.

The face registration process is complete.
5.5.5 Program Analysis
Import Required Libraries
from libs.PipeLine import PipeLine
from libs.AIBase import AIBase
from libs.AI2D import Ai2d
from libs.Utils import *
import os,sys,ujson,gc,math
from media.media import *
import nncase_runtime as nn
import ulab.numpy as np
import image
import aidemo
Face Detection
# Custom face detection task class
class FaceDetApp(AIBase):
    def __init__(self,kmodel_path,model_input_size,anchors,confidence_threshold=0.25,nms_threshold=0.3,rgb888p_size=[1280,720],display_size=[1920,1080],debug_mode=0):
        super().__init__(kmodel_path,model_input_size,rgb888p_size,debug_mode)
        # kmodel path | kmodel路径
        self.kmodel_path=kmodel_path
        # Detection model input resolution
        self.model_input_size=model_input_size
        # Confidence threshold
        self.confidence_threshold=confidence_threshold
FaceDetApp loads the face detection model and performs face detection on input images.
kmodel_path: Path to face detection model.model_input_size: Input image resolution.anchors: Anchor boxes for prediction.confidence_threshold: Confidence threshold, detection boxes below this value will be discarded.nms_threshold: Non-Maximum Suppression (NMS) threshold for removing overlapping detection boxes.
Image Preprocessing and Post-processing
    # Configure preprocessing operations. Here pad and resize are used. Ai2d supports crop/shift/pad/resize/affine. For details, see /sdcard/app/libs/AI2D.py
    def config_preprocess(self,input_image_size=None):
        with ScopedTiming("set preprocess config",self.debug_mode > 0):
            # Initialize ai2d preprocessing config. Default is sensor-to-AI resolution. You can modify input size by setting input_image_size
            ai2d_input_size=input_image_size if input_image_size else self.rgb888p_size
            self.image_size=[input_image_size[1],input_image_size[0]]
            # Calculate padding parameters and set padding preprocessing
            self.ai2d.pad(self.get_pad_param(ai2d_input_size), 0, [104,117,123])
            # Set resize preprocessing
            self.ai2d.resize(nn.interp_method.tf_bilinear, nn.interp_mode.half_pixel)
            # Build preprocessing pipeline. Parameters are input tensor shape and output tensor shape
            self.ai2d.build([1,3,ai2d_input_size[1],ai2d_input_size[0]],[1,3,self.model_input_size[1],self.model_input_size[0]])

    # Custom post-processing. Results is the array list output by the model. Here the face_det_post_process interface from aidemo library is used
    def postprocess(self,results):
        with ScopedTiming("postprocess",self.debug_mode > 0):
            res = aidemo.face_det_post_process(self.confidence_threshold,self.nms_threshold,self.model_input_size[0],self.anchors,self.image_size,results)
            if len(res)==0:
                return res
            else:
                return res[0],res[1]
Use Ai2d to perform image padding, scaling, and other preprocessing to ensure the input meets the model requirements, then use aidemo.face_det_post_process to post-process the detection results and return valid face boxes and key points.
Face Registration
# Custom face registration task class
class FaceRegistrationApp(AIBase):
    def __init__(self,kmodel_path,model_input_size,rgb888p_size=[1920,1080],display_size=[1920,1080],debug_mode=0):
        super().__init__(kmodel_path,model_input_size,rgb888p_size,debug_mode)
        # kmodel path
        self.kmodel_path=kmodel_path
        # Face registration model input resolution
        self.model_input_size=model_input_size
        # Image resolution from sensor to AI, width 16-byte aligned
        self.rgb888p_size=[ALIGN_UP(rgb888p_size[0],16),rgb888p_size[1]]
        # Video output VO resolution, width 16-byte aligned
        self.display_size=[ALIGN_UP(display_size[0],16),display_size[1]]
        # Debug mode
        self.debug_mode=debug_mode
        # Standard 5 facial landmarks
FaceRegistrationApp loads and runs the face registration model. It computes and extracts facial features from the input image, producing a 28-dimensional feature vector.
kmodel_path: Path to face registration model.model_input_size: Face registration model input size.Affine transformation: Calculates the affine transformation matrix based on input keypoints to ensure facial region alignment.
Post-processing: extract the registration results, which are the facial feature vectors.
5.6 Face Recognition
5.6.1 Experiment Overview
This section demonstrates using the K230 development board for face recognition training. Features are collected from specific images from the previous section for registration, enabling recognition of different faces.
5.6.2 Preparation
Module Connection
Connect the K230 development board to your PC using a Type-C data cable, as shown below:

Double-click to open CanMV IDE K230.

Click the connection button in the lower left corner.

Upon successful connection, the icon in the lower left corner of CanMV IDE will change to the following:

If the connection takes more than 10 seconds, it indicates a connection failure. Click the Cancel button, and a pop-up window will appear. Click OK and recheck the connection.

Note
Connection Failure Causes and Solutions:
Cable is not a data cable: Some Type-C cables are charging-only cables without data transfer capability. Please use a Type-C cable with data transfer functionality. The factory-supplied cable is a Type-C data cable.
Other K230 firmware was flashed: Re-flash the factory firmware, then reconnect.
5.6.3 Program Execution and Download
Display Mode Configuration:
The program can use the select_display="" parameter to choose the display mode: HDMI, LCD, or IDE virtual.

The K230 program supports two operation modes: online execution and offline execution.
Online Execution:
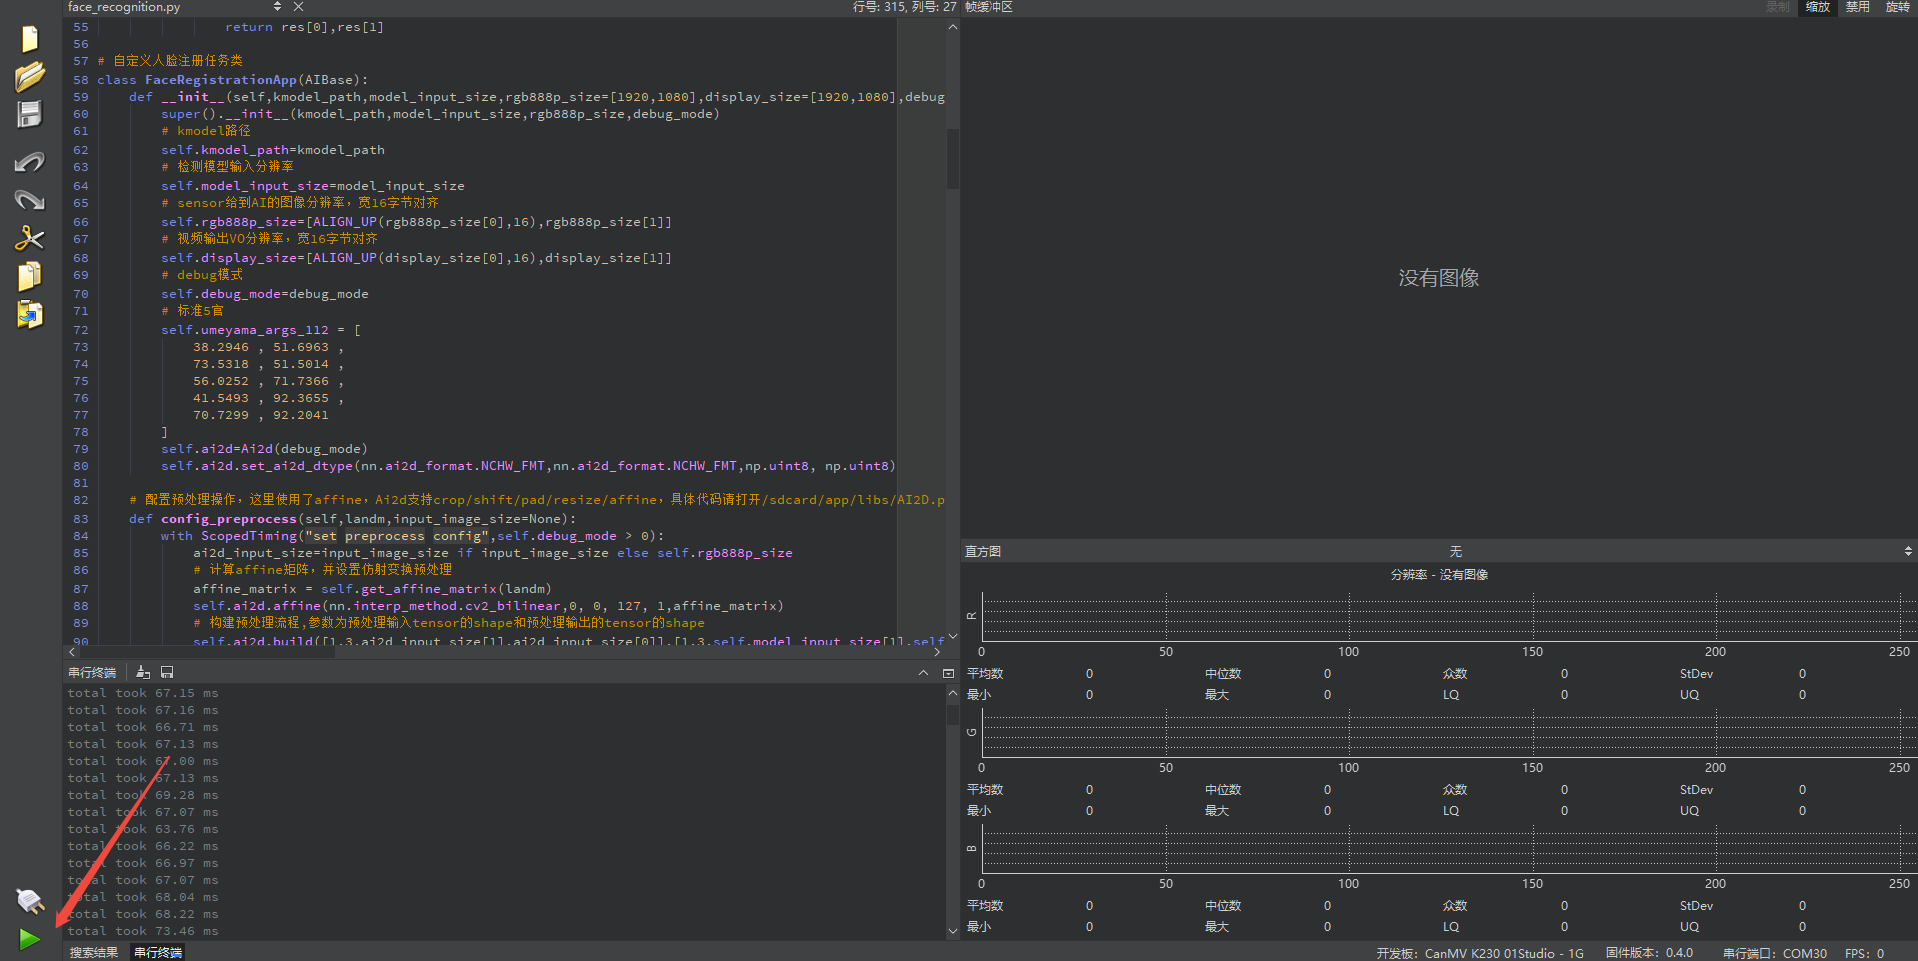
After connecting, drag the program face_recognition.py into the CanMV IDE K230 code editor area, then click the run button  in the lower left corner to run the program online, as shown below:
Note
Programs run using this method will be lost upon disconnection or power-off and will not be saved on the development board.
Offline Execution:
After connecting, drag the program face_recognition.py from this section’s directory into the CanMV IDE K230 code editor area, click Tools in the toolbar, and select Save open script to CanMV Board (as main.py), as shown below:

Click Yes.

Once the file is written, click OK to confirm and complete saving the MicroPython file to the K230 development board.

With this method, the K230 development board will automatically run the MicroPython file upon power-up without connection, enabling offline execution.
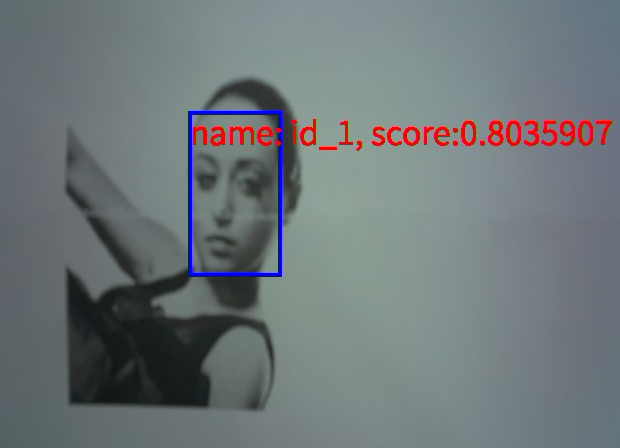
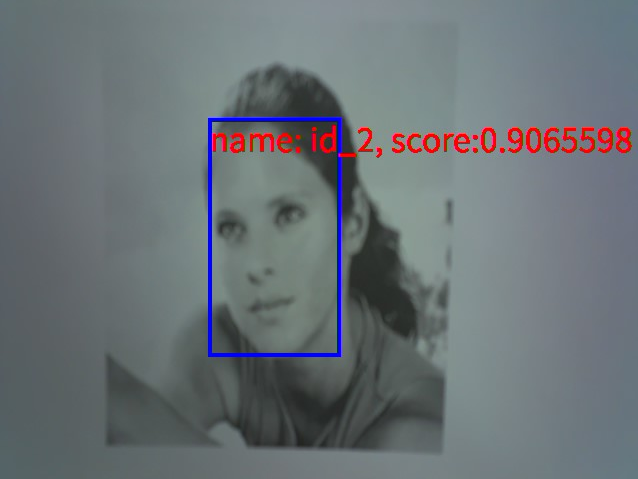
5.6.4 Program Outcome
After running, the face recognition code compares the camera input with the two face databases located in /sdcard/examples/utils/db/, enabling the distinction between different faces.

5.6.5 Program Analysis
Import Required Libraries
import os,sys,ujson,gc,math
import ulab.numpy as np
import image
import aidemo
from media.display import *
from media.media import *
from media.display import Display
import nncase_runtime as nn

from libs.PipeLine import PipeLine
from libs.AIBase import AIBase
from libs.AI2D import Ai2d
from libs.Utils import * # Contains ALIGN_UP, ScopedTiming
from media.media import * # Contains Display class
Face Detection
# Custom face detection task class
class FaceDetApp(AIBase):
    def __init__(self,kmodel_path,model_input_size,anchors,confidence_threshold=0.25,nms_threshold=0.3,rgb888p_size=[1920,1080],display_size=[1920,1080],debug_mode=0):
        super().__init__(kmodel_path,model_input_size,rgb888p_size,debug_mode)
        # kmodel path
        self.kmodel_path=kmodel_path
        # Detection model input resolution
        self.model_input_size=model_input_size
        # Confidence threshold
        self.confidence_threshold=confidence_threshold
        # NMS threshold
        self.nms_threshold=nms_threshold
        self.anchors=anchors
        # Image resolution from sensor to AI, width 16-byte aligned
        self.rgb888p_size=[ALIGN_UP(rgb888p_size[0],16),rgb888p_size[1]]
        # Video output VO resolution, width 16-byte aligned, this resolution is used for OSD drawing
        self.display_size=[ALIGN_UP(display_size[0],16),display_size[1]]
        # Debug mode
        self.debug_mode=debug_mode
        # Instantiate Ai2d for model preprocessing
        self.ai2d=Ai2d(debug_mode)
        # Set Ai2d input/output format and type
        self.ai2d.set_ai2d_dtype(nn.ai2d_format.NCHW_FMT,nn.ai2d_format.NCHW_FMT,np.uint8, np.uint8)
First, load the face detection model with the given model path, input size, and anchor configuration.
Next, the input image is preprocessed with operations such as padding and scaling, then passed through the detection model to output face bounding boxes and key points.
Post-processing results are processed through
aidemo.face_det_post_processto determine the final valid face boxes.
Image Preprocessing and Post-processing
    def config_preprocess(self,input_image_size=None):
        with ScopedTiming("set preprocess config",self.debug_mode > 0):
            # Initialize ai2d preprocessing config, default is sensor-to-AI size, can modify input size by setting input_image_size
            ai2d_input_size=input_image_size if input_image_size else self.rgb888p_size
            top, bottom, left, right,_ =letterbox_pad_param(self.rgb888p_size,self.model_input_size)
            self.ai2d.pad([0, 0, 0, 0, top, bottom, left, right], 0, [104, 117, 123])  # Pad edges
            # Set resize preprocessing
            self.ai2d.resize(nn.interp_method.tf_bilinear, nn.interp_mode.half_pixel)
            # Build preprocessing pipeline, parameters are input tensor shape and output tensor shape
            self.ai2d.build([1,3,ai2d_input_size[1],ai2d_input_size[0]],[1,3,self.model_input_size[1],self.model_input_size[0]])
Use
Ai2dfor image padding, scaling and other preprocessing to ensure input meets model requirements, then useaidemo.face_det_post_processto post-process detection results.Return valid face boxes and keypoints.
config_preprocess: Configure image preprocessing steps, including padding and scaling.postprocess: Post-processing function that uses given confidence and NMS thresholds to process detection results and filter out invalid face boxes.
Face Registration Comparison
# Custom face registration task class
class FaceRegistrationApp(AIBase):
    def __init__(self,kmodel_path,model_input_size,rgb888p_size=[1920,1080],display_size=[1920,1080],debug_mode=0):
        super().__init__(kmodel_path,model_input_size,rgb888p_size,debug_mode)
        # kmodel path
        self.kmodel_path=kmodel_path
        # Detection model input resolution
        self.model_input_size=model_input_size
        # Image resolution from sensor to AI, width 16-byte aligned
        self.rgb888p_size=[ALIGN_UP(rgb888p_size[0],16),rgb888p_size[1]]
        # Video output VO resolution, width 16-byte aligned
        self.display_size=[ALIGN_UP(display_size[0],16),display_size[1]]
        # Debug mode
        self.debug_mode=debug_mode
        # Standard 5 facial landmarks
        self.umeyama_args_112 = [
            38.2946 , 51.6963 ,
            73.5318 , 51.5014 ,
            56.0252 , 71.7366 ,
            41.5493 , 92.3655 ,
            70.7299 , 92.2041
        ]
        self.ai2d=Ai2d(debug_mode)
        self.ai2d.set_ai2d_dtype(nn.ai2d_format.NCHW_FMT,nn.ai2d_format.NCHW_FMT,np.uint8, np.uint8)

    # Configure preprocessing operations. Here affine is used. Ai2d supports crop/shift/pad/resize/affine. For details, see /sdcard/app/libs/AI2D.py
    def config_preprocess(self,landm,input_image_size=None):
        with ScopedTiming("set preprocess config",self.debug_mode > 0):
            ai2d_input_size=input_image_size if input_image_size else self.rgb888p_size
            # Calculate affine matrix and set affine transformation preprocessing
            affine_matrix = self.get_affine_matrix(landm)
            self.ai2d.affine(nn.interp_method.cv2_bilinear,0, 0, 127, 1,affine_matrix)
            # Build preprocessing pipeline. Parameters are input tensor shape and output tensor shape
            self.ai2d.build([1,3,ai2d_input_size[1],ai2d_input_size[0]],[1,3,self.model_input_size[1],self.model_input_size[0]])

    # Custom post-processing
    def postprocess(self,results):
        with ScopedTiming("postprocess",self.debug_mode > 0):
            return results[0][0]
FaceRegistrationApp is used for face registration, comparing facial images with existing faces in the database.
Affine transformation: Geometrically transforms the input image through affine transformation to align with standard facial feature point positions.
SVD: Uses Singular Value Decomposition (SVD) to align facial feature points, ensuring accurate image transformation.__init__: Initializes the face registration application, loading model path and input size.config_preprocess: Preprocesses the input image through affine transformation.postprocess: Processes registration results.get_affine_matrix: Calculates the affine transformation matrix.
Face Recognition and Image Rendering
# Face recognition task class
class FaceRecognition:
    def __init__(self,face_det_kmodel,face_reg_kmodel,det_input_size,reg_input_size,database_dir,anchors,confidence_threshold=0.25,nms_threshold=0.3,face_recognition_threshold=0.75,rgb888p_size=[1280,720],display_size=[1920,1080],debug_mode=0):
        # Path to face detection model
        self.face_det_kmodel=face_det_kmodel
        # Face recognition model path
        self.face_reg_kmodel=face_reg_kmodel
        # Face detection model input resolution
        self.det_input_size=det_input_size
        # Face recognition model input resolution
        self.reg_input_size=reg_input_size
        self.database_dir=database_dir
        # anchors
        self.anchors=anchors
        # Confidence threshold
        self.confidence_threshold=confidence_threshold
        # NMS threshold
        self.nms_threshold=nms_threshold
        self.face_recognition_threshold=face_recognition_threshold
        # Image resolution from sensor to AI, width 16-byte aligned
        self.rgb888p_size=[ALIGN_UP(rgb888p_size[0],16),rgb888p_size[1]]
        # Video output VO resolution, width 16-byte aligned, this resolution is used for OSD drawing
        self.display_size=[ALIGN_UP(display_size[0],16),display_size[1]]
        # Debug mode
        self.debug_mode=debug_mode
        self.max_register_face = 100                  # Maximum number of faces in database
        self.feature_num = 128                        # Face recognition feature dimension
        self.valid_register_face = 0                  # Number of registered faces
        self.db_name= []
        self.db_data= []
        # Pass display_size to FaceDetApp and FaceRegistrationApp
        self.face_det=FaceDetApp(self.face_det_kmodel,model_input_size=self.det_input_size,anchors=self.anchors,confidence_threshold=self.confidence_threshold,nms_threshold=self.nms_threshold,rgb888p_size=self.rgb888p_size,display_size=self.display_size,debug_mode=0)
        self.face_reg=FaceRegistrationApp(self.face_reg_kmodel,model_input_size=self.reg_input_size,rgb888p_size=self.rgb888p_size,display_size=self.display_size)
        self.face_det.config_preprocess()
        # Initialize face database
        self.database_init()

    # run function
    def run(self,input_np):
        # Execute face detection
        det_boxes,landms=self.face_det.run(input_np)
        recg_res = []
        for landm in landms:
            # For each facial landmark, infer to get facial features and calculate similarity in database
            self.face_reg.config_preprocess(landm)
            feature=self.face_reg.run(input_np)
            res = self.database_search(feature)
            recg_res.append(res)
        return det_boxes,recg_res
FaceRecognition implements a complete facial recognition system. It performs face detection on input images, then extracts facial features and compares them with registered features in the database, finally outputting recognition results.
run: Executes face detection and recognition.database_init: Initializes the database and reads registered facial feature files.database_search: Matches currently extracted features with features in the database, returning the best match.draw_result: Draws detection results on the image, such as boxed faces and recognition results.
5.7 Human Detection
5.7.1 Experiment Overview
This section demonstrates the human detection functionality of the K230 development board through programming.
5.7.2 Preparation
Module Connection
Connect the K230 development board to your PC using a Type-C data cable, as shown below:

Double-click to open CanMV IDE K230.

Click the connection button in the lower left corner.

Upon successful connection, the icon in the lower left corner of CanMV IDE will change to the following:

If the connection takes more than 10 seconds, it indicates a connection failure. Click the Cancel button, and a pop-up window will appear. Click OK and recheck the connection.

Note
Connection Failure Causes and Solutions:
Cable is not a data cable: Some Type-C cables are charging-only cables without data transfer capability. Please use a Type-C cable with data transfer functionality. The factory-supplied cable is a Type-C data cable.
Other K230 firmware was flashed: Re-flash the factory firmware, then reconnect.
5.7.3 Program Execution and Download
Display Mode Configuration:
The program can use the select_display="" parameter to choose the display mode: HDMI, LCD, or IDE virtual.

The K230 program supports two operation modes: online execution and offline execution.
Online Execution:
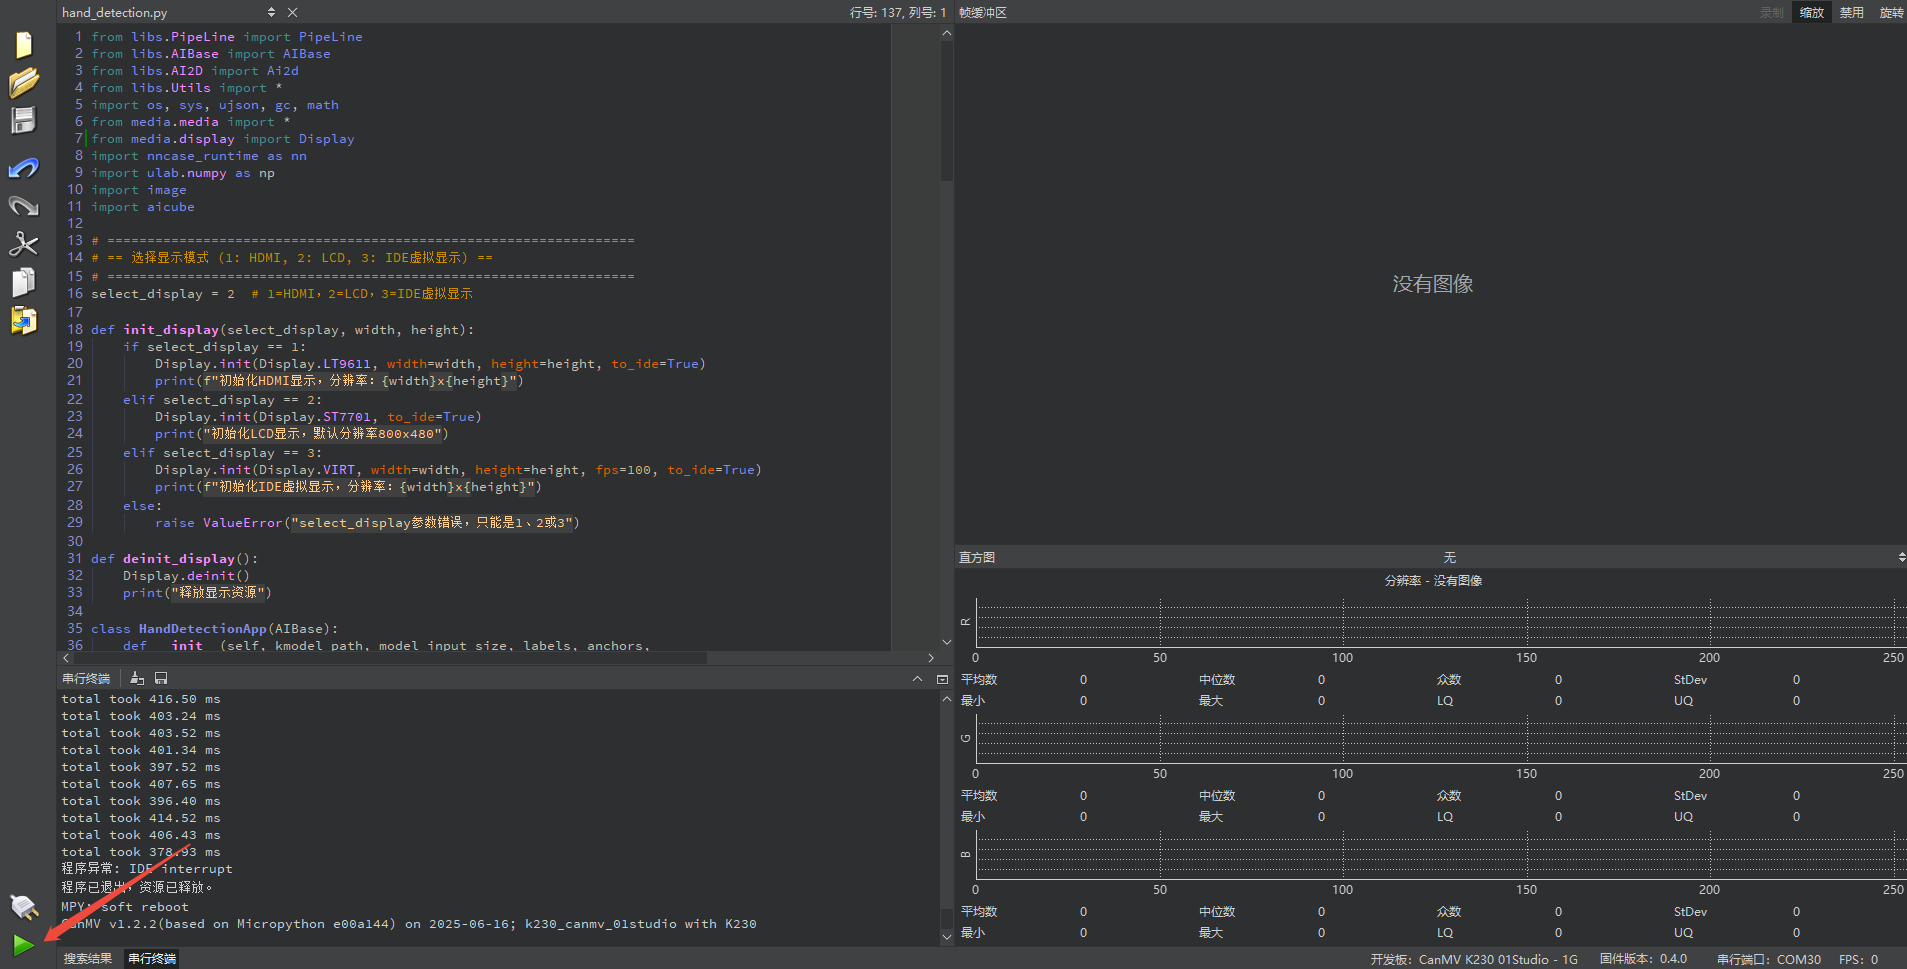
After connecting, drag the program person_detection.py into the CanMV IDE K230 code editor area, then click the run button  in the lower left corner to run the program online, as shown below:
Note
Programs run using this method will be lost upon disconnection or power-off and will not be saved on the development board.

Offline Execution:
After connecting, drag the program person_detection.py from this section’s directory into the CanMV IDE K230 code editor area, click Tools in the toolbar, and select Save open script to CanMV Board (as main.py), as shown below:

Click Yes.
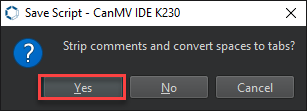
Once the file is written, click OK to confirm and complete saving the MicroPython file to the K230 development board.

With this download method, when you subsequently power on the K230 development board without connecting it, the board will run the MicroPython file, enabling offline operation. | With this method, the K230 development board will automatically run the MicroPython file upon power-up without connection, enabling offline execution.
5.7.4 Program Outcome
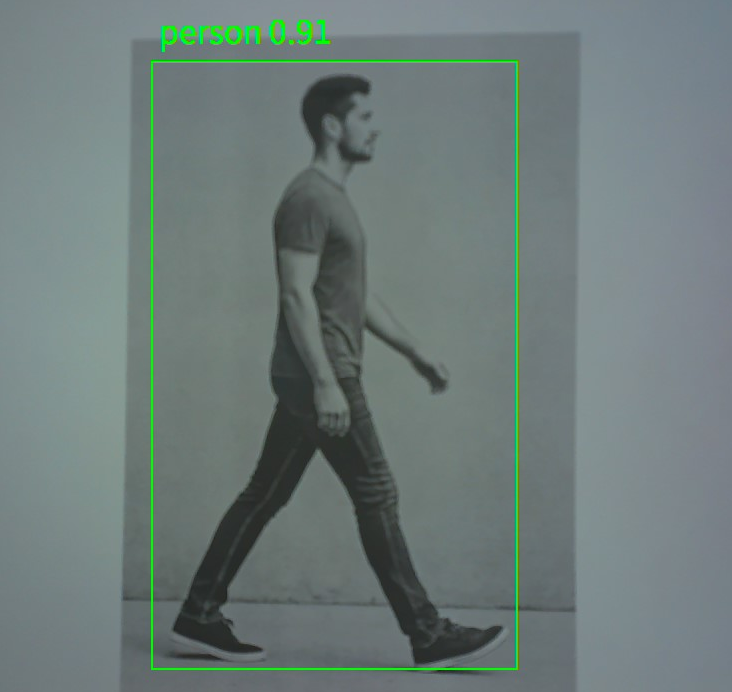
In the returned video feed, detect the human body in the camera view and draw a green rectangle around it.
5.7.5 Program Analysis
Import Required Libraries
from libs.PipeLine import PipeLine
from libs.AIBase import AIBase
from libs.AI2D import Ai2d
from libs.Utils import *
import os, sys, ujson, gc, math
from media.media import *
from media.display import Display   # Ensure SDK support
import nncase_runtime as nn
import ulab.numpy as np
import image
import `aicube`
Import Required Libraries
def init_display(select_display, width, height):
    if select_display == 1:
        Display.init(Display.LT9611, width=width, height=height, to_ide=True)
        print(f"Initialize HDMI display, resolution: {width}x{height}")  # Initialize HDMI display, resolution: {width}x{height}
    elif select_display == 2:
        Display.init(Display.ST7701, to_ide=True)
        print("Initialize LCD display, default resolution 800x480")  # Initialize LCD display, default resolution 800x480
    elif select_display == 3:
        Display.init(Display.VIRT, width=width, height=height, fps=100, to_ide=True)
        print(f"Initialize IDE virtual display, resolution: {width}x{height}")  # Initialize IDE virtual display, resolution: {width}x{height}
    else:
        raise ValueError("select_display parameter error, must be 1, 2, or 3")  # select_display parameter error, must be 1, 2, or 3
Define a function to initialize the display, which takes three parameters: select_display to choose the display type by numeric code, width for the display width in pixels, and height for the display height in pixels.
Import Required Libraries
class PersonDetectionApp(AIBase):
    def __init__(self, kmodel_path, model_input_size, labels, anchors,
                 confidence_threshold=0.2, nms_threshold=0.5, nms_option=False,
                 strides=[8, 16, 32], rgb888p_size=[224, 224], display_size=[1920, 1080], debug_mode=0):
        super().__init__(kmodel_path, model_input_size, rgb888p_size, debug_mode)
        self.kmodel_path = kmodel_path
        self.model_input_size = model_input_size
        self.labels = labels
        self.anchors = anchors
        self.strides = strides
        self.confidence_threshold = confidence_threshold
        self.nms_threshold = nms_threshold
        self.nms_option = nms_option
        self.rgb888p_size = [ALIGN_UP(rgb888p_size[0], 16), rgb888p_size[1]]
        self.display_size = [ALIGN_UP(display_size[0], 16), display_size[1]]
        self.debug_mode = debug_mode
        self.ai2d = Ai2d(debug_mode)
        self.ai2d.set_ai2d_dtype(nn.ai2d_format.NCHW_FMT,
                                 nn.ai2d_format.NCHW_FMT, np.uint8, np.uint8)

    def config_preprocess(self, input_image_size=None):
        with ScopedTiming("set preprocess config", self.debug_mode > 0):
            ai2d_input_size = input_image_size if input_image_size else self.rgb888p_size
            top, bottom, left, right, _ = center_pad_param(self.rgb888p_size, self.model_input_size)
            self.ai2d.pad([0, 0, 0, 0, top, bottom, left, right], 0, [0, 0, 0])
            self.ai2d.resize(nn.interp_method.tf_bilinear,
                             nn.interp_mode.half_pixel)
            self.ai2d.build([1, 3, ai2d_input_size[1], ai2d_input_size[0]],
                            [1, 3, self.model_input_size[1], self.model_input_size[0]])

    def postprocess(self, results):
        with ScopedTiming("postprocess", self.debug_mode > 0):
            dets = `aicube`.anchorbasedet_post_process(results[0], results[1], results[2], self.model_input_size,
                                                     self.rgb888p_size, self.strides, len(self.labels),
                                                     self.confidence_threshold, self.nms_threshold, self.anchors, self.nms_option)
            return dets
A class PersonDetectionApp is defined for human detection tasks, inheriting from AIBase. Its core functions include model and parameter initialization, image preprocessing configuration, post-processing after model inference, and result rendering.
Import Required Libraries
if __name__ == "__main__":
    display_mode_map = {1: "hdmi", 2: "lcd", 3: "ide"}
    display_mode = display_mode_map.get(select_display, "hdmi")

    if display_mode == "hdmi":
        display_size = [1920, 1080]
    elif display_mode == "lcd":
        display_size = [800, 480]
    else:
        display_size = [1280, 720]

    rgb888p_size = [1280, 720]
    kmodel_path = "/sdcard/examples/kmodel/person_detect_yolov5n.kmodel"
    confidence_threshold = 0.2
    nms_threshold = 0.6
    labels = ["person"]
    anchors = [10, 13, 16, 30, 33, 23, 30, 61, 62, 45, 59, 119, 116, 90, 156, 198, 373, 326]

    # Initialize display
    init_display(select_display, width=display_size[0], height=display_size[1])

    pl = PipeLine(rgb888p_size=rgb888p_size, display_mode=display_mode)
    pl.create()
    display_size = pl.get_display_size()

    person_det = PersonDetectionApp(kmodel_path, model_input_size=[640, 640], labels=labels, anchors=anchors,
                                   confidence_threshold=confidence_threshold, nms_threshold=nms_threshold, nms_option=False,
                                   strides=[8, 16, 32], rgb888p_size=rgb888p_size, display_size=display_size, debug_mode=0)
    person_det.config_preprocess()
Select the display type based on the input number
select_display, which can be HDMI, LCD, or IDE virtual display, and set the corresponding resolution. The default mode is HDMI.
    rgb888p_size = [1280, 720]
    kmodel_path = "/sdcard/examples/kmodel/person_detect_yolov5n.kmodel"
    confidence_threshold = 0.2
    nms_threshold = 0.6
    labels = ["person"]
    anchors = [10, 13, 16, 30, 33, 23, 30, 61, 62, 45, 59, 119, 116, 90, 156, 198, 373, 326]
Set the input image size for capture and processing, and specify the path to the lightweight YOLOv5 model. Configure the detection confidence and non-maximum suppression thresholds to ensure accurate results. Define the target classes—human in this example—and their corresponding anchor box parameters to simplify decoding of detection boxes during post-processing.
    # Initialize display
    init_display(select_display, width=display_size[0], height=display_size[1])

    pl = PipeLine(rgb888p_size=rgb888p_size, display_mode=display_mode)
    pl.create()
    display_size = pl.get_display_size()
Call the display initialization function to start the display module based on the selected device, matching resolution settings.
Instantiate the pipeline to integrate image capture, processing, and display. Call
create()to initialize the underlying hardware and software of the pipeline. Retrieve the current display resolution for the pipeline to dynamically synchronize subsequent drawing and display parameters.
    person_det = PersonDetectionApp(kmodel_path, model_input_size=[640, 640], labels=labels, anchors=anchors,
                                   confidence_threshold=confidence_threshold, nms_threshold=nms_threshold, nms_option=False,
                                   strides=[8, 16, 32], rgb888p_size=rgb888p_size, display_size=display_size, debug_mode=0)
    person_det.config_preprocess()
Load the YOLOv5 model and set the input resolution. Provide the labels, anchor boxes, thresholds, and multi-scale output strides. Call the preprocessing configuration function to set up the image preprocessing pipeline.
    try:
        while True:
            with ScopedTiming("total", 1):
                img = pl.get_frame()
                res = person_det.run(img)
                person_det.draw_result(pl, res)
                pl.show_image()
                gc.collect()
    except KeyboardInterrupt:
        print("Program stopped by user")
    finally:
        person_det.deinit()
        pl.destroy()
        deinit_display()
Enter an infinite loop to capture images in real time and perform inference. Use a timer manager to track the total processing time. Call the model inference interface to obtain object detection results and visualize them on the display. Perform manual garbage collection to prevent memory leaks. Support user exit via Ctrl+C to ensure proper resource release.
5.8 Human Keypoint Detection
5.8.1 Experiment Overview
This section demonstrates the human keypoint detection functionality of the K230 development board through programming.
5.8.2 Preparation
Module Connection
Connect the K230 development board to your PC using a Type-C data cable, as shown below:

Double-click to open CanMV IDE K230.

Click the connection button in the lower left corner.

Upon successful connection, the icon in the lower left corner of CanMV IDE will change to the following:

If the connection takes more than 10 seconds, it indicates a connection failure. Click the Cancel button, and a pop-up window will appear. Click OK and recheck the connection.

Note
Connection Failure Causes and Solutions:
Cable is not a data cable: Some Type-C cables are charging-only cables without data transfer capability. Please use a Type-C cable with data transfer functionality. The factory-supplied cable is a Type-C data cable.
Other K230 firmware was flashed: Re-flash the factory firmware, then reconnect.
5.8.3 Program Execution and Download
Display Mode Configuration:
The program can use the select_display="" parameter to choose the display mode: HDMI, LCD, or IDE virtual.

The K230 program supports two operation modes: online execution and offline execution.
Online Execution:
After connecting, drag the program person_kp_detect.py into the CanMV IDE K230 code editor area, then click the run button  in the lower left corner to run the program online, as shown below:
Note
Programs run using this method will be lost upon disconnection or power-off and will not be saved on the development board.

Offline Execution:
After connecting, drag the program person_kp_detect.py from this section’s directory into the CanMV IDE K230 code editor area, click Tools in the toolbar, and select Save open script to CanMV Board (as main.py), as shown below:

Click Yes.

Once the file is written, click OK to confirm and complete saving the MicroPython file to the K230 development board.

With this download method, when you subsequently power on the K230 development board without connecting it, the board will run the MicroPython file, enabling offline operation. | With this method, the K230 development board will automatically run the MicroPython file upon power-up without connection, enabling offline execution.
5.8.4 Program Outcome
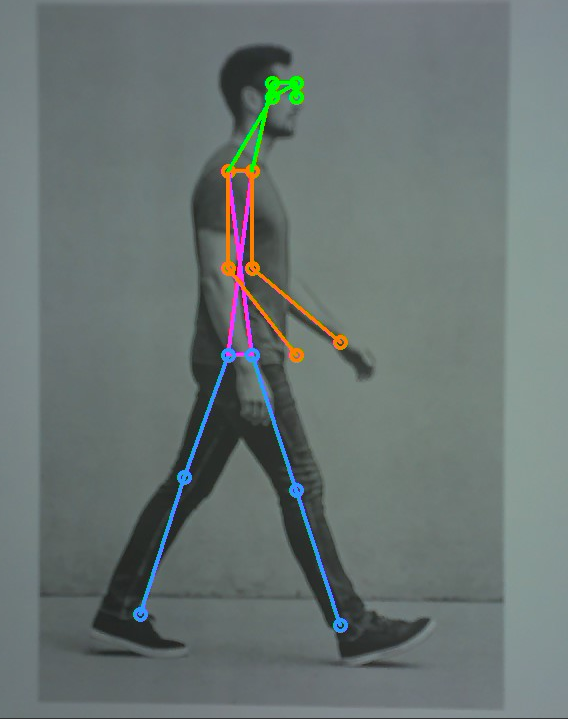
In the live feed, detect the human body in the camera view and mark the corresponding limb joints.
5.8.5 Program Analysis
Import Required Libraries
from libs.PipeLine import PipeLine
from libs.AIBase import AIBase
from libs.AI2D import Ai2d
from libs.Utils import *
import os, sys, ujson, gc, math
from media.media import *
from media.display import Display  # Ensure SDK support
import nncase_runtime as nn
import ulab.numpy as np
import image
import aidemo
Display Initialization Function
# ==================================================================
# == Select Display Mode (1: HDMI, 2: LCD, 3: IDE Virtual Display) ==
# ==================================================================
select_display = 3  # 1=HDMI, 2=LCD, 3=IDE Virtual Display


def init_display(select_display, width, height):
    if select_display == 1:
        Display.init(Display.LT9611, width=width, height=height, to_ide=True)
        print(f"Initialize HDMI display, resolution: {width}x{height}")
    elif select_display == 2:
        Display.init(Display.ST7701, to_ide=True)
        print("Initialize LCD display, default resolution 800x480")
    elif select_display == 3:
        Display.init(Display.VIRT, width=width, height=height, fps=100, to_ide=True)
        print(f"Initialize IDE virtual display, resolution: {width}x{height}")
    else:
        raise ValueError("select_display parameter error, must be 1, 2, or 3")
Define a function to initialize the display, which takes three parameters: select_display for choosing the display type using a numeric code, width for the display width in pixels, and height for the display height in pixels.
Human Keypoint Detection Class
# Custom human keypoint detection class
class PersonKeyPointApp(AIBase):
    def __init__(self, kmodel_path, model_input_size,
                 confidence_threshold=0.2, nms_threshold=0.5,
                 rgb888p_size=[1280, 720], display_size=[1920, 1080], debug_mode=0):
        super().__init__(kmodel_path, model_input_size, rgb888p_size, debug_mode)
        self.kmodel_path = kmodel_path
        self.model_input_size = model_input_size
        self.confidence_threshold = confidence_threshold
        self.nms_threshold = nms_threshold
        self.rgb888p_size = [ALIGN_UP(rgb888p_size[0], 16), rgb888p_size[1]]
        self.display_size = [ALIGN_UP(display_size[0], 16), display_size[1]]
        self.debug_mode = debug_mode

        # Skeleton connection definitions
        self.SKELETON = [
            (16, 14), (14, 12), (17, 15), (15, 13), (12, 13), (6, 12), (7, 13),
            (6, 7), (6, 8), (7, 9), (8, 10), (9, 11), (2, 3), (1, 2),
            (1, 3), (2, 4), (3, 5), (4, 6), (5, 7)
        ]
        # Limb colors
        self.LIMB_COLORS = [
            (255, 51, 153, 255), (255, 51, 153, 255), (255, 51, 153, 255),
            (255, 51, 153, 255), (255, 255, 51, 255), (255, 255, 51, 255),
            (255, 255, 51, 255), (255, 255, 128, 0), (255, 255, 128, 0),
            (255, 255, 128, 0), (255, 255, 128, 0), (255, 255, 128, 0),
            (255, 0, 255, 0), (255, 0, 255, 0), (255, 0, 255, 0),
            (255, 0, 255, 0), (255, 0, 255, 0), (255, 0, 255, 0),
            (255, 0, 255, 0)
        ]
Defines a human keypoint detection task class PersonKeyPointApp based on YOLOv5 and subsequent pose estimation models. It implements model initialization, image preprocessing, model output post-processing, and detection result rendering.
Main Program
    display_mode_map = {1: "hdmi", 2: "lcd", 3: "ide"}
    display_mode = display_mode_map.get(select_display, "hdmi")

    if display_mode == "hdmi":
        display_size = [1920, 1080]
    elif display_mode == "lcd":
        display_size = [800, 480]
    else:
        display_size = [1280, 720]
Map the numeric value of
select_displayto the corresponding display name using a dictionary. Set the resolution according to the display type: 1080p for HDMI, 800×480 for LCD which is common for small to medium screens, and 1280×720 for the IDE virtual display.
    rgb888p_size = [320, 320]
    kmodel_path = "/sdcard/examples/kmodel/yolov8n-pose.kmodel"
    confidence_threshold = 0.2
    nms_threshold = 0.5
Set the AI model input resolution to 320×320 for faster real-time inference. Load the YOLOv8 lightweight pose estimation model yolov8n-pose.kmodel. Apply a confidence threshold of 0.2 to filter out low-confidence detections and a non-maximum suppression threshold of 0.5 to remove duplicate detections.
    pl = PipeLine(rgb888p_size=rgb888p_size, display_mode=display_mode)
    pl.create()
    display_size = pl.get_display_size()
Create a
Pipelineinstance and set capture and display parameters. Call thecreatemethod to initialize capture, AI preprocessing, and display device drivers. Obtain the actual resolution of the current display device.
    person_kp = PersonKeyPointApp(
        kmodel_path,
        model_input_size=[320, 320],
        confidence_threshold=confidence_threshold,
        nms_threshold=nms_threshold,
        rgb888p_size=rgb888p_size,
        display_size=display_size,
        debug_mode=0
    )
    person_kp.config_preprocess()
Initialize the
PersonKeyPointApptask, binding model parameters, thresholds, and image size. Call the preprocessing configuration method to establish the image preprocessing pipeline, such as pad and resize.
    try:
        while True:
            with ScopedTiming("total", 1):
                img = pl.get_frame()
                res = person_kp.run(img)
                person_kp.draw_result(pl, res)
                pl.show_image()
                gc.collect()
    except KeyboardInterrupt:
        print("User interrupted program")  # Program stopped by user
    finally:
        person_kp.deinit()
        pl.destroy()
        deinit_display()
Continuously capture images and perform inference in a loop. Use
ScopedTimingto measure the total frame processing time, including image capture, inference, and drawing. Draw human keypoints and connect them with skeleton lines, displaying the results in real time on the selected screen. Callgc.collect()to trigger garbage collection and ensure stable operation. The program supports safe exit via keyboard interrupt such as Ctrl+C.
5.9 Fall Detection
5.9.1 Experiment Overview
This section demonstrates the fall detection functionality of the K230 development board through programming.
5.9.2 Preparation
Module Connection
Connect the K230 development board to your PC using a Type-C data cable, as shown below:

Double-click to open CanMV IDE K230.

Click the connection button in the lower left corner.

Upon successful connection, the icon in the lower left corner of CanMV IDE will change to the following:

If the connection takes more than 10 seconds, it indicates a connection failure. Click the Cancel button, and a pop-up window will appear. Click OK and recheck the connection.

Note
Connection Failure Causes and Solutions:
Cable is not a data cable: Some Type-C cables are charging-only cables without data transfer capability. Please use a Type-C cable with data transfer functionality. The factory-supplied cable is a Type-C data cable.
Other K230 firmware was flashed: Re-flash the factory firmware, then reconnect.
5.9.3 Program Execution and Download
Display Mode Configuration:
The program can use the select_display="" parameter to choose the display mode: HDMI, LCD, or IDE virtual.

The K230 program supports two operation modes: online execution and offline execution.
Online Execution:
After connecting, drag the program falldown_detection.py into the CanMV IDE K230 code editor area, then click the run button  in the lower left corner to run the program online, as shown below:
Note
Programs run using this method will be lost upon disconnection or power-off and will not be saved on the development board.
Offline Execution:
After connecting, drag the program falldown_detection.py from this section’s directory into the CanMV IDE K230 code editor area, click Tools in the toolbar, and select Save open script to CanMV Board (as main.py), as shown below:

Click Yes.

Once the file is written, click OK to confirm and complete saving the MicroPython file to the K230 development board.

With this method, the K230 development board will automatically run the MicroPython file upon power-up without connection, enabling offline execution.
5.9.4 Program Outcome
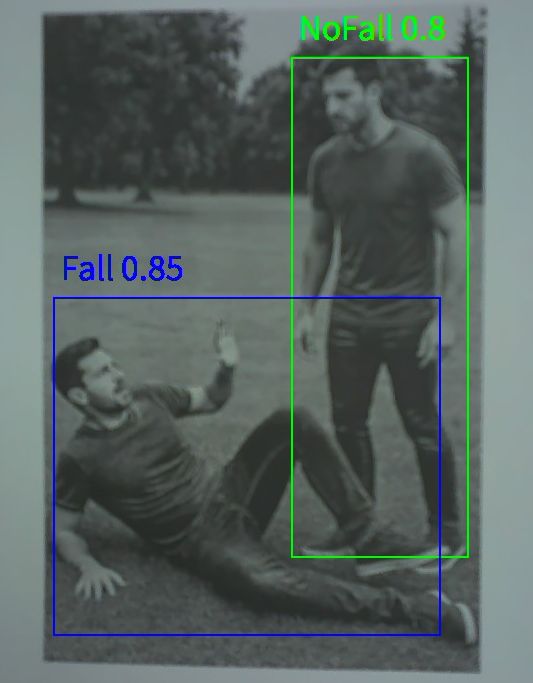
In the transmitted video feed, the system detects humans in the camera’s view and determines whether each person has fallen or not.
5.9.5 Program Analysis
Import Required Libraries
from libs.PipeLine import PipeLine
from libs.AIBase import AIBase
from libs.AI2D import Ai2d
from libs.Utils import *
import os, sys, ujson, gc, math
from media.media import *
from media.display import Display   # Ensure SDK support
import nncase_runtime as nn
import ulab.numpy as np
import image
import `aicube`
Display Initialization Function
def init_display(select_display, width, height):
    if select_display == 1:
        Display.init(Display.LT9611, width=width, height=height, to_ide=True)
        print(f"Initialize HDMI display, resolution: {width}x{height}")
    elif select_display == 2:
        Display.init(Display.ST7701, to_ide=True)
        print("Initialize LCD display, default resolution 800x480")
    elif select_display == 3:
        Display.init(Display.VIRT, width=width, height=height, fps=100, to_ide=True)
        print(f"Initialize IDE virtual display, resolution: {width}x{height}")
    else:
        raise ValueError("select_display parameter error, must be 1, 2, or 3")

def deinit_display():
    Display.deinit()
    print("Release display resources")
Define a function to initialize the display, which takes three parameters: select_display for choosing the display type using a numeric code, width for the display width in pixels, and height for the display height in pixels.
Human Detection Class
# Custom fall detection class
class FallDetectionApp(AIBase):
    def __init__(self, kmodel_path, model_input_size, labels, anchors,
                 confidence_threshold=0.2, nms_threshold=0.5, nms_option=False,
                 strides=[8,16,32], rgb888p_size=[224,224], display_size=[1920,1080],
                 debug_mode=0):
        super().__init__(kmodel_path, model_input_size, rgb888p_size, debug_mode)
        self.kmodel_path = kmodel_path
        self.model_input_size = model_input_size
        self.labels = labels
        self.anchors = anchors
        self.strides = strides
        self.confidence_threshold = confidence_threshold
        self.nms_threshold = nms_threshold
        self.nms_option = nms_option
        self.rgb888p_size = [ALIGN_UP(rgb888p_size[0], 16), rgb888p_size[1]]
        self.display_size = [ALIGN_UP(display_size[0], 16), display_size[1]]
        self.debug_mode = debug_mode
        self.color = [(255,0, 0, 255), (255,0, 255, 0), (255,255,0, 0), (255,255,0, 255)]
        self.ai2d = Ai2d(debug_mode)
        self.ai2d.set_ai2d_dtype(nn.ai2d_format.NCHW_FMT,
                                 nn.ai2d_format.NCHW_FMT, np.uint8, np.uint8)

    def config_preprocess(self, input_image_size=None):
        with ScopedTiming("set preprocess config", self.debug_mode > 0):
            ai2d_input_size = input_image_size if input_image_size else self.rgb888p_size
            top, bottom, left, right, _ = center_pad_param(self.rgb888p_size, self.model_input_size)
            self.ai2d.pad([0, 0, 0, 0, top, bottom, left, right], 0, [0,0,0])
            self.ai2d.resize(nn.interp_method.tf_bilinear, nn.interp_mode.half_pixel)
            self.ai2d.build([1,3, ai2d_input_size[1], ai2d_input_size[0]],
                            [1,3,self.model_input_size[1], self.model_input_size[0]])
A class FallDetectionApp is defined for human detection tasks, inheriting from AIBase. Its core functions include initializing the model and parameters, configuring image preprocessing, performing post-processing after model inference, and rendering the results.
Main Program
if __name__ == "__main__":
    display_mode_map = {1:"hdmi", 2:"lcd", 3:"ide"}
    display_mode = display_mode_map.get(select_display, "hdmi")

    if display_mode == "hdmi":
        display_size = [1920,1080]
    elif display_mode == "lcd":
        display_size = [800,480]
    else:
        display_size = [1280,720]
Select the display type based on the input number
select_display, choosing from HDMI, LCD, or IDE virtual display, and set the corresponding resolution. The default mode is HDMI.
    rgb888p_size = [1280,720]
    kmodel_path = "/sdcard/examples/kmodel/yolov5n-falldown.kmodel"
    confidence_threshold = 0.3
    nms_threshold = 0.45
    labels = ["Fall", "NoFall"]
    anchors = [10, 13, 16, 30, 33, 23, 30, 61, 62, 45, 59, 119, 116, 90, 156, 198, 373, 326]
Set the input image size for image capture and processing. Specify the path to the YOLOv5 lightweight model. Set the detection confidence threshold and non-maximum suppression threshold to ensure accurate filtering of results. Define the detection classes, in this case only humans, and provide the corresponding anchor box parameters to facilitate decoding of the detection boxes during post-processing.
    init_display(select_display, width=display_size[0], height=display_size[1])

    pl = PipeLine(rgb888p_size=rgb888p_size, display_mode=display_mode)
    pl.create()
    display_size = pl.get_display_size()
Call the display initialization function to start the display module based on the selected device, matching resolution settings.
Instantiate the pipeline to integrate capture, processing, and display. Call
create()to initialize the pipeline’s underlying hardware and software. Get the display size corresponding to the current pipeline, dynamically syncing subsequent drawing and display parameters.
    fall_det = FallDetectionApp(
        kmodel_path,
        model_input_size=[640,640],
        labels=labels,
        anchors=anchors,
        confidence_threshold=confidence_threshold,
        nms_threshold=nms_threshold,
        nms_option=False,
        strides=[8,16,32],
        rgb888p_size=rgb888p_size,
        display_size=display_size,
        debug_mode=0
    )
    fall_det.config_preprocess()
Load the YOLOv5 model and set the input resolution. Provide labels, anchor boxes, thresholds, and multi-scale output strides. Call the configuration preprocessing function to establish the image preprocessing pipeline.
    try:
        while True:
            with ScopedTiming("total",1):
                img = pl.get_frame()
                res = fall_det.run(img)
                fall_det.draw_result(pl, res)
                pl.show_image()
                gc.collect()
    except KeyboardInterrupt:
        print("User interrupted program")  # Ensure SDK support
    finally:
        fall_det.deinit()
        pl.destroy()
        deinit_display()
Enter an infinite loop to continuously capture images and perform inference. Track the total processing time using a timing manager. Obtain detection results through the model inference interface. Visualize the results on the display. Perform garbage collection to prevent memory leaks. Support safe exit with Ctrl+C to ensure proper resource release.
5.10 Hand Recognition
5.10.1 Experiment Overview
This section demonstrates the hand recognition functionality of the K230 development board through programming.
5.10.2 Preparation
Module Connection
Connect the K230 development board to your PC using a Type-C data cable, as shown below:

Double-click to open CanMV IDE K230.

Click the connection button in the lower left corner.

Upon successful connection, the icon in the lower left corner of CanMV IDE will change to the following:

If the connection takes more than 10 seconds, it indicates a connection failure. Click the Cancel button, and a pop-up window will appear. Click OK and recheck the connection.

Note
Connection Failure Causes and Solutions:
Cable is not a data cable: Some Type-C cables are charging-only cables without data transfer capability. Please use a Type-C cable with data transfer functionality. The factory-supplied cable is a Type-C data cable.
Other K230 firmware was flashed: Re-flash the factory firmware, then reconnect.
5.10.3 Program Execution and Download
Display Mode Configuration:
The program can use the select_display="" parameter to choose the display mode: HDMI, LCD, or IDE virtual.

The K230 program supports two operation modes: online execution and offline execution.
Online Execution:
After connecting, drag the program hand_detection.py into the CanMV IDE K230 code editor area, then click the run button  in the lower left corner to run the program online, as shown below:
Note
Programs run using this method will be lost upon disconnection or power-off and will not be saved on the development board.

Offline Execution:
After connecting, drag the program hand_detection.py into the CanMV IDE K230 code editor area, click Tools in the toolbar, and select Save open script to CanMV Board (as main.py), as shown below:

Click Yes.

Once the file is written, click OK to confirm and complete saving the MicroPython file to the K230 development board.

With this download method, when you subsequently power on the K230 development board without connecting it, the board will run the MicroPython file, enabling offline operation. | With this method, the K230 development board will automatically run the MicroPython file upon power-up without connection, enabling offline execution.
5.10.4 Program Outcome
In the returned video feed, detect the hand in the camera image and draw a green rectangular box around it.
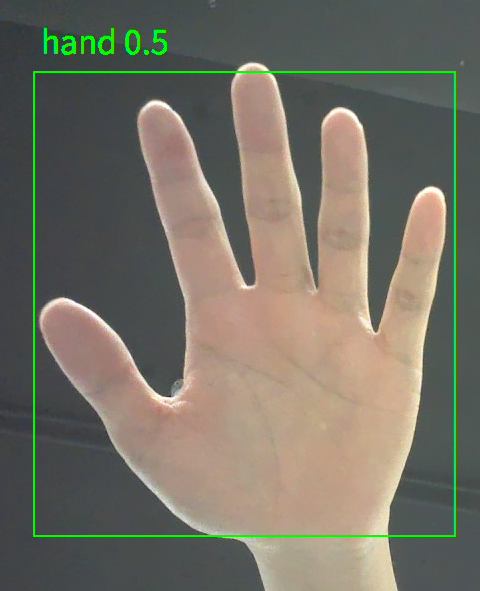
5.10.5 Program Analysis
Import Required Libraries
from libs.PipeLine import PipeLine
from libs.AIBase import AIBase
from libs.AI2D import Ai2d
from libs.Utils import *
import os, sys, ujson, gc, math
from media.media import *
from media.display import Display
import nncase_runtime as nn
import ulab.numpy as np
import image
import `aicube`
Display Initialization Function
# ==================================================================
# == Select Display Mode (1: HDMI, 2: LCD, 3: IDE Virtual Display)==
# ==================================================================
select_display = 3  # 1=HDMI, 2=LCD, 3=IDE Virtual Display

def init_display(select_display, width, height):
    if select_display == 1:
        Display.init(Display.LT9611, width=width, height=height, to_ide=True)
        print(f"Initialize HDMI display, resolution: {width}x{height}")
    elif select_display == 2:
        Display.init(Display.ST7701, to_ide=True)
        print("Initialize LCD display, default resolution 800x480")
    elif select_display == 3:
        Display.init(Display.VIRT, width=width, height=height, fps=100, to_ide=True)
        print(f"Initialize IDE virtual display, resolution: {width}x{height}")
    else:
        raise ValueError("select_display parameter error, must be 1, 2, or 3")
Define a function to initialize the display, which takes three parameters: select_display for choosing the display type using a numeric code, width for the display width in pixels, and height for the display height in pixels.
Hand Detection
class HandDetectionApp(AIBase):
    def __init__(self, kmodel_path, model_input_size, labels, anchors,
                 confidence_threshold=0.2, nms_threshold=0.5, nms_option=False,
                 strides=[8,16,32], rgb888p_size=[224,224], display_size=[1920,1080],
                 debug_mode=0):
        super().__init__(kmodel_path, model_input_size, rgb888p_size, debug_mode)
        self.kmodel_path = kmodel_path
        self.model_input_size = model_input_size
        self.labels = labels
        self.anchors = anchors
        self.strides = strides
        self.confidence_threshold = confidence_threshold
        self.nms_threshold = nms_threshold
        self.nms_option = nms_option
        self.rgb888p_size = [ALIGN_UP(rgb888p_size[0], 16), rgb888p_size[1]]
        self.display_size = [ALIGN_UP(display_size[0], 16), display_size[1]]
        self.debug_mode = debug_mode
        self.ai2d = Ai2d(debug_mode)
        self.ai2d.set_ai2d_dtype(nn.ai2d_format.NCHW_FMT,
                                 nn.ai2d_format.NCHW_FMT, np.uint8, np.uint8)

    def config_preprocess(self, input_image_size=None):
        with ScopedTiming("set preprocess config", self.debug_mode > 0):
            ai2d_input_size = input_image_size if input_image_size else self.rgb888p_size
            top, bottom, left, right, _ = center_pad_param(self.rgb888p_size, self.model_input_size)
            self.ai2d.pad([0, 0, 0, 0, top, bottom, left, right], 0, [0, 0, 0])
            self.ai2d.resize(nn.interp_method.tf_bilinear, nn.interp_mode.half_pixel)
            self.ai2d.build([1,3,ai2d_input_size[1],ai2d_input_size[0]],
                            [1,3,self.model_input_size[1],self.model_input_size[0]])
Define a HandDetectionApp class for hand detection and keypoint estimation based on the YOLO framework. Its main functions include model initialization, image preprocessing, post-processing of inference results, and visualization of detection outputs.
Main Program
    display_mode_map = {1:"hdmi", 2:"lcd", 3:"ide"}
    display_mode = display_mode_map.get(select_display, "hdmi")

    if display_mode == "hdmi":
        display_size = [1920,1080]
    elif display_mode == "lcd":
        display_size = [800,480]
    else:
        display_size = [1280,720]
Map the numeric value of
select_displayto the corresponding display name using a dictionary. Set the resolution according to the display type: 1080p for HDMI, 800×480 for LCD which is common for small to medium screens, and 1280×720 for the IDE virtual display.
    rgb888p_size = [1280,720]
    kmodel_path = "/sdcard/examples/kmodel/hand_det.kmodel"
    confidence_threshold = 0.2
    nms_threshold = 0.5
    labels = ["hand"]
    anchors = [26,27, 53,52, 75,71, 80,99, 106,82, 99,134, 140,113, 161,172, 245,276]
Set the input image size to 1280×720, load the YOLO model for hand detection, configure the detection confidence threshold and non-maximum suppression (NMS) threshold, and specify the target class label (hand) along with the model’s anchor box parameters.
    pl = PipeLine(rgb888p_size=rgb888p_size, display_mode=display_mode)
    pl.create()
    display_size = pl.get_display_size()
Build a pipeline for image capture, AI inference, and display. Start the pipeline and obtain the actual display size.
    hand_det = HandDetectionApp(
        kmodel_path,
        model_input_size=[512,512],
        labels=labels,
        anchors=anchors,
        confidence_threshold=confidence_threshold,
        nms_threshold=nms_threshold,
        nms_option=False,
        strides=[8,16,32],
        rgb888p_size=rgb888p_size,
        display_size=display_size,
        debug_mode=0
    )
    hand_det.config_preprocess()
Initialize the task class using the model path and input resolution. Load the model and post-processing configuration, then call the method to set up image preprocessing such as padding and scaling.
    try:
        while True:
            with ScopedTiming("total", 1):
                img = pl.get_frame()
                res = hand_det.run(img)
                hand_det.draw_result(pl, res)
                pl.show_image()
                gc.collect()
    except KeyboardInterrupt:
        print("User interrupted program")  # Program stopped by user
    finally:
        hand_det.deinit()
        pl.destroy()
        deinit_display()
Continuously capture data from the camera, run the hand detection model for inference, draw detection boxes and results, and display the rendered image. Manually trigger garbage collection to prevent memory leaks. Support safe exit by pressing Ctrl+C, and release task and device resources when finished.
5.11 Hand Keypoint Detection
5.11.1 Experiment Overview
This section demonstrates the hand keypoint detection functionality of the K230 development board through programming.
5.11.2 Preparation
Module Connection
Connect the K230 development board to your PC using a Type-C data cable, as shown below:

Double-click to open CanMV IDE K230.

Click the connection button in the lower left corner.

Upon successful connection, the icon in the lower left corner of CanMV IDE will change to the following:

If the connection takes more than 10 seconds, it indicates a connection failure. Click the Cancel button, and a pop-up window will appear. Click OK and recheck the connection.

Note
Connection Failure Causes and Solutions:
Cable is not a data cable: Some Type-C cables are charging-only cables without data transfer capability. Please use a Type-C cable with data transfer functionality. The factory-supplied cable is a Type-C data cable.
Other K230 firmware was flashed: Re-flash the factory firmware, then reconnect.
5.11.3 Program Execution and Download
Display Mode Configuration:
The program can use the select_display="" parameter to choose the display mode: HDMI, LCD, or IDE virtual.

The K230 program supports two operation modes: online execution and offline execution.
Online Execution:
After connecting, drag the program hand_keypoint_detection.py into the CanMV IDE K230 code editor area, then click the run button  in the lower left corner to run the program online, as shown below:
Note
Programs run using this method will be lost upon disconnection or power-off and will not be saved on the development board.

Offline Execution:
After connecting, drag the program hand_keypoint_detection.py from this section’s directory into the CanMV IDE K230 code editor area, click Tools in the toolbar, and select Save open script to CanMV Board (as main.py), as shown below:

Click Yes.

Once the file is written, click OK to confirm and complete saving the MicroPython file to the K230 development board.

With this method, the K230 development board will automatically run the MicroPython file upon power-up without connection, enabling offline execution.
5.11.4 Program Outcome
In the returned video feed, detect the hand in the camera image and draw a green rectangle around it. Use different colors to mark the detected finger joints.
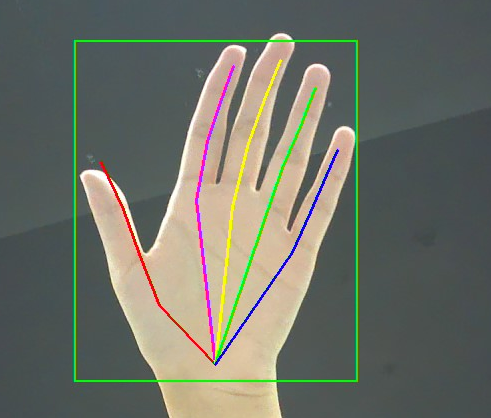
5.11.5 Program Analysis
Import Required Libraries
from libs.PipeLine import PipeLine
from libs.AIBase import AIBase
from libs.AI2D import Ai2d
from libs.Utils import *
import os, sys, ujson, gc, math
from media.media import *
from media.display import Display  # Ensure SDK support
import nncase_runtime as nn
import ulab.numpy as np
import image
import `aicube`
Display Initialization Function
# ==================================================================
# == Select Display Mode (1: HDMI, 2: LCD, 3: IDE Virtual Display) ==
# ==================================================================
select_display = 3  # 1=HDMI, 2=LCD, 3=IDE Virtual Display

def init_display(select_display, width, height):
    if select_display == 1:
        Display.init(Display.LT9611, width=width, height=height, to_ide=True)
        print(f"Initialize HDMI display, resolution: {width}x{height}")
    elif select_display == 2:
        Display.init(Display.ST7701, to_ide=True)
        print("Initialize LCD display, default resolution 800x480")
    elif select_display == 3:
        Display.init(Display.VIRT, width=width, height=height, fps=100, to_ide=True)
        print(f"Initialize IDE virtual display, resolution: {width}x{height}")
    else:
        raise ValueError("select_display parameter error, must be 1, 2, or 3")
Define a function to initialize the display, which takes three parameters: select_display for choosing the display type using a numeric code, width for the display width in pixels, and height for the display height in pixels.
Hand Detection
# Custom hand detection task class
class HandDetApp(AIBase):
    def __init__(self,kmodel_path,labels,model_input_size,anchors,
                 confidence_threshold=0.2,nms_threshold=0.5,nms_option=False,
                 strides=[8,16,32],rgb888p_size=[1920,1080],display_size=[1920,1080],debug_mode=0):
        super().__init__(kmodel_path,model_input_size,rgb888p_size,debug_mode)
        self.kmodel_path = kmodel_path
        self.labels = labels
        self.model_input_size = model_input_size
        self.confidence_threshold = confidence_threshold
        self.nms_threshold = nms_threshold
        self.anchors = anchors
        self.strides = strides
        self.nms_option = nms_option
        self.rgb888p_size = [ALIGN_UP(rgb888p_size[0],16), rgb888p_size[1]]
        self.display_size = [ALIGN_UP(display_size[0],16), display_size[1]]
        self.debug_mode = debug_mode
        self.ai2d = Ai2d(debug_mode)
        self.ai2d.set_ai2d_dtype(nn.ai2d_format.NCHW_FMT,
                                 nn.ai2d_format.NCHW_FMT, np.uint8, np.uint8)

    def config_preprocess(self,input_image_size=None):
        with ScopedTiming("set preprocess config", self.debug_mode > 0):
            ai2d_input_size = input_image_size if input_image_size else self.rgb888p_size
            top, bottom, left, right, _ = center_pad_param(self.rgb888p_size, self.model_input_size)
            self.ai2d.pad([0, 0, 0, 0, top, bottom, left, right], 0, [114, 114, 114])
            self.ai2d.resize(nn.interp_method.tf_bilinear, nn.interp_mode.half_pixel)
            self.ai2d.build([1,3, ai2d_input_size[1], ai2d_input_size[0]],
                            [1,3, self.model_input_size[1], self.model_input_size[0]])
Define a custom hand detection task class named HandDetApp, which implements the complete workflow from model loading to preprocessing and post-processing.
Gesture Keypoint Detection
# Custom hand gesture keypoint detection task class
class HandKPDetApp(AIBase):
    def __init__(self,kmodel_path,model_input_size,rgb888p_size=[1920,1080],display_size=[1920,1080],debug_mode=0):
        super().__init__(kmodel_path,model_input_size,rgb888p_size,debug_mode)
        self.kmodel_path = kmodel_path
        self.model_input_size = model_input_size
        self.rgb888p_size = [ALIGN_UP(rgb888p_size[0],16), rgb888p_size[1]]
        self.display_size = [ALIGN_UP(display_size[0],16), display_size[1]]
        self.crop_params = []
        self.debug_mode = debug_mode
        self.ai2d = Ai2d(debug_mode)
        self.ai2d.set_ai2d_dtype(nn.ai2d_format.NCHW_FMT,
                                 nn.ai2d_format.NCHW_FMT, np.uint8, np.uint8)

    def config_preprocess(self,det,input_image_size=None):
        with ScopedTiming("set preprocess config", self.debug_mode > 0):
            ai2d_input_size = input_image_size if input_image_size else self.rgb888p_size
            self.crop_params = self.get_crop_param(det)
            self.ai2d.crop(self.crop_params[0], self.crop_params[1], self.crop_params[2], self.crop_params[3])
            self.ai2d.resize(nn.interp_method.tf_bilinear, nn.interp_mode.half_pixel)
            self.ai2d.build([1,3, ai2d_input_size[1], ai2d_input_size[0]],
                            [1,3, self.model_input_size[1], self.model_input_size[0]])

    def postprocess(self,results):
        with ScopedTiming("postprocess", self.debug_mode > 0):
            results=results[0].reshape(results[0].shape[0]*results[0].shape[1])
            results_show = np.zeros(results.shape, dtype=np.int16)
            results_show[0::2] = results[0::2]*self.crop_params[3] + self.crop_params[0]
            results_show[1::2] = results[1::2]*self.crop_params[2] + self.crop_params[1]
            results_show[0::2] = results_show[0::2]*(self.display_size[0]/self.rgb888p_size[0])
            results_show[1::2] = results_show[1::2]*(self.display_size[1]/self.rgb888p_size[1])
            return results_show
The HandKPDetApp class is a custom hand keypoint detection task. It uses a YOLOv8-based keypoint model and integrates input preprocessing, post-processing of model inference, and coordinate restoration to produce hand keypoint outputs.
Hand Keypoint Detection
# Hand keypoint detection task synthesis class
class HandKeyPointDet:
    def __init__(self, hand_det_kmodel, hand_kp_kmodel,
                 det_input_size, kp_input_size, labels, anchors,
                 confidence_threshold=0.25, nms_threshold=0.3, nms_option=False,
                 strides=[8,16,32], rgb888p_size=[1280,720], display_size=[1920,1080],
                 debug_mode=0):
        self.hand_det_kmodel = hand_det_kmodel
        self.hand_kp_kmodel = hand_kp_kmodel
        self.det_input_size = det_input_size
        self.kp_input_size = kp_input_size
        self.labels = labels
        self.anchors = anchors
        self.confidence_threshold = confidence_threshold
        self.nms_threshold = nms_threshold
        self.nms_option = nms_option
        self.strides = strides
        self.rgb888p_size = [ALIGN_UP(rgb888p_size[0],16), rgb888p_size[1]]
        self.display_size = [ALIGN_UP(display_size[0],16), display_size[1]]
        self.debug_mode = debug_mode
        self.hand_det = HandDetApp(self.hand_det_kmodel, self.labels,
                                  model_input_size=self.det_input_size, anchors=self.anchors,
                                  confidence_threshold=self.confidence_threshold, nms_threshold=self.nms_threshold,
                                  nms_option=self.nms_option, strides=self.strides,
                                  rgb888p_size=self.rgb888p_size, display_size=self.display_size, debug_mode=0)
        self.hand_kp = HandKPDetApp(self.hand_kp_kmodel,
                                    model_input_size=self.kp_input_size,
                                    rgb888p_size=self.rgb888p_size,
                                    display_size=self.display_size)
        self.hand_det.config_preprocess()
Define a class named HandKeyPointDet to implement a hand keypoint detection task using two models in sequence.
Main Program
if __name__=="__main__":
    display_mode_map = {1:"hdmi", 2:"lcd", 3:"ide"}
    display_mode = display_mode_map.get(select_display, "hdmi")

    if display_mode == "hdmi":
        display_size = [1920,1080]
    elif display_mode == "lcd":
        display_size = [800,480]
    else:
        display_size = [1280,720]
Map the numeric value of
select_displayto the corresponding display name using a dictionary. Set the resolution according to the display type: 1080p for HDMI, 800×480 for LCD which is common for small to medium screens, and 1280×720 for the IDE virtual display.
    rgb888p_size = [1280,720]
    hand_det_kmodel_path = "/sdcard/examples/kmodel/hand_det.kmodel"
    hand_kp_kmodel_path = "/sdcard/examples/kmodel/handkp_det.kmodel"
    anchors = [26,27, 53,52, 75,71, 80,99, 106,82, 99,134, 140,113, 161,172, 245,276]
    hand_det_input_size = [512,512]
    hand_kp_input_size = [256,256]
    confidence_threshold = 0.2
    nms_threshold = 0.5
    labels = ["hand"]
Specify the file paths and input sizes for the hand detection and keypoint models. Configure the anchor box parameters for decoding detection boxes during post-processing. Set the confidence and NMS thresholds to adjust the sensitivity of detection filtering. The label is set to
"hand", indicating that only hands are detected.
    pl = PipeLine(rgb888p_size=rgb888p_size, display_mode=display_mode)
    pl.create()
    display_size = pl.get_display_size()
Instantiate the video capture pipeline, combining RGB data and the type of display device. Call
create()to start the device and drivers, and retrieve the display device’s resolution synchronously.
    hkd = HandKeyPointDet(hand_det_kmodel_path, hand_kp_kmodel_path,
                         det_input_size=hand_det_input_size, kp_input_size=hand_kp_input_size,
                         labels=labels, anchors=anchors,
                         confidence_threshold=confidence_threshold, nms_threshold=nms_threshold,
                         nms_option=False, strides=[8,16,32],
                         rgb888p_size=rgb888p_size, display_size=display_size)
Create a detection object that links two models in sequence to perform bounding box detection and keypoint inference within the boxes. Provide the input sizes for both the detection and keypoint models, along with the relevant thresholds and anchor parameters.
    try:
        while True:
            with ScopedTiming("total", 1):
                img = pl.get_frame()                          # Capture current frame
                det_boxes, hand_res = hkd.run(img)            # Run detection and keypoint inference
                hkd.draw_result(pl, det_boxes, hand_res)      # Draw results on display
                pl.show_image()                               # Display the image
                gc.collect()                                  # Trigger garbage collection
    except KeyboardInterrupt:
        print("User interrupted program")  # Program stopped by user
    finally:
        hkd.hand_det.deinit()                                # Release hand detection resources
        hkd.hand_kp.deinit()                                 # Release keypoint detection resources
        pl.destroy()                                          # Destroy pipeline
        deinit_display()                                      # Release display resources
Enter an infinite loop to continuously capture camera frames and perform full inference using
hkd.run(), which first detects the hand and then predicts keypoints within the detected region. Draw the detection boxes and keypoints on the display buffer, display the resulting frame, and manually trigger garbage collection to maintain system stability. Press Ctrl+C to safely stop the process and release all device and model resources.
5.12 Hand Keypoint Classification
5.12.1 Experiment Overview
This section demonstrates the hand keypoint classification functionality of the K230 development board through programming.
5.12.2 Preparation
Module Connection
Connect the K230 development board to your PC using a Type-C data cable, as shown below:
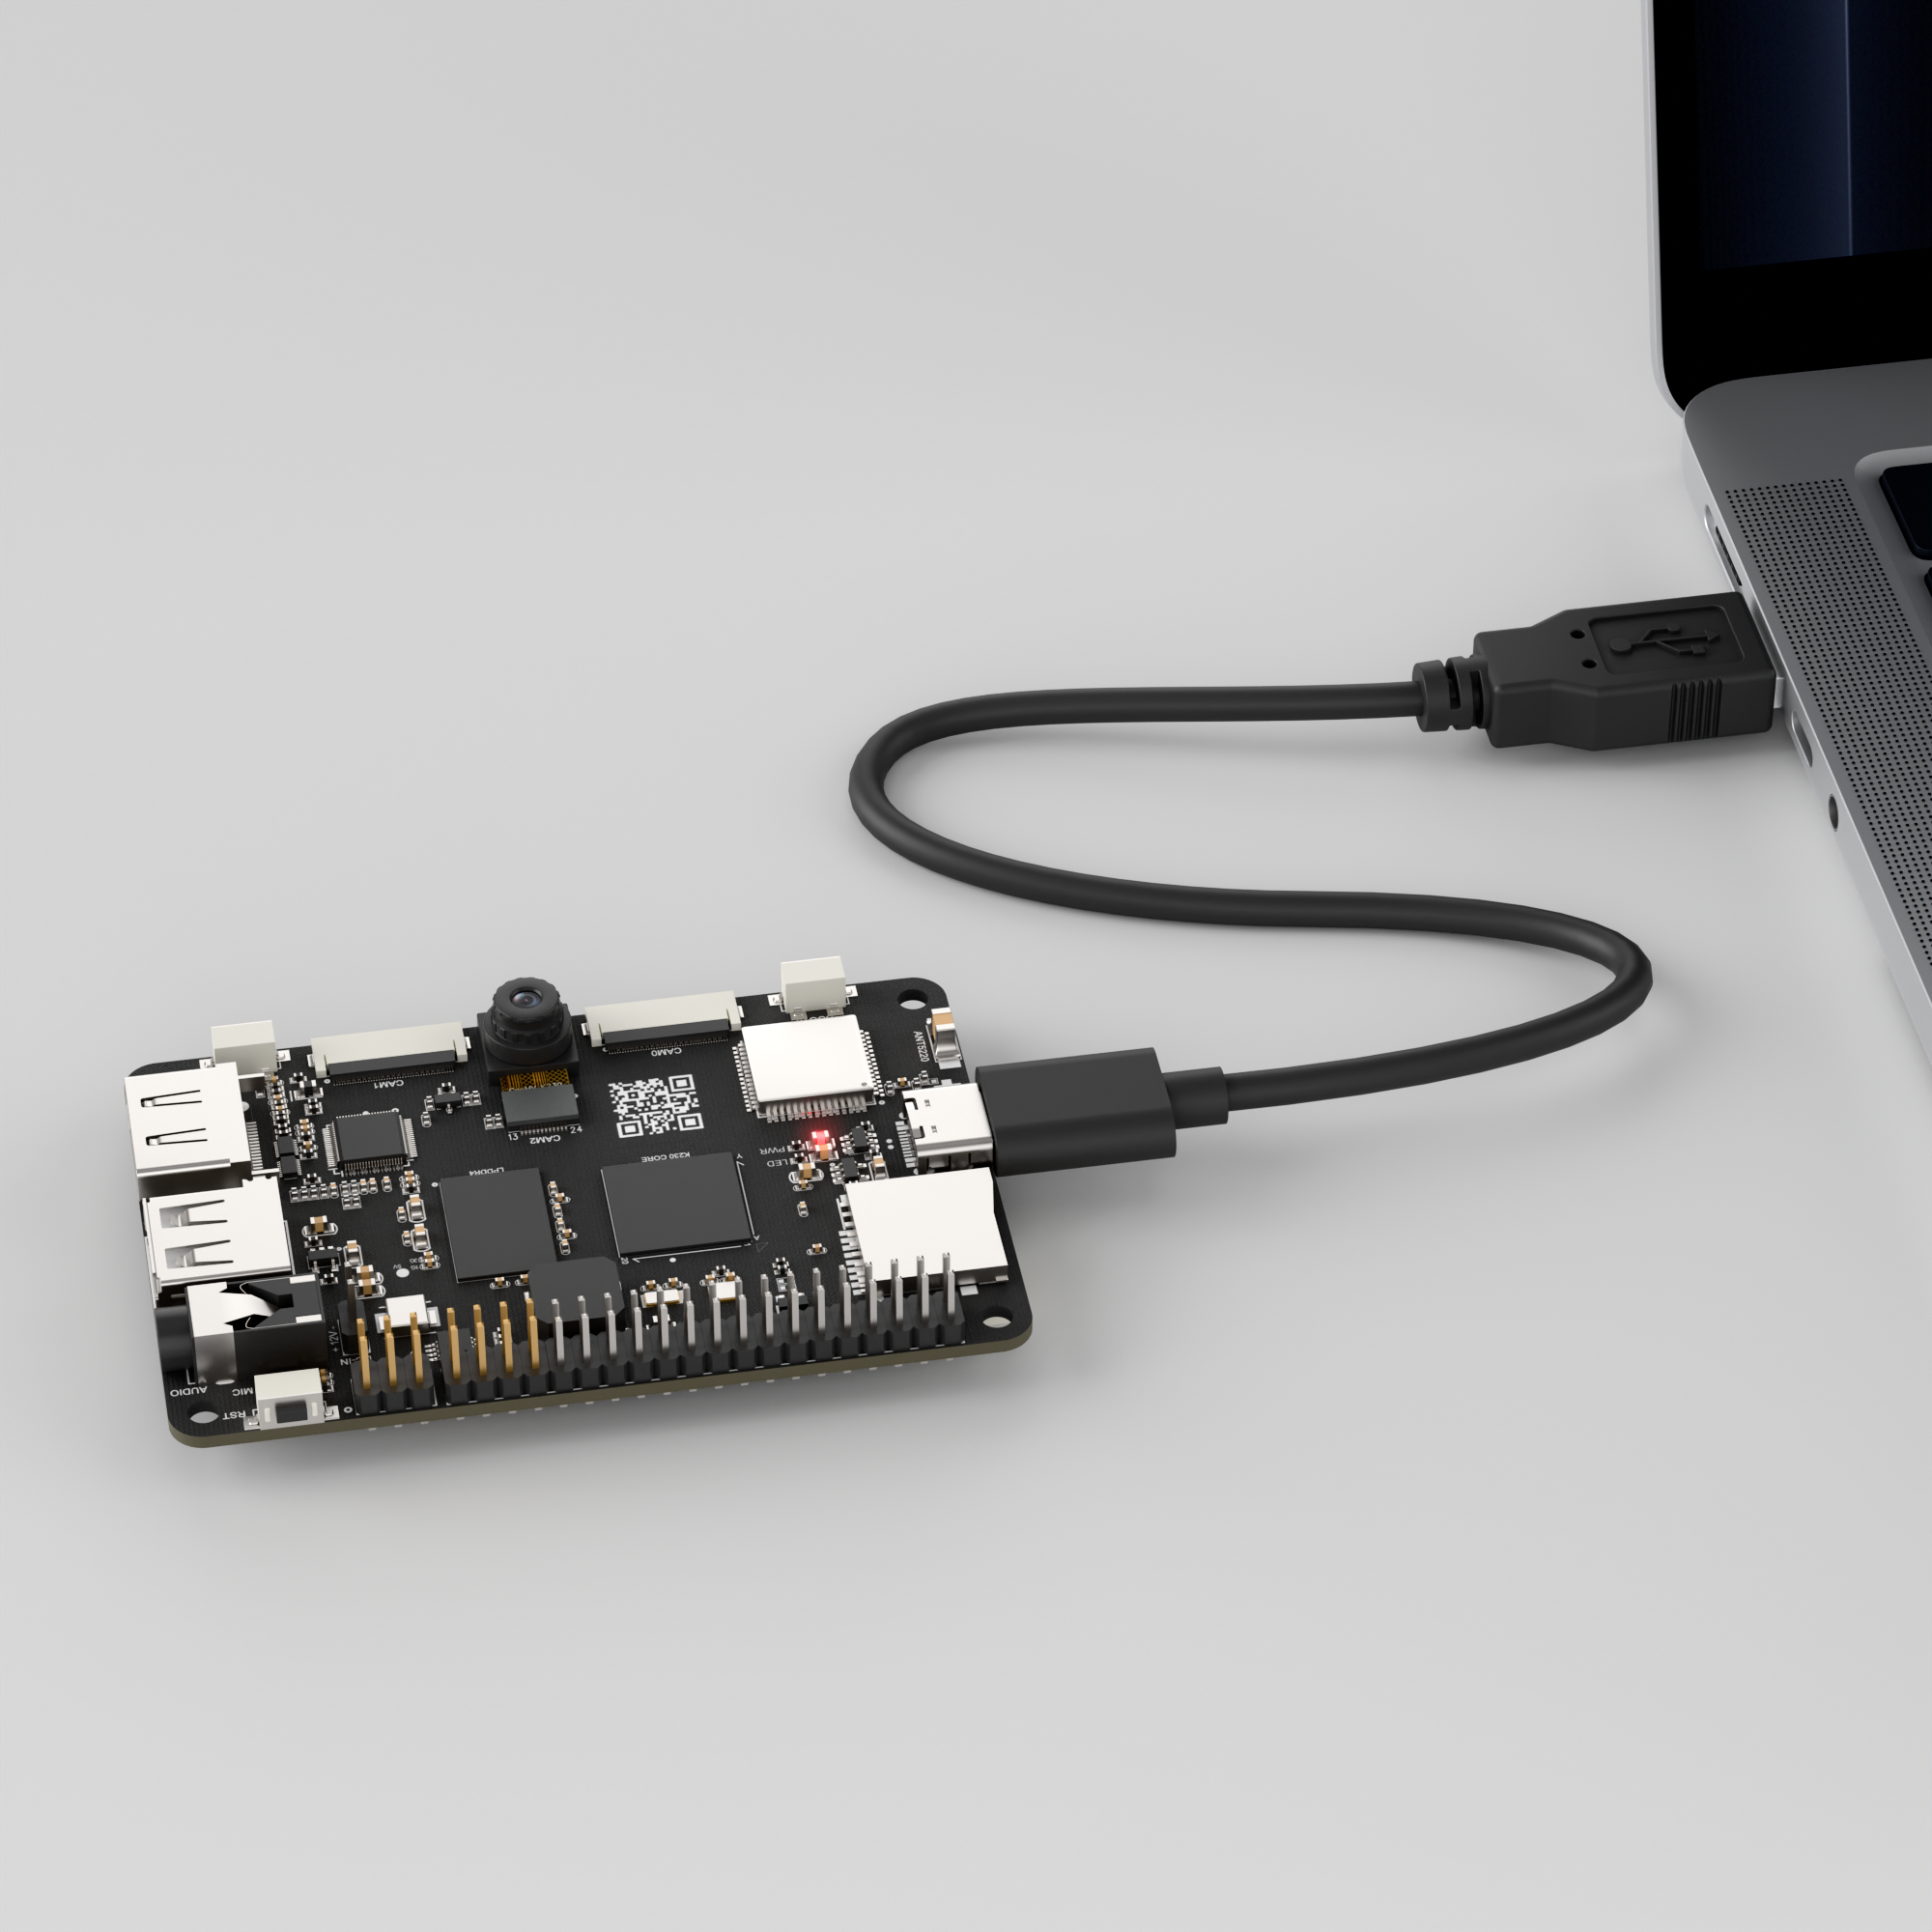
Double-click to open CanMV IDE K230.

Click the connection button in the lower left corner.

Upon successful connection, the icon in the lower left corner of CanMV IDE will change to the following:

If the connection takes more than 10 seconds, it indicates a connection failure. Click the Cancel button, and a pop-up window will appear. Click OK and recheck the connection.

Note
Connection Failure Causes and Solutions:
Cable is not a data cable: Some Type-C cables are charging-only cables without data transfer capability. Please use a Type-C cable with data transfer functionality. The factory-supplied cable is a Type-C data cable.
Other K230 firmware was flashed: Re-flash the factory firmware, then reconnect.
5.12.3 Program Execution and Download
Display Mode Configuration:
The program can use the select_display="" parameter to choose the display mode: HDMI, LCD, or IDE virtual.

The K230 program supports two operation modes: online execution and offline execution.
Online Execution:
After connecting, drag the program hand_keypoint_class.py into the CanMV IDE K230 code editor area, then click the run button  in the lower left corner to run the program online, as shown below:
Note
Programs run using this method will be lost upon disconnection or power-off and will not be saved on the development board.

Offline Execution:
After connecting, drag the program hand_keypoint_class.py into the CanMV IDE K230 code editor area, click Tools in the toolbar, and select Save open script to CanMV Board (as main.py), as shown below:

Click Yes.

Once the file is written, click OK to confirm and complete saving the MicroPython file to the K230 development board.
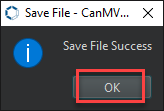
With this method, the K230 development board will automatically run the MicroPython file upon power-up without connection, enabling offline execution.
5.12.4 Program Outcome
In the returned video feed, detect the hand and its joints from the camera image, and infer the corresponding hand gesture.
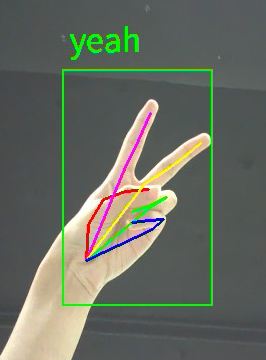
5.12.5 Program Analysis
Import Required Libraries
from libs.PipeLine import PipeLine
from libs.AIBase import AIBase
from libs.AI2D import Ai2d
from libs.Utils import *
import os, sys, ujson, gc, math
from media.media import *
from media.display import Display  # Ensure SDK support
import nncase_runtime as nn
import ulab.numpy as np
import image
import `aicube`
Display Initialization Function
# ==================================================================
# == Select Display Mode (1: HDMI, 2: LCD, 3: IDE Virtual Display) ==
# ==================================================================
select_display = 3  # 1=HDMI, 2=LCD, 3=IDE Virtual Display

def init_display(select_display, width, height):
    if select_display == 1:
        Display.init(Display.LT9611, width=width, height=height, to_ide=True)
        print(f"Initialize HDMI display, resolution: {width}x{height}")
    elif select_display == 2:
        Display.init(Display.ST7701, to_ide=True)
        print("Initialize LCD display, default resolution 800x480")
    elif select_display == 3:
        Display.init(Display.VIRT, width=width, height=height, fps=100, to_ide=True)
        print(f"Initialize IDE virtual display, resolution: {width}x{height}")
    else:
        raise ValueError("select_display parameter error, must be 1, 2, or 3")
Define a function to initialize the display, which takes three parameters: select_display for choosing the display type using a numeric code, width for the display width in pixels, and height for the display height in pixels.
Hand Detection
# Custom hand detection task class
class HandDetApp(AIBase):
    def __init__(self,kmodel_path,labels,model_input_size,anchors,
                 confidence_threshold=0.2,nms_threshold=0.5,nms_option=False,
                 strides=[8,16,32],rgb888p_size=[1920,1080],display_size=[1920,1080],
                 debug_mode=0):
        super().__init__(kmodel_path,model_input_size,rgb888p_size,debug_mode)
        self.kmodel_path = kmodel_path
        self.labels = labels
        self.model_input_size = model_input_size
        self.confidence_threshold = confidence_threshold
        self.nms_threshold = nms_threshold
        self.anchors = anchors
        self.strides = strides
        self.nms_option = nms_option
        self.rgb888p_size = [ALIGN_UP(rgb888p_size[0],16), rgb888p_size[1]]
        self.display_size = [ALIGN_UP(display_size[0],16), display_size[1]]
        self.debug_mode = debug_mode
        self.ai2d = Ai2d(debug_mode)
        self.ai2d.set_ai2d_dtype(nn.ai2d_format.NCHW_FMT,
                                 nn.ai2d_format.NCHW_FMT, np.uint8, np.uint8)

    def config_preprocess(self,input_image_size=None):
        with ScopedTiming("set preprocess config", self.debug_mode > 0):
            ai2d_input_size = input_image_size if input_image_size else self.rgb888p_size
            top, bottom, left, right, _ = center_pad_param(self.rgb888p_size, self.model_input_size)
            self.ai2d.pad([0,0,0,0,top,bottom,left,right], 0, [114,114,114])
            self.ai2d.resize(nn.interp_method.tf_bilinear, nn.interp_mode.half_pixel)
            self.ai2d.build([1,3, ai2d_input_size[1], ai2d_input_size[0]],
                            [1,3, self.model_input_size[1], self.model_input_size[0]])
Define a hand detection task class HandDetApp based on anchor boxes, which handles the complete workflow including model initialization, image preprocessing configuration, and post-processing of inference results.
Custom Hand Gesture Keypoint Classification
# Custom hand gesture keypoint classification task class
class HandKPClassApp(AIBase):
    def __init__(self,kmodel_path,model_input_size,
                 rgb888p_size=[1920,1080], display_size=[1920,1080], debug_mode=0):
        super().__init__(kmodel_path,model_input_size,rgb888p_size,debug_mode)
        self.kmodel_path = kmodel_path                        # Model path
        self.model_input_size = model_input_size              # Model input size
        self.rgb888p_size = [ALIGN_UP(rgb888p_size[0],16), rgb888p_size[1]]  # RGB image size
        self.display_size = [ALIGN_UP(display_size[0],16), display_size[1]]  # Display size
        self.crop_params = []                                 # Crop parameters
        self.debug_mode = debug_mode                          # Debug mode flag
        self.ai2d = Ai2d(debug_mode)                          # AI2D preprocessor
        self.ai2d.set_ai2d_dtype(nn.ai2d_format.NCHW_FMT,
                                 nn.ai2d_format.NCHW_FMT, np.uint8, np.uint8)

    def config_preprocess(self,det,input_image_size=None):
        with ScopedTiming("set preprocess config", self.debug_mode > 0):
            ai2d_input_size = input_image_size if input_image_size else self.rgb888p_size
            self.crop_params = self.get_crop_param(det)
            self.ai2d.crop(self.crop_params[0], self.crop_params[1], self.crop_params[2], self.crop_params[3])
            self.ai2d.resize(nn.interp_method.tf_bilinear, nn.interp_mode.half_pixel)
            self.ai2d.build([1,3, ai2d_input_size[1], ai2d_input_size[0]],
                            [1,3, self.model_input_size[1], self.model_input_size[0]])

    def postprocess(self,results):
        with ScopedTiming("postprocess", self.debug_mode > 0):
            results = results[0].reshape(results[0].shape[0]*results[0].shape[1])
            results_show = np.zeros(results.shape, dtype=np.int16)
            results_show[0::2] = results[0::2] * self.crop_params[3] + self.crop_params[0]
            results_show[1::2] = results[1::2] * self.crop_params[2] + self.crop_params[1]
            gesture = self.hk_gesture(results_show)
            results_show[0::2] = results_show[0::2] * (self.display_size[0]/self.rgb888p_size[0])
            results_show[1::2] = results_show[1::2] * (self.display_size[1]/self.rgb888p_size[1])
            return results_show, gesture
Define a custom hand keypoint classification task class HandKPClassApp, which inherits from the base AI class and performs keypoint detection and gesture classification based on hand detection results.
Main Program
    display_mode_map = {1:"hdmi", 2:"lcd", 3:"ide"}
    display_mode = display_mode_map.get(select_display, "hdmi")

    if display_mode == "hdmi":
        display_size = [1920,1080]
    elif display_mode == "lcd":
        display_size = [800,480]
    else:
        display_size = [1280,720]
Map the
select_displayvalue to the corresponding display device using a dictionary. Set the resolution based on the display type: HDMI is 1080p full HD, LCD is 800×480 for common small to medium screens, and the IDE virtual display is 1280×720.
    rgb888p_size = [1280,720]                      # Input image resolution
    hand_det_kmodel_path = "/sdcard/examples/kmodel/hand_det.kmodel"      # Hand detection model path
    hand_kp_kmodel_path = "/sdcard/examples/kmodel/handkp_det.kmodel"     # Hand keypoint model path
    anchors = [26,27,53,52,75,71,80,99,106,82,99,134,140,113,161,172,245,276]  # Anchor boxes
    hand_det_input_size = [512,512]                # Detection model input size
    hand_kp_input_size = [256,256]                 # Keypoint model input size
    confidence_threshold = 0.2                      # Confidence threshold
    nms_threshold = 0.5                             # NMS threshold
    labels = ["hand"]                               # Detection labels
Define the RGB input image size and display resolution. Specify the paths for the gesture detection model and the hand keypoint model. Use the anchor box array in conjunction with the detection model’s post-processing. Set the confidence and NMS thresholds to control detection and filtering sensitivity. The label list contains only
"hand", indicating that only hands are detected.
    pl = PipeLine(rgb888p_size=rgb888p_size, display_mode=display_mode)  # Create pipeline
    pl.create()                                                            # Initialize pipeline
    display_size = pl.get_display_size()                                   # Get display size
Build the pipeline for image capture, AI inference, and display, start the pipeline, and obtain the actual display size.
    hkc = HandKeyPointClass(                       # Create hand keypoint detection object
        hand_det_kmodel_path,
        hand_kp_kmodel_path,
        det_input_size=hand_det_input_size,
        kp_input_size=hand_kp_input_size,
        labels=labels,
        anchors=anchors,
        confidence_threshold=confidence_threshold,
        nms_threshold=nms_threshold,
        nms_option=False,
        strides=[8,16,32],
        rgb888p_size=rgb888p_size,
        display_size=display_size,
        debug_mode=0
    )
Create a two-stage detection task object using the paths of the detection model and the keypoint model. Configure the input size, model anchors, thresholds, stride, and display parameters. The class first detects the hand bounding box and then predicts keypoints within that box.
    try:
        while True:
            with ScopedTiming("total",1):
                img = pl.get_frame()                          # Capture current frame
                det_boxes, gesture_res = hkc.run(img)        # Run inference on current frame
                hkc.draw_result(pl, det_boxes, gesture_res)  # Draw inference results for current frame
                pl.show_image()                              # Display inference results
                gc.collect()                                 # Trigger garbage collection
    except KeyboardInterrupt:
        print("User interrupted program")  # Program stopped by user
    finally:
        hkc.hand_det.deinit()
        hkc.hand_kp.deinit()
        pl.destroy()
        deinit_display()
In the main loop, continuously retrieve real-time image frames from the camera pipeline and use
HandKeyPointClassto run the detection and keypoint inference process. Draw the inference results onto the screen buffer and display the rendered image to provide real-time feedback. Manually trigger garbage collection in the loop to prevent memory leaks, and allow the user to safely exit with Ctrl+C, releasing all model and hardware resources in the destructor.
5.13 Dynamic Gesture Recognition
5.13.1 Experiment Overview
This section demonstrates the dynamic gesture recognition functionality of the K230 development board through programming.
5.13.2 Preparation
Module Connection
Connect the K230 development board to your PC using a Type-C data cable, as shown below:

Double-click to open CanMV IDE K230.

Click the connection button in the lower left corner.

Upon successful connection, the icon in the lower left corner of CanMV IDE will change to the following:

If the connection takes more than 10 seconds, it indicates a connection failure. Click the Cancel button, and a pop-up window will appear. Click OK and recheck the connection.

Note
Connection Failure Causes and Solutions:
Cable is not a data cable: Some Type-C cables are charging-only cables without data transfer capability. Please use a Type-C cable with data transfer functionality. The factory-supplied cable is a Type-C data cable.
Other K230 firmware was flashed: Re-flash the factory firmware, then reconnect.
5.13.3 Program Execution and Download
Display Mode Configuration:
The program can use the select_display="" parameter to choose the display mode: HDMI, LCD, or IDE virtual.

The K230 program supports two operation modes: online execution and offline execution.
Online Execution:
After connecting, drag the program hand_keypoint_class.py into the CanMV IDE K230 code editor area, then click the run button  in the lower left corner to run the program online, as shown below:
Note
Programs run using this method will be lost upon disconnection or power-off and will not be saved on the development board.

Offline Execution:
After connecting, drag the program hand_keypoint_class.py into the CanMV IDE K230 code editor area, click Tools in the toolbar, and select Save open script to CanMV Board (as main.py), as shown below:

Click Yes.

Once the file is written, click OK to confirm and complete saving the MicroPython file to the K230 development board.

With this method, the K230 development board will automatically run the MicroPython file upon power-up without connection, enabling offline execution.
5.13.3 Program Outcome
In the returned video feed, infer the corresponding hand gesture from the hand captured by the camera.

5.13.4 Program Analysis
Import Required Libraries
from libs.PipeLine import PipeLine
from libs.AIBase import AIBase
from libs.AI2D import Ai2d
from libs.Utils import *
import os, sys, ujson, gc, math, time
from media.media import *
import nncase_runtime as nn
import ulab.numpy as np
import image
import `aicube`
from media.media import *
from media.display import *
select_display = 3
Display Initialization Function
def init_display(select_display):
    if select_display == 1:
        width, height = 640, 480
        Display.init(Display.LT9611, width=width, height=height, to_ide=True)
        print(f"Initialize HDMI display, resolution: {width}x{height}")
    elif select_display == 2:
        width, height = 800, 480
        Display.init(Display.ST7701, width=width, height=height, to_ide=True)
        print(f"Initialize LCD display, resolution: {width}x{height}")
    elif select_display == 3:
        width, height = 800, 480
        Display.init(Display.VIRT, width=width, height=height, fps=100, to_ide=True)
        print(f"Initialize IDE virtual display, resolution: {width}x{height}")
    else:
        raise ValueError("select_display parameter error, must be 1, 2, or 3")
    return width, height
Define a function to initialize the display. It takes one parameter, select_display, which specifies the display type using a numeric code, and returns the display width and height in pixels.
Hand Detection Class HandDetApp
class HandDetApp(AIBase):
    def __init__(self,kmodel_path,labels,model_input_size,anchors,confidence_threshold=0.2,nms_threshold=0.5,nms_option=False,strides=[8,16,32],rgb888p_size=[1920,1080],display_size=[1920,1080],debug_mode=0):
        super().__init__(kmodel_path,model_input_size,rgb888p_size,debug_mode)
        self.kmodel_path=kmodel_path
        self.labels=labels
        self.model_input_size=model_input_size
        self.confidence_threshold=confidence_threshold
        self.nms_threshold=nms_threshold
        self.anchors=anchors
        self.strides = strides
        self.nms_option = nms_option
        self.rgb888p_size=[ALIGN_UP(rgb888p_size[0],16),rgb888p_size[1]]
        self.display_size=[ALIGN_UP(display_size[0],16),display_size[1]]
        self.debug_mode=debug_mode
        self.ai2d=Ai2d(debug_mode)
        self.ai2d.set_ai2d_dtype(nn.ai2d_format.NCHW_FMT,nn.ai2d_format.NCHW_FMT,np.uint8, np.uint8)

    def config_preprocess(self,input_image_size=None):
        with ScopedTiming("set preprocess config",self.debug_mode > 0):
            ai2d_input_size = input_image_size if input_image_size else self.rgb888p_size
            top, bottom, left, right,_ = center_pad_param(self.rgb888p_size,self.model_input_size)
            self.ai2d.pad([0, 0, 0, 0, top, bottom, left, right], 0, [114, 114, 114])
            self.ai2d.resize(nn.interp_method.tf_bilinear, nn.interp_mode.half_pixel)
            self.ai2d.build([1,3,ai2d_input_size[1],ai2d_input_size[0]],[1,3,self.model_input_size[1],self.model_input_size[0]])

    def postprocess(self,results):
        with ScopedTiming("postprocess",self.debug_mode > 0):
            dets = `aicube`.anchorbasedet_post_process(results[0], results[1], results[2], self.model_input_size, self.rgb888p_size, self.strides, len(self.labels), self.confidence_threshold, self.nms_threshold, self.anchors, self.nms_option)
            return dets
Perform hand detection on the images captured by the camera and return the hand bounding box in the format (x1, y1, x2, y2).
Dynamic Gesture Recognition Class DynamicGestureApp
class HandKPClassApp(AIBase):
    def __init__(self,kmodel_path,model_input_size,rgb888p_size=[1920,1080],display_size=[1920,1080],debug_mode=0):
        super().__init__(kmodel_path,model_input_size,rgb888p_size,debug_mode)
        self.kmodel_path=kmodel_path
        self.model_input_size=model_input_size
        self.rgb888p_size=[ALIGN_UP(rgb888p_size[0],16),rgb888p_size[1]]
        self.display_size=[ALIGN_UP(display_size[0],16),display_size[1]]
        self.crop_params=[]
        self.debug_mode=debug_mode
        self.ai2d=Ai2d(debug_mode)
        self.ai2d.set_ai2d_dtype(nn.ai2d_format.NCHW_FMT,nn.ai2d_format.NCHW_FMT,np.uint8, np.uint8)

    def config_preprocess(self,det,input_image_size=None):
        with ScopedTiming("set preprocess config",self.debug_mode > 0):
            ai2d_input_size=input_image_size if input_image_size else self.rgb888p_size
            self.crop_params = self.get_crop_param(det)
            self.ai2d.crop(self.crop_params[0],self.crop_params[1],self.crop_params[2],self.crop_params[3])
            self.ai2d.resize(nn.interp_method.tf_bilinear, nn.interp_mode.half_pixel)
            self.ai2d.build([1,3,ai2d_input_size[1],ai2d_input_size[0]],[1,3,self.model_input_size[1],self.model_input_size[0]])
Use the hand bounding box returned by the HandDetApp class as input to perform dynamic gesture recognition and return the gesture category, such as up, down, left, or right.
Main Program
if __name__=="__main__":
    width, height = init_display(select_display)
    display_mode_map = {1:"hdmi", 2:"lcd", 3:"ide"}
    display_mode = display_mode_map.get(select_display, "lcd")
    rgb888p_size = [1920,1080]

    pl=PipeLine(rgb888p_size=rgb888p_size, display_mode=display_mode)
    pl.create()
    display_size=pl.get_display_size()

    hand_det_kmodel_path="/sdcard/examples/kmodel/hand_det.kmodel"
    hand_kp_kmodel_path="/sdcard/examples/kmodel/handkp_det.kmodel"
    gesture_kmodel_path="/sdcard/examples/kmodel/gesture.kmodel"
    hand_det_input_size=[512,512]
    hand_kp_input_size=[256,256]
    gesture_input_size=[224,224]
    confidence_threshold=0.2
    nms_threshold=0.5
    labels=["hand"]
    anchors=[26,27,53,52,75,71,80,99,106,82,99,134,140,113,161,172,245,276]

    dg=DynamicGesture(
        hand_det_kmodel_path, hand_kp_kmodel_path, gesture_kmodel_path,
        det_input_size=hand_det_input_size, kp_input_size=hand_kp_input_size, gesture_input_size=gesture_input_size,
        labels=labels, anchors=anchors, confidence_threshold=confidence_threshold,
        nms_threshold=nms_threshold, nms_option=False, strides=[8,16,32],
        rgb888p_size=rgb888p_size, display_size=display_size
    )
rgb888p_size = [1920,1080]defines the resolution used for initializing camera sampling.hand_det_kmodel_path = "/sdcard/examples/kmodel/hand_det.kmodel"defines the model path.hand_det_input_size = [512,512]defines the model input size.
dg=DynamicGesture()creates the business-layer object that manages all three sub-models in a unified workflow, such as detection, keypoints, and dynamic gestures.
    try:
        while True:
            with ScopedTiming("total",1):
                img=pl.get_frame()
                output1,output2=dg.run(img)
                dg.draw_result(pl,output1,output2)
                pl.show_image()
                gc.collect()
    except KeyboardInterrupt:
        pass
    finally:
        dg.hand_det.deinit()
        dg.hand_kp.deinit()
        dg.dg.deinit()
        pl.destroy()
        deinit_display()
img=pl.get_frame()captures one RGB image frame.dg.draw_result(pl, output1, output2)overlays arrows, prompt images, or text to the OSD layer based on current state and inference results.pl.show_image()displays a frame on the screen by compositing the OSD onto the display layer.Build a pipeline for image capture, AI inference, and display, then start the pipeline and retrieve the actual display size.
Create a two-stage detection task object using the paths of the detection and keypoint models. Configure the input size, model anchors, thresholds, stride, and display parameters. The class first detects the hand bounding box and then predicts keypoints within that box.
finally: Manually perform garbage collection in the loop to prevent memory leaks. Press Ctrl+C to safely exit, which triggers the destructor to release all model and hardware resources.
5.14 Rock-Paper-Scissors
5.14.1 Experiment Overview
This section demonstrates the rock-paper-scissors game functionality using gesture recognition on the K230 development board through programming.
5.14.2 Preparation
Module Connection | Module Connection
Connect the K230 development board to your PC using a Type-C data cable, as shown below:
Double-click to open CanMV IDE K230.
Click the connection button in the lower left corner.
Upon successful connection, the icon in the lower left corner of CanMV IDE will change to the following:
If the connection takes more than 10 seconds, it indicates a connection failure. Click the Cancel button, and a pop-up window will appear. Click OK and recheck the connection.
Note
Connection Failure Causes and Solutions:
Cable is not a data cable: Some Type-C cables are charging-only cables without data transfer capability. Please use a Type-C cable with data transfer functionality. The factory-supplied cable is a Type-C data cable.
Other K230 firmware was flashed: Re-flash the factory firmware, then reconnect.
5.14.3 Program Execution and Download
Display Mode Configuration:
The program can use the select_display="" parameter to choose the display mode: HDMI, LCD, or IDE virtual.
The K230 program supports two operation modes: online execution and offline execution.
Online Execution:
After connecting, drag the program hand_keypoint_class.py into the CanMV IDE K230 code editor area, then click the run button in the lower left corner to run the program online, as shown below:
Note
Programs run using this method will be lost upon disconnection or power-off and will not be saved on the development board.
Offline Execution:
After connecting, drag the program hand_keypoint_class.py into the CanMV IDE K230 code editor area, click Tools in the toolbar, and select Save open script to CanMV Board (as main.py), as shown below:
Click Yes.
Once the file is written, click OK to confirm and complete saving the MicroPython file to the K230 development board.
With this download method, when you subsequently power on the K230 development board without connecting it, the board will run the MicroPython file, enabling offline operation. | With this method, the K230 development board will automatically run the MicroPython file upon power-up without connection, enabling offline execution.
5.14.4 Program Outcome
In the returned video feed, detect the hand from the camera image, recognize the corresponding gesture, and draw the robot’s randomly chosen ‘rock-paper-scissors’ move. Record both the player’s and the robot’s moves, then analyze and output the result.
5.14.5 Program Analysis
Import Required Libraries
from libs.PipeLine import PipeLine
from libs.AIBase import AIBase
from libs.AI2D import Ai2d
from libs.Utils import *
import os,sys,ujson,gc,math
from random import randint
from media.media import *
import nncase_runtime as nn
import ulab.numpy as np
import image
import `aicube`
import aidemo
from media.media import *
from media.display import *
Display Initialization Function
def init_display(select_display):
    if select_display == 1:
        width, height = 640, 480
        Display.init(Display.LT9611, width=width, height=height, to_ide=True)
        print(f"Initialize HDMI display, resolution: {width}x{height}")
    elif select_display == 2:
        width, height = 800, 480
        Display.init(Display.ST7701, width=width, height=height, to_ide=True)
        print(f"Initialize LCD display, resolution: {width}x{height}")
    elif select_display == 3:
        width, height = 1920, 1080
        Display.init(Display.VIRT, width=width, height=height, fps=100, to_ide=True)
        print(f"Initialize IDE virtual display, resolution: {width}x{height}")
    else:
        raise ValueError("select_display parameter error, must be 1, 2, or 3")
    return width, height
Define a function to initialize the display. It takes one parameter, select_display, which specifies the display type using a numeric code, and returns the display width and height in pixels.
Hand Detection Class HandDetApp
# Custom hand detection task class
class HandDetApp(AIBase):
    def __init__(self,kmodel_path,labels,model_input_size,anchors,confidence_threshold=0.2,nms_threshold=0.5,nms_option=False, strides=[8,16,32],rgb888p_size=[1920,1080],display_size=[1920,1080],debug_mode=0):
        super().__init__(kmodel_path,model_input_size,rgb888p_size,debug_mode)
        self.kmodel_path=kmodel_path
        self.labels=labels
        self.model_input_size=model_input_size
        self.confidence_threshold=confidence_threshold
        self.nms_threshold=nms_threshold
        self.anchors=anchors
        self.strides = strides
        self.nms_option = nms_option
        self.rgb888p_size=[ALIGN_UP(rgb888p_size[0],16),rgb888p_size[1]]
        self.display_size=[ALIGN_UP(display_size[0],16),display_size[1]]
        self.debug_mode=debug_mode
        self.ai2d=Ai2d(debug_mode)
        self.ai2d.set_ai2d_dtype(nn.ai2d_format.NCHW_FMT,nn.ai2d_format.NCHW_FMT,np.uint8, np.uint8)

    def config_preprocess(self,input_image_size=None):
        with ScopedTiming("set preprocess config",self.debug_mode > 0):
            ai2d_input_size = input_image_size if input_image_size else self.rgb888p_size
            top, bottom, left, right,_ = center_pad_param(self.rgb888p_size,self.model_input_size)
            self.ai2d.pad([0, 0, 0, 0, top, bottom, left, right], 0, [114, 114, 114])
            self.ai2d.resize(nn.interp_method.tf_bilinear, nn.interp_mode.half_pixel)
            self.ai2d.build([1,3,ai2d_input_size[1],ai2d_input_size[0]],[1,3,self.model_input_size[1],self.model_input_size[0]])

    def postprocess(self,results):
        with ScopedTiming("postprocess",self.debug_mode > 0):
            dets = `aicube`.anchorbasedet_post_process(results[0], results[1], results[2], self.model_input_size, self.rgb888p_size, self.strides, len(self.labels), self.confidence_threshold, self.nms_threshold, self.anchors, self.nms_option)
            return dets
Perform hand detection on the images captured by the camera and return the hand bounding box in the format (x1, y1, x2, y2).
HandKPClassApp Hand Gesture Keypoint Classification Task Class
# Custom hand gesture keypoint classification task class
class HandKPClassApp(AIBase):
    def __init__(self,kmodel_path,model_input_size,rgb888p_size=[1920,1080],display_size=[1920,1080],debug_mode=0):
        super().__init__(kmodel_path,model_input_size,rgb888p_size,debug_mode)
        self.kmodel_path=kmodel_path
        self.model_input_size=model_input_size
        self.rgb888p_size=[ALIGN_UP(rgb888p_size[0],16),rgb888p_size[1]]
        self.display_size=[ALIGN_UP(display_size[0],16),display_size[1]]
        self.crop_params=[]
        self.debug_mode=debug_mode
        self.ai2d=Ai2d(debug_mode)
        self.ai2d.set_ai2d_dtype(nn.ai2d_format.NCHW_FMT,nn.ai2d_format.NCHW_FMT,np.uint8, np.uint8)

    def config_preprocess(self,det,input_image_size=None):
        with ScopedTiming("set preprocess config",self.debug_mode > 0):
            ai2d_input_size=input_image_size if input_image_size else self.rgb888p_size
            self.crop_params = self.get_crop_param(det)
            self.ai2d.crop(self.crop_params[0],self.crop_params[1],self.crop_params[2],self.crop_params[3])
            self.ai2d.resize(nn.interp_method.tf_bilinear, nn.interp_mode.half_pixel)
            self.ai2d.build([1,3,ai2d_input_size[1],ai2d_input_size[0]],[1,3,self.model_input_size[1],self.model_input_size[0]])
Use the hand bounding box returned by the HandDetApp class to perform hand keypoint detection. Calculate joint angles based on the keypoints and determine the specific hand gesture.
FingerGuess Rock-Paper-Scissors Task Class
if __name__=="__main__":
    width, height = init_display(select_display)
    display_mode_map = {"hdmi":"hdmi", "lcd":"lcd", "lt9611":"hdmi", "st7701":"lcd","hx8399":"lcd"}
    display_mode = display_mode_map.get("lcd")  # Default by HDMI, can be changed to LCD based on requirements
    rgb888p_size = [1280, 720]
    hand_det_kmodel_path="/sdcard/examples/kmodel/hand_det.kmodel"
    hand_kp_kmodel_path="/sdcard/examples/kmodel/handkp_det.kmodel"
    anchors = [26,27, 53,52, 75,71, 80,99, 106,82, 99,134, 140,113, 161,172, 245,276]
    hand_det_input_size=[512,512]
    hand_kp_input_size=[256,256]
    confidence_threshold=0.2
    nms_threshold=0.5
    labels=["hand"]
    guess_mode = 3

    pl=PipeLine(rgb888p_size=rgb888p_size,display_mode=display_mode)
    pl.create()
    display_size=pl.get_display_size()

    hkc=FingerGuess(hand_det_kmodel_path,hand_kp_kmodel_path,det_input_size=hand_det_input_size,kp_input_size=hand_kp_input_size,
                    labels=labels,anchors=anchors,confidence_threshold=confidence_threshold,nms_threshold=nms_threshold,nms_option=False,
                    strides=[8,16,32],guess_mode=guess_mode,rgb888p_size=rgb888p_size,display_size=display_size)
Perform hand detection and keypoint recognition to play a rock-paper-scissors game, and display text and prompts on the screen.
Main Program
if __name__=="__main__":
    width, height = init_display(select_display)
    display_mode_map = {"hdmi":"hdmi", "lcd":"lcd", "lt9611":"hdmi", "st7701":"lcd","hx8399":"lcd"}
    display_mode = display_mode_map.get("lcd")  # Default by HDMI, can be changed to LCD based on requirements
    rgb888p_size = [1280, 720]
    hand_det_kmodel_path="/sdcard/examples/kmodel/hand_det.kmodel"
    hand_kp_kmodel_path="/sdcard/examples/kmodel/handkp_det.kmodel"
    anchors = [26,27, 53,52, 75,71, 80,99, 106,82, 99,134, 140,113, 161,172, 245,276]
    hand_det_input_size=[512,512]
    hand_kp_input_size=[256,256]
    confidence_threshold=0.2
    nms_threshold=0.5
    labels=["hand"]
    guess_mode = 3

    pl=PipeLine(rgb888p_size=rgb888p_size,display_mode=display_mode)
    pl.create()
    display_size=pl.get_display_size()

    hkc=FingerGuess(hand_det_kmodel_path,hand_kp_kmodel_path,det_input_size=hand_det_input_size,kp_input_size=hand_kp_input_size,
                    labels=labels,anchors=anchors,confidence_threshold=confidence_threshold,nms_threshold=nms_threshold,nms_option=False,
                    strides=[8,16,32],guess_mode=guess_mode,rgb888p_size=rgb888p_size,display_size=display_size)
rgb888p_size = [128,720]defines the resolution used for initializing camera sampling.hand_kp_kmodel_path="/sdcard/examples/kmodel/handkp_det.kmodel"defines the model pathhand_det_input_size = [512,512]defines the model input size.pl=PipeLine(rgb888p_size=rgb888p_size,display_mode=display_modecreates a video object.pl.create()initializes the video object.display_size=pl.get_display_size()gets the actual display size.
       try:
           while True:
               with ScopedTiming("total",1):
                   img=pl.get_frame()
                   det_boxes,gesture_res=hkc.run(img)
                   hkc.draw_result(pl,det_boxes,gesture_res)
                   pl.show_image()
                   gc.collect()
       except KeyboardInterrupt:
           pass
       finally:
           hkc.hand_det.deinit()
           hkc.hand_kp.deinit()
           pl.destroy()
           deinit_display()
img=pl.get_frame()captures one RGB image frame.Use
det_boxes, gesture_res = hkc.run(img)to runFingerGuess, which performs hand detection, then keypoint recognition, and finally outputs the gesture result.dg.draw_result(pl, output1, output2)overlays arrows, prompt images, or text to the OSD layer based on current state and inference results.Use
hkc.draw_result(pl, det_boxes, gesture_res)to render the results on the OSD layer, showing prompts, images, and scores according to the detected gesture or mode.Use
pl.show_image()to render a frame to the screen with the OSD overlaid on the display layer.finally: Manually perform garbage collection in the loop to prevent memory leaks. Press Ctrl+C to safely exit, which triggers the destructor to release all model and hardware resources.
5.15 License Plate Detection
5.15.1 Experiment Overview
This section demonstrates license plate detection functionality on the K230 development board through programming, using rectangular boxes to indicate detected plates.
5.15.2 Preparation
Module Connection | Module Connection
Connect the K230 development board to your PC using a Type-C data cable, as shown below:

Double-click to open CanMV IDE K230.

Click the connection button in the lower left corner.

Upon successful connection, the icon in the lower left corner of CanMV IDE will change to the following:

If the connection takes more than 10 seconds, it indicates a connection failure. Click the Cancel button, and a pop-up window will appear. Click OK and recheck the connection.

Note
Connection Failure Causes and Solutions:
Cable is not a data cable: Some Type-C cables are charging-only cables without data transfer capability. Please use a Type-C cable with data transfer functionality. The factory-supplied cable is a Type-C data cable.
Other K230 firmware was flashed: Re-flash the factory firmware, then reconnect.
5.15.3 Program Execution and Download
Display Mode Configuration:
The program can use the select_display="" parameter to choose the display mode: HDMI, LCD, or IDE virtual.

The K230 program supports two operation modes: online execution and offline execution.
Online Running: After connecting, drag the program licence_det.py into the CanMV IDE K230 code editor area, then click the run button  in the lower left corner to run the program online, as shown below:
Note
Programs run using this method will be lost upon disconnection or power-off and will not be saved on the development board.
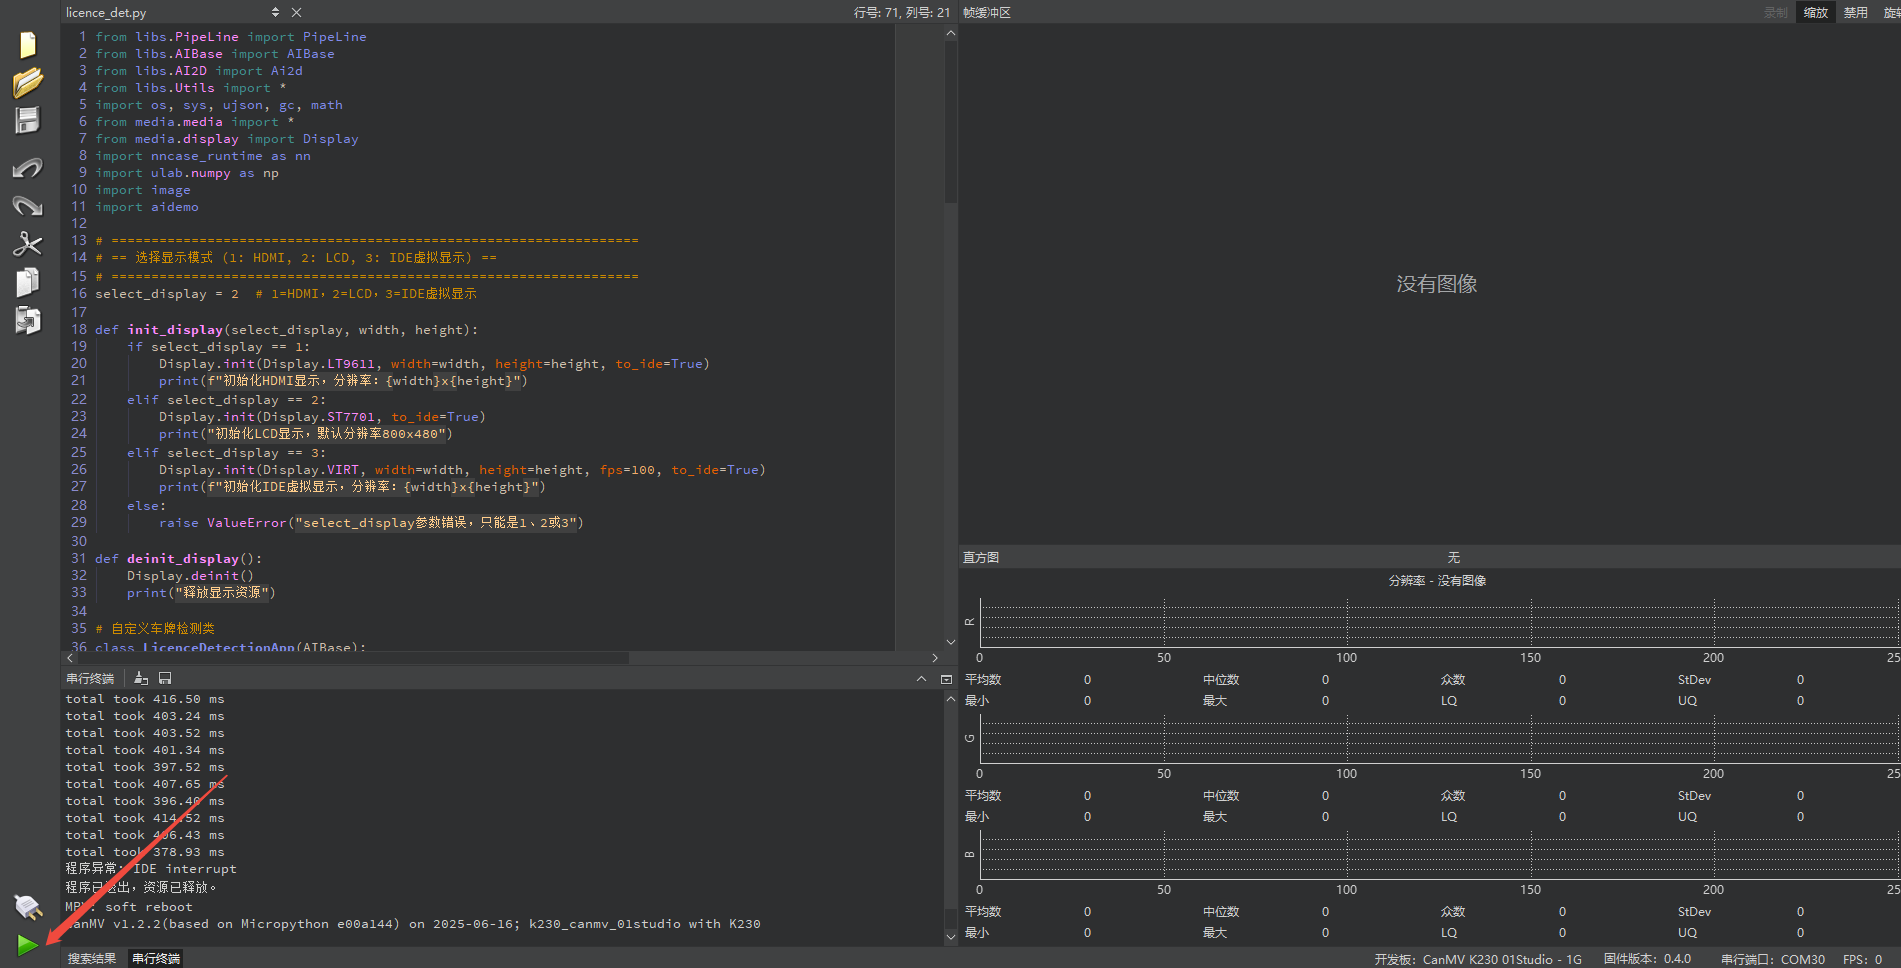
Offline Execution:
After connecting, drag the program licence_det.py into the CanMV IDE K230 code editor area, click Tools in the toolbar, and select Save open script to CanMV Board (as main.py), as shown below:

Click Yes.

Once the file is written, click OK to confirm and complete saving the MicroPython file to the K230 development board.

With this method, the K230 development board will automatically run the MicroPython file upon power-up without connection, enabling offline execution.
5.15.4 Program Outcome
Detect all license plates in real time from the camera feed and mark each with a green quadrilateral that tightly fits the plate’s actual contour.
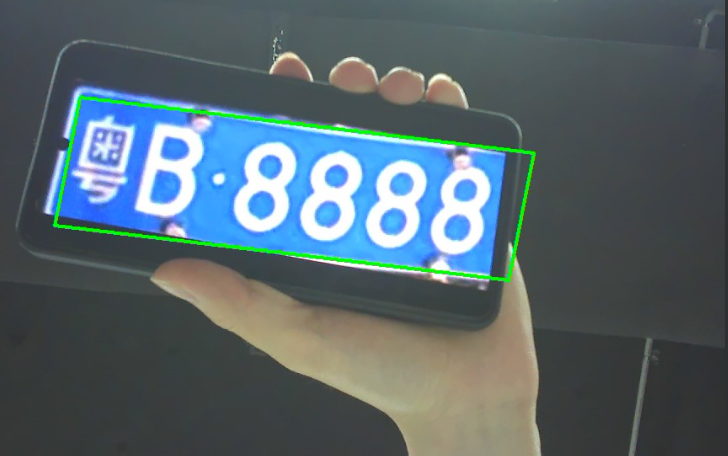
5.15.5 Program Analysis
Import Required Libraries
from libs.PipeLine import PipeLine
from libs.AIBase import AIBase
from libs.AI2D import Ai2d
from libs.Utils import *
import os, sys, ujson, gc, math
from media.media import *
from media.display import Display
import nncase_runtime as nn
import ulab.numpy as np
import image
import aidemo
License Plate Detection
class LicenceDetectionApp(AIBase):
    def __init__(self, kmodel_path, model_input_size, confidence_threshold=0.5, nms_threshold=0.2, rgb888p_size=[224,224], display_size=[1920,1080], debug_mode=0):
        super().__init__(kmodel_path, model_input_size, rgb888p_size, debug_mode)
        self.kmodel_path = kmodel_path
        self.model_input_size = model_input_size
        self.confidence_threshold = confidence_threshold
        self.nms_threshold = nms_threshold
        self.rgb888p_size = [ALIGN_UP(rgb888p_size[0], 16), rgb888p_size[1]]
        self.display_size = [ALIGN_UP(display_size[0], 16), display_size[1]]
        self.debug_mode = debug_mode
        self.ai2d = Ai2d(debug_mode)
        self.ai2d.set_ai2d_dtype(nn.ai2d_format.NCHW_FMT,
                                 nn.ai2d_format.NCHW_FMT,
                                 np.uint8, np.uint8)
Load key parameters such as Kmodel model path, input resolution
(model_input_size), and thresholds for filtering invalid detection boxes(mask_threshold, box_threshold).Call the highly encapsulated library function
aicube.ocr_post_process.aicubeautomatically processes all the complex decoding steps, translating the raw feature map into a structured list where each entry includes a cropped text image and its coordinates in the original image.
Draw Results
    def draw_result(self, pl, dets):
        with ScopedTiming("display_draw", self.debug_mode > 0):
            pl.osd_img.clear()
            if dets:
                point_8 = np.zeros((8), dtype=np.int16)
                for det in dets:
                    for i in range(4):
                        x = det[i*2+0] / self.rgb888p_size[0] * self.display_size[0]
                        y = det[i*2+1] / self.rgb888p_size[1] * self.display_size[1]
                        point_8[i*2+0] = int(x)
                        point_8[i*2+1] = int(y)
                    for i in range(4):
                        pl.osd_img.draw_line(
                            point_8[i*2+0], point_8[i*2+1],
                            point_8[((i+1)%4)*2+0], point_8[((i+1)%4)*2+1],
                            color=(255, 0, 255, 0), thickness=4)
pl.osd_img.clear(): Clear the previous frame’s OSD (On-Screen Display) layer before each drawing.Iterate through each license plate in the detection results
detslist.Connect the four vertices sequentially through
pl.osd_img.draw_lineto form a closed green quadrilateral.Using
((i+1) % 4)guarantees that the points are connected in order, forming the sequence: point 0 → point 1 → point 2 → point 3 → point 0.
5.16 License Plate Recognition
5.16.1 Experiment Overview
This section demonstrates license plate recognition functionality on the K230 development board through programming, using rectangular boxes to indicate detected plates and displaying license plate numbers.
5.16.2 Preparation
Module Connection | Module Connection
Connect the K230 development board to your PC using a Type-C data cable, as shown below:

Double-click to open CanMV IDE K230.

Click the connection button in the lower left corner.

Upon successful connection, the icon in the lower left corner of CanMV IDE will change to the following:

If the connection takes more than 10 seconds, it indicates a connection failure. Click the Cancel button, and a pop-up window will appear. Click OK and recheck the connection.

Note
Connection Failure Causes and Solutions:
Cable is not a data cable: Some Type-C cables are charging-only cables without data transfer capability. Please use a Type-C cable with data transfer functionality. The factory-supplied cable is a Type-C data cable.
Other K230 firmware was flashed: Re-flash the factory firmware, then reconnect.
5.16.3 Program Execution and Download
Display Mode Configuration:
The program can use the select_display="" parameter to choose the display mode: HDMI, LCD, or IDE virtual.

The K230 program supports two operation modes: online execution and offline execution.
Online Execution:
After connecting, drag the program licence_det_rec.py into the CanMV IDE K230 code editor area, then click the run button  in the lower left corner to run the program online, as shown below:
Note
Programs run using this method will be lost upon disconnection or power-off and will not be saved on the development board.
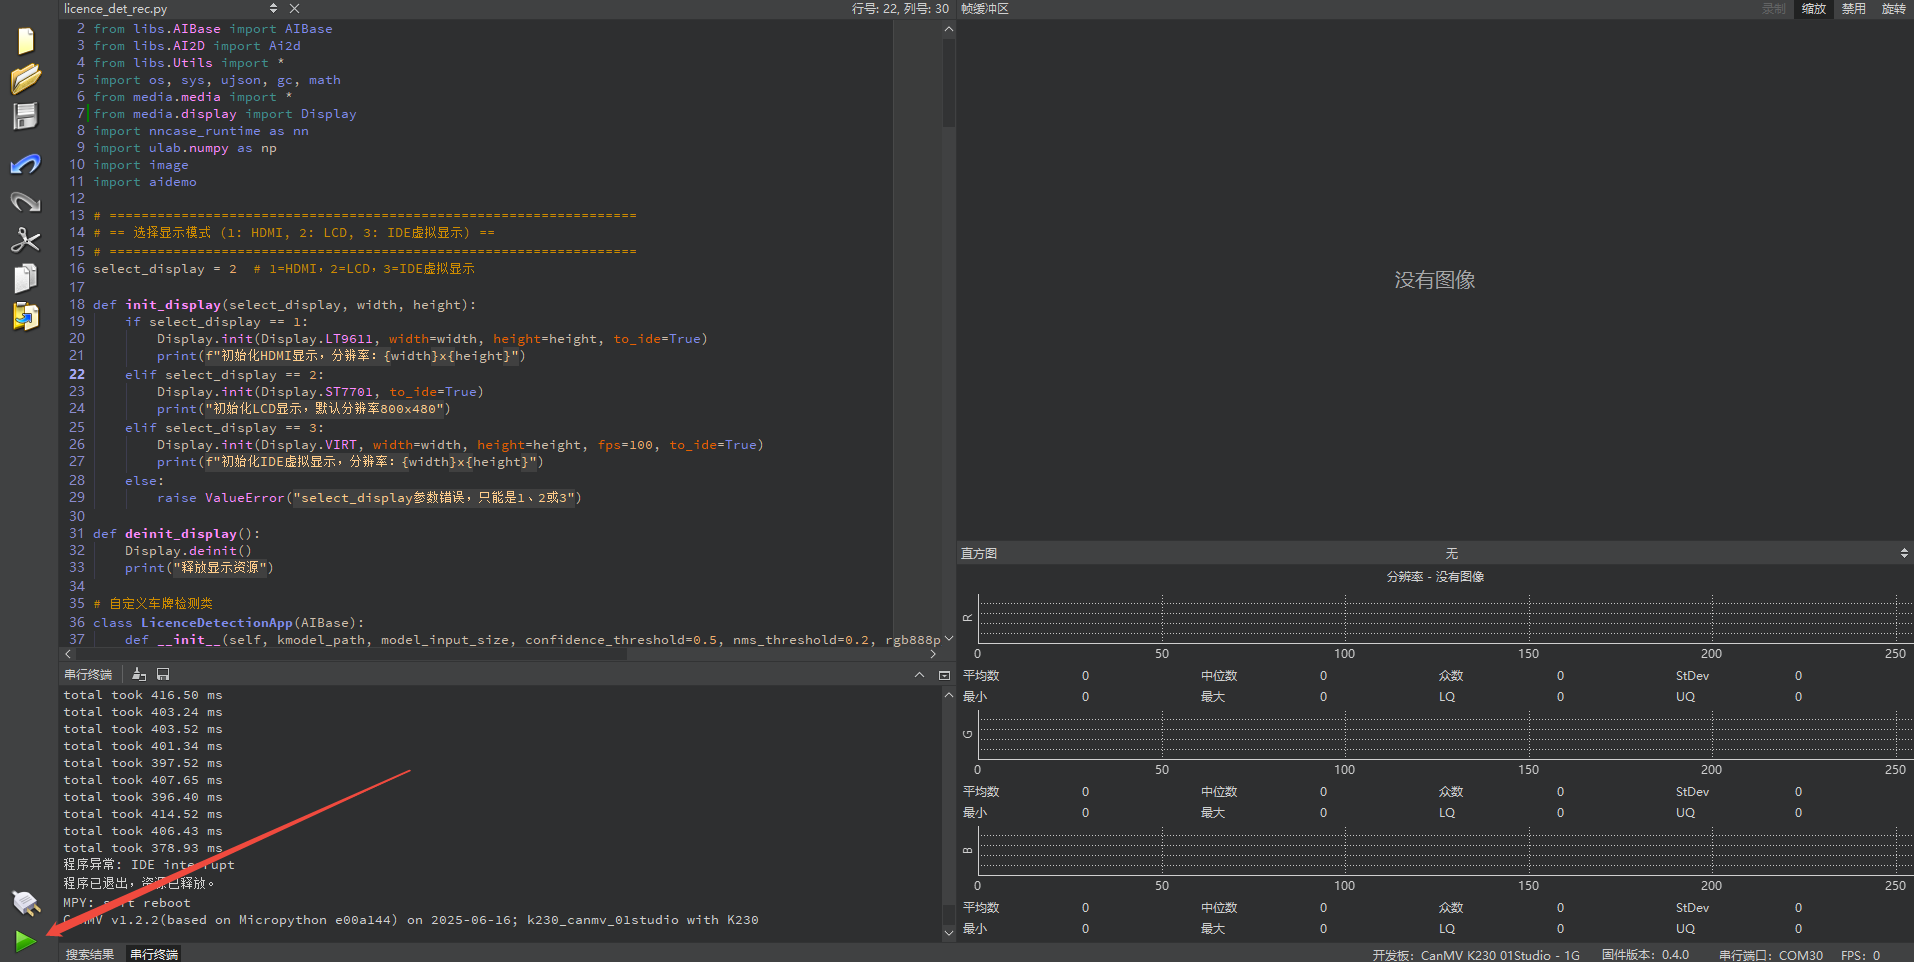
Offline Execution:
After connecting, drag the program licence_det_rec.py from this section’s directory into the CanMV IDE K230 code editor area, click Tools in the toolbar, and select Save open script to CanMV Board (as main.py), as shown below:

Click Yes.

Once the file is written, click OK to confirm and complete saving the MicroPython file to the K230 development board.

With this method, the K230 development board will automatically run the MicroPython file upon power-up without connection, enabling offline execution.
5.16.4 Program Outcome
Draw a precise green quadrilateral around the license plate, closely following its actual contour, and recognize the license plate content.
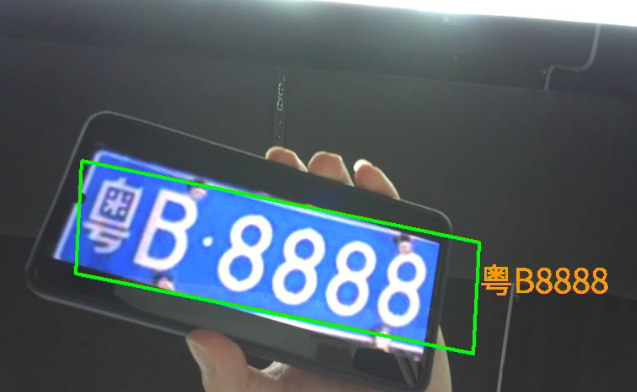
5.16.5 Program Analysis
Import Required Libraries
from libs.PipeLine import PipeLine
from libs.AIBase import AIBase
from libs.AI2D import Ai2d
from libs.Utils import *
import os, sys, ujson, gc, math
from media.media import *
from media.display import Display
import nncase_runtime as nn
import ulab.numpy as np
import image
import aidemo
License Plate Detection
# Custom license plate detection class
class LicenceDetectionApp(AIBase):
    def __init__(self, kmodel_path, model_input_size, confidence_threshold=0.5, nms_threshold=0.2, rgb888p_size=[224,224], display_size=[1920,1080], debug_mode=0):
        super().__init__(kmodel_path, model_input_size, rgb888p_size, debug_mode)
        self.kmodel_path = kmodel_path
        self.model_input_size = model_input_size
        self.confidence_threshold = confidence_threshold
        self.nms_threshold = nms_threshold
        self.rgb888p_size = [ALIGN_UP(rgb888p_size[0],16), rgb888p_size[1]]
        self.display_size = [ALIGN_UP(display_size[0],16), display_size[1]]
        self.debug_mode = debug_mode
        self.ai2d = Ai2d(debug_mode)
        self.ai2d.set_ai2d_dtype(nn.ai2d_format.NCHW_FMT,
                                 nn.ai2d_format.NCHW_FMT,
                                 np.uint8, np.uint8)
self.kmodel_path = kmodel_path: Path to license plate detection model.self.model_input_size = model_input_size: Model input resolution.self.confidence_threshold = confidence_threshold: Detection confidence threshold.return det_res: Return detection boxes.
License Plate Recognition
# Custom license plate recognition class
class LicenceRecognitionApp(AIBase):
    def __init__(self, kmodel_path, model_input_size, rgb888p_size=[1920,1080], display_size=[1920,1080], debug_mode=0):
        super().__init__(kmodel_path, model_input_size, rgb888p_size, debug_mode)
        self.kmodel_path = kmodel_path
        self.model_input_size = model_input_size
        self.rgb888p_size = [ALIGN_UP(rgb888p_size[0],16), rgb888p_size[1]]
        self.display_size = [ALIGN_UP(display_size[0],16), display_size[1]]
        self.debug_mode = debug_mode
        self.dict_rec = ["挂", "使", "领", "澳", "港", "皖", "沪", "津", "渝", "冀", "晋", "蒙", "辽", "吉", "黑", "苏", "浙",
                         "京", "闽", "赣", "鲁", "豫", "鄂", "湘", "粤", "桂", "琼", "川", "贵", "云", "藏", "陕", "甘", "青",
                         "宁", "新", "警", "学", "0", "1", "2", "3", "4", "5", "6", "7", "8", "9", "A", "B", "C", "D", "E",
                         "F", "G", "H", "J", "K", "L", "M", "N", "P", "Q", "R", "S", "T", "U", "V", "W", "X", "Y", "Z", "_", "-"]
        self.dict_size = len(self.dict_rec)
        self.ai2d = Ai2d(debug_mode)
        self.ai2d.set_ai2d_dtype(nn.ai2d_format.NCHW_FMT,
                                 nn.ai2d_format.NCHW_FMT,
                                 np.uint8, np.uint8)

    def config_preprocess(self, input_image_size=None):
        with ScopedTiming("set preprocess config", self.debug_mode > 0):
            ai2d_input_size = input_image_size if input_image_size else self.rgb888p_size
            self.ai2d.resize(nn.interp_method.tf_bilinear, nn.interp_mode.half_pixel)
            self.ai2d.build([1,3, ai2d_input_size[1], ai2d_input_size[0]],
                            [1,3, self.model_input_size[1], self.model_input_size[0]])

    def postprocess(self, results):
        with ScopedTiming("postprocess", self.debug_mode > 0):
            output_data = results[0].reshape((-1, self.dict_size))
            max_indices = np.argmax(output_data, axis=1)
            result_str = ""
            for i in range(max_indices.shape[0]):
                index = max_indices[i]
                if index > 0 and (i == 0 or index != max_indices[i - 1]):
                    result_str += self.dict_rec[index - 1]
            return result_str
self.dict_rec = []: Dictionary Table: License plate character categories, including digits, letters, and special symbols.
nself.dict_size = len(self.dict_rec): Get dictionary size.def config_preprocess(): Configure preprocessing for the recognition model.def postprocess(): Perform post-processing on the recognition model output to decode it into a license plate string.
License Plate Recognition Integration
Initialize Parameters
# Custom license plate recognition class
class LicenceRecognitionApp(AIBase):
    def __init__(self, kmodel_path, model_input_size, rgb888p_size=[1920,1080], display_size=[1920,1080], debug_mode=0):
        super().__init__(kmodel_path, model_input_size, rgb888p_size, debug_mode)
        self.kmodel_path = kmodel_path
        self.model_input_size = model_input_size
        self.rgb888p_size = [ALIGN_UP(rgb888p_size[0],16), rgb888p_size[1]]
        self.display_size = [ALIGN_UP(display_size[0],16), display_size[1]]
        self.debug_mode = debug_mode
        self.dict_rec = ["挂", "使", "领", "澳", "港", "皖", "沪", "津", "渝", "冀", "晋", "蒙", "辽", "吉", "黑", "苏", "浙",
                         "京", "闽", "赣", "鲁", "豫", "鄂", "湘", "粤", "桂", "琼", "川", "贵", "云", "藏", "陕", "甘", "青",
                         "宁", "新", "警", "学", "0", "1", "2", "3", "4", "5", "6", "7", "8", "9", "A", "B", "C", "D", "E",
                         "F", "G", "H", "J", "K", "L", "M", "N", "P", "Q", "R", "S", "T", "U", "V", "W", "X", "Y", "Z", "_", "-"]
        self.dict_size = len(self.dict_rec)
        self.ai2d = Ai2d(debug_mode)
        self.ai2d.set_ai2d_dtype(nn.ai2d_format.NCHW_FMT,
                                 nn.ai2d_format.NCHW_FMT,
                                 np.uint8, np.uint8)
Initialize Detection Model
        self.licence_det = LicenceDetectionApp(self.licence_det_kmodel,
                                               model_input_size=self.det_input_size,
                                               confidence_threshold=self.confidence_threshold,
                                               nms_threshold=self.nms_threshold,
                                               rgb888p_size=self.rgb888p_size,
                                               display_size=self.display_size,
                                               debug_mode=0)
Initialize Recognition Model
        self.licence_rec = LicenceRecognitionApp(self.licence_rec_kmodel,
                                                 model_input_size=self.rec_input_size,
                                                 rgb888p_size=self.rgb888p_size,
                                                 display_size=self.display_size)
        self.licence_det.config_preprocess()
Detection and Recognition Pipeline
    def run(self, input_np):
        det_boxes = self.licence_det.run(input_np)
        imgs_array_boxes = aidemo.ocr_rec_preprocess(input_np,
                                                     [self.rgb888p_size[1], self.rgb888p_size[0]],
                                                     det_boxes)
        imgs_array = imgs_array_boxes[0]
        boxes = imgs_array_boxes[1]
        rec_res = []
        for img_array in imgs_array:
            self.licence_rec.config_preprocess(input_image_size=[img_array.shape[3], img_array.shape[2]])
            licence_str = self.licence_rec.run(img_array)
            rec_res.append(licence_str)
            gc.collect()
        return det_boxes, rec_res
Draw Detection and Recognition Results on Screen
    def draw_result(self, pl, det_res, rec_res):
        pl.osd_img.clear()
        if det_res:
            point_8 = np.zeros((8), dtype=np.int16)
            for det_index in range(len(det_res)):
                for i in range(4):
                    x = det_res[det_index][i * 2 + 0]/self.rgb888p_size[0]*self.display_size[0]
                    y = det_res[det_index][i * 2 + 1]/self.rgb888p_size[1]*self.display_size[1]
                    point_8[i * 2 + 0] = int(x)
                    point_8[i * 2 + 1] = int(y)
                for i in range(4):
                    pl.osd_img.draw_line(point_8[i * 2 + 0], point_8[i * 2 + 1],
                                         point_8[(i+1) % 4 * 2 + 0], point_8[(i+1) % 4 * 2 + 1],
                                         color=(255, 0, 255, 0), thickness=4)
                pl.osd_img.draw_string_advanced(point_8[6], point_8[7] + 20, 40,
                                               rec_res[det_index], color=(255, 255, 153, 18))
Main Program
if __name__ == "__main__":
    # Select display mode
    display_mode_map = {1: "hdmi", 2:"lcd", 3:"ide"}
    select_display = 2  # 1=HDMI, 2=LCD, 3=IDE Virtual Display
    display_mode = display_mode_map.get(select_display, "hdmi")

    if display_mode == "hdmi":
        display_size = [1920, 1080]
    elif display_mode == "lcd":
        display_size = [800, 480]
    else:
        display_size = [1280, 720]

    rgb888p_size = [640, 360]
select_display = 2: Set to LCD output.display_mode: Set resolutions for different display modes.rgb888p_size = [640, 360]: Set input image resolution.
    licence_det_kmodel_path = "/sdcard/examples/kmodel/LPD_640.kmodel"
    licence_rec_kmodel_path = "/sdcard/examples/kmodel/licence_reco.kmodel"
    licence_det_input_size = [640, 640]
    licence_rec_input_size = [220, 32]
    confidence_threshold = 0.2
    nms_threshold = 0.2
licence_det_kmodel_path: Set model path.licence_det_input_size: Set license plate detection model size.licence_rec_input_size: Set license plate recognition model size.confidence_threshold = 0.2: Set detection confidence threshold.nms_threshold = 0.2: NMS threshold.
    # Initialize display
    def init_display(select_display, width, height):
        if select_display == 1:
            Display.init(Display.LT9611, width=width, height=height, to_ide=True)
            print(f"Initialize HDMI display, resolution: {width}x{height}")
        elif select_display == 2:
            Display.init(Display.ST7701, to_ide=True)
            print("Initialize LCD display, default resolution 800x480")
        elif select_display == 3:
            Display.init(Display.VIRT, width=width, height=height, fps=100, to_ide=True)
            print(f"Initialize IDE virtual display, resolution: {width}x{height}")
        else:
            raise ValueError("select_display parameter error, must be 1, 2, or 3")
Initialize display for different modes.
    init_display(select_display, display_size[0], display_size[1])

    pl = PipeLine(rgb888p_size=rgb888p_size, display_mode=display_mode)
    pl.create()
    display_size = pl.get_display_size()

    lr = LicenceRec(licence_det_kmodel_path, licence_rec_kmodel_path,
                    det_input_size=licence_det_input_size,
                    rec_input_size=licence_rec_input_size,
                    confidence_threshold=confidence_threshold,
                    nms_threshold=nms_threshold,
                    rgb888p_size=rgb888p_size,
                    display_size=display_size,
                    debug_mode=0)
init_display(): Initialize display device.
    lr = LicenceRec(licence_det_kmodel_path, licence_rec_kmodel_path,
                    det_input_size=licence_det_input_size,
                    rec_input_size=licence_rec_input_size,
                    confidence_threshold=confidence_threshold,
                    nms_threshold=nms_threshold,
                    rgb888p_size=rgb888p_size,
                    display_size=display_size,
                    debug_mode=0)
init_display(): Initialize overall license plate recognition pipeline.
    try:
        while True:
            with ScopedTiming("total", 1):
                img = pl.get_frame()
                det_res, rec_res = lr.run(img)
                lr.draw_result(pl, det_res, rec_res)
                pl.show_image()
                gc.collect()
    except KeyboardInterrupt:
        print("User interrupted program")  # Program stopped by user
    finally:
        lr.licence_det.deinit()
        lr.licence_rec.deinit()
        pl.destroy()
        deinit_display()
with ScopedTiming("total", 1): Timer to track elapsed time.img = pl.get_frame(): Capture one image frame from the camera.det_res, rec_res = lr.run(img): Execute detection and recognition.lr.draw_result(pl, det_res, rec_res): Draw results on the image.pl.show_image(): Display the image.gc.collect(): Memory garbage collection.
5.17 Character Detection
5.17.1 Experiment Overview
This section demonstrates character detection functionality on the K230 development board through programming, determining character shapes by detecting dark and light patterns.
5.17.2 Preparation
Module Connection
Connect the K230 development board to your PC using a Type-C data cable, as shown below:

Double-click to open CanMV IDE K230.

Click the connection button in the lower left corner.

Upon successful connection, the icon in the lower left corner of CanMV IDE will change to the following:
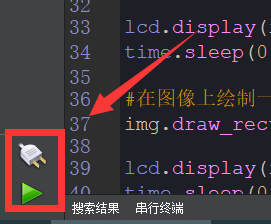
If the connection takes more than 10 seconds, it indicates a connection failure. Click the Cancel button, and a pop-up window will appear. Click OK and recheck the connection.

Note
Connection Failure Causes and Solutions:
Cable is not a data cable: Some Type-C cables are charging-only cables without data transfer capability. Please use a Type-C cable with data transfer functionality. The factory-supplied cable is a Type-C data cable.
Other K230 firmware was flashed: Re-flash the factory firmware, then reconnect.
5.17.3 Program Execution and Download
Display Mode Configuration:
The program can use the select_display="" parameter to choose the display mode: HDMI, LCD, or IDE virtual.

The K230 program supports two operation modes: online execution and offline execution.
Online Execution:
After connecting, drag the program ocr_det.py into the CanMV IDE K230 code editor area, then click the run button  in the lower left corner to run the program online, as shown below:
Note
Programs run using this method will be lost upon disconnection or power-off and will not be saved on the development board.
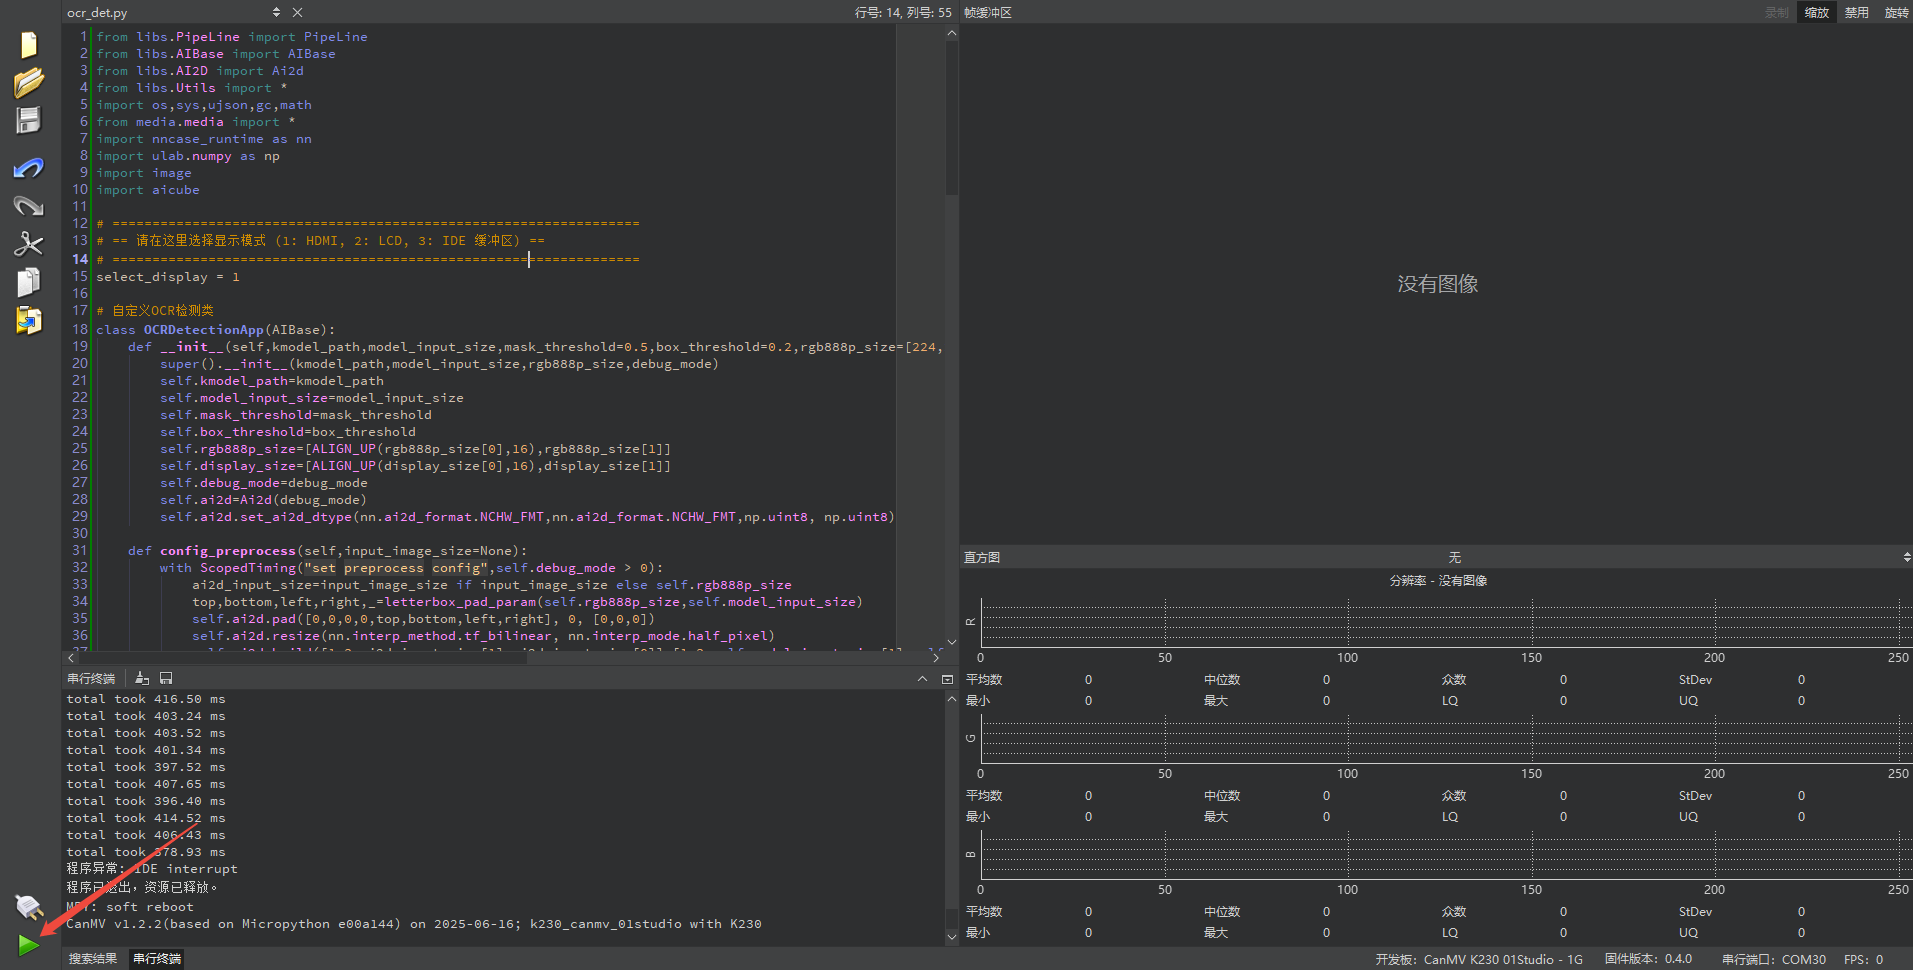
Offline Execution:
After connecting, drag the program ocr_det.py from this section’s directory into the CanMV IDE K230 code editor area, click Tools in the toolbar, and select Save open script to CanMV Board (as main.py), as shown below:

Click Yes.

Once the file is written, click OK to confirm and complete saving the MicroPython file to the K230 development board.

With this download method, when you subsequently power on the K230 development board without connecting it, the board will run the MicroPython file, enabling offline operation. | With this method, the K230 development board will automatically run the MicroPython file upon power-up without connection, enabling offline execution.
5.17.4 Program Outcome
The device acts as a real-time ‘text position scanner’, performing text recognition on the dynamic video captured by the camera.
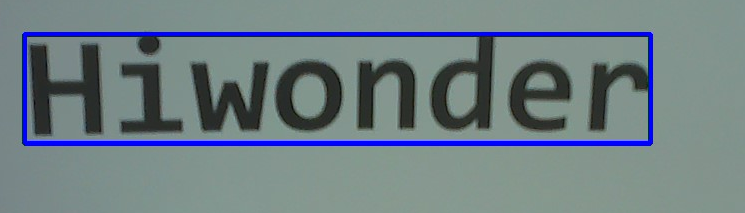
5.17.5 Program Analysis
Import Required Libraries
from libs.PipeLine import PipeLine
from libs.AIBase import AIBase
from libs.AI2D import Ai2d
from libs.Utils import *
import os,sys,ujson,gc,math
from media.media import *
import nncase_runtime as nn
import ulab.numpy as np
import image
import `aicube`
Text Detection
# Custom OCR detection class
class OCRDetectionApp(AIBase):
    def __init__(self,kmodel_path,model_input_size,mask_threshold=0.5,box_threshold=0.2,rgb888p_size=[224,224],display_size=[1920,1080],debug_mode=0):
        super().__init__(kmodel_path,model_input_size,rgb888p_size,debug_mode)
        self.kmodel_path=kmodel_path
        self.model_input_size=model_input_size
        self.mask_threshold=mask_threshold
        self.box_threshold=box_threshold
        self.rgb888p_size=[ALIGN_UP(rgb888p_size[0],16),rgb888p_size[1]]
        self.display_size=[ALIGN_UP(display_size[0],16),display_size[1]]
        self.debug_mode=debug_mode
        self.ai2d=Ai2d(debug_mode)
        self.ai2d.set_ai2d_dtype(nn.ai2d_format.NCHW_FMT,nn.ai2d_format.NCHW_FMT,np.uint8, np.uint8)
Load key parameters, such as the Kmodel path, input resolution
model_input_size, and thresholdsmask_thresholdandbox_thresholdfor filtering invalid detection boxes.Call the highly encapsulated library function
aicube.ocr_post_process.aicubeautomatically processes all the complex decoding steps, translating the raw feature map into a structured list where each entry includes a cropped text image and its coordinates in the original image.
Draw Results
def draw_detection_result(pl, det_res, rgb888p_size, display_size):
    pl.osd_img.clear()
    if not det_res:
        return

    for det in det_res:
        # The det structure returned by `aicube`.ocr_post_process is [cropped image, coordinate list]
        # We only need the coordinate list det[1] to draw the bounding box
        box_coords = det[1]
        for i in range(4):
            x1 = box_coords[(i * 2)] / rgb888p_size[0] * display_size[0]
            y1 = box_coords[(i * 2 + 1)] / rgb888p_size[1] * display_size[1]
            x2 = box_coords[((i + 1) * 2) % 8] / rgb888p_size[0] * display_size[0]
            y2 = box_coords[((i + 1) * 2 + 1) % 8] / rgb888p_size[1] * display_size[1]
            # Draw red detection boxes
            pl.osd_img.draw_line((int(x1), int(y1), int(x2), int(y2)), color=(255, 0, 0, 255), thickness=5)
Draw red detection boxes on the screen layer.
pl.osd_img.clear(): Clear the previous frame’s OSD content before each drawing.For each detected text item
det, extract coordinate informationdet[1].Then, convert these coordinates proportionally to match the
display_sizecoordinates based on AI input imagergb888p_sizecoordinates.Finally, call
pl.osd_img.draw_lineto connect the four vertices, forming a red quadrilateral box.
5.18 Character Recognition
5.18.1 Experiment Overview
This section demonstrates character recognition functionality on the K230 development board through programming, determining character shapes by detecting dark and light patterns, and recognizing the text.
5.18.2 Preparation
Module Connection
Connect the K230 development board to your PC using a Type-C data cable, as shown below:

Double-click to open CanMV IDE K230.

Click the connection button in the lower left corner.

Upon successful connection, the icon in the lower left corner of CanMV IDE will change to the following:

If the connection takes more than 10 seconds, it indicates a connection failure. Click the Cancel button, and a pop-up window will appear. Click OK and recheck the connection.

Note
Connection Failure Causes and Solutions:
Cable is not a data cable: Some Type-C cables are charging-only cables without data transfer capability. Please use a Type-C cable with data transfer functionality. The factory-supplied cable is a Type-C data cable.
Other K230 firmware was flashed: Re-flash the factory firmware, then reconnect.
5.18.3 Program Execution and Download
Display Mode Configuration:
The program can use the select_display="" parameter to choose the display mode: HDMI, LCD, or IDE virtual.

The K230 program supports two operation modes: online execution and offline execution.
Online Execution:
After connecting, drag the program ocr_rec.py into the CanMV IDE K230 code editor area, then click the run button  in the lower left corner to run the program online, as shown below:
Note
Programs run using this method will be lost upon disconnection or power-off and will not be saved on the development board.
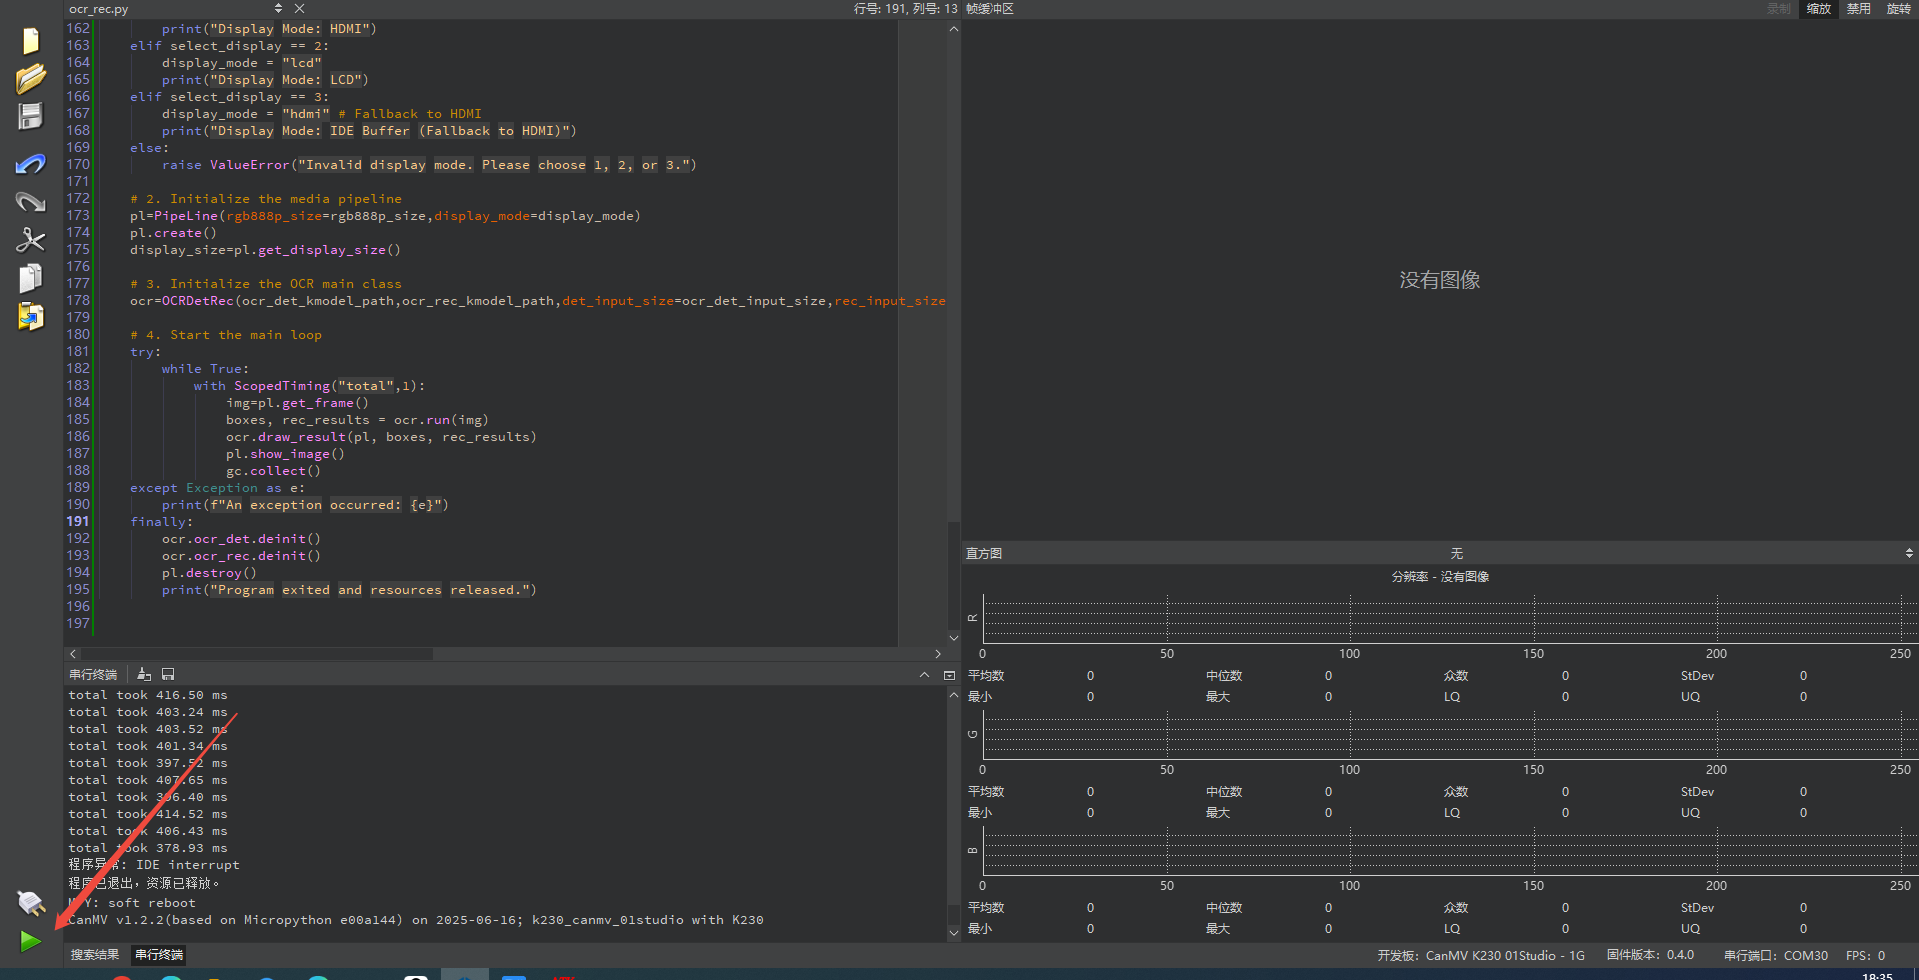
Offline Execution:
After connecting, drag the program ocr_rec.py into the CanMV IDE K230 code editor area, click Tools in the toolbar, and select Save open script to CanMV Board (as main.py), as shown below:

Click Yes.

Once the file is written, click OK to confirm and complete saving the MicroPython file to the K230 development board.

With this method, the K230 development board will automatically run the MicroPython file upon power-up without connection, enabling offline execution.
5.18.4 Program Outcome
Draw a precise blue quadrilateral around the text, closely following its actual contour. Even if the text is tilted, the box tightly encloses it, while the recognized text is displayed in blue above or near the blue box.
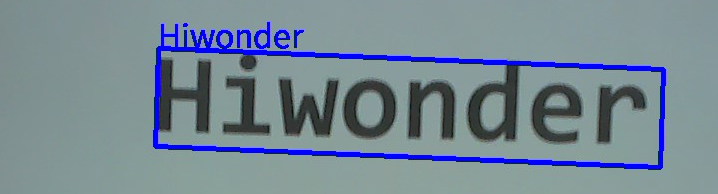
5.18.5 Program Analysis
Import Required Libraries
from libs.PipeLine import PipeLine
from libs.AIBase import AIBase
from libs.AI2D import Ai2d
from libs.Utils import *
import os,sys,ujson,gc,math
from media.media import *
import nncase_runtime as nn
import ulab.numpy as np
import image
import `aicube`
Text Detection
class OCRDetectionApp(AIBase):
    def __init__(self,kmodel_path,model_input_size,mask_threshold=0.5,box_threshold=0.2,rgb888p_size=[224,224],display_size=[1920,1080],debug_mode=0):
        super().__init__(kmodel_path,model_input_size,rgb888p_size,debug_mode)
        self.kmodel_path=kmodel_path
        self.model_input_size=model_input_size
        self.mask_threshold=mask_threshold
        self.box_threshold=box_threshold
        self.rgb888p_size=[ALIGN_UP(rgb888p_size[0],16),rgb888p_size[1]]
        self.display_size=[ALIGN_UP(display_size[0],16),display_size[1]]
        self.debug_mode=debug_mode
        self.ai2d=Ai2d(debug_mode)
        self.ai2d.set_ai2d_dtype(nn.ai2d_format.NCHW_FMT,nn.ai2d_format.NCHW_FMT,np.uint8, np.uint8)
Load key parameters including the
Kmodelmodel path, input resolutionmodel_input_size, and thresholds for filtering invalid detection boxesmask_threshold,box_threshold.Call the highly encapsulated library function
aicube.ocr_post_process.aicubeautomatically processes all the complex decoding steps, translating the raw feature map into a structured list where each entry includes a cropped text image and its coordinates in the original image.
Text Recognition
class OCRRecognitionApp(AIBase):
    def __init__(self,kmodel_path,model_input_size,dict_path,rgb888p_size=[1920,1080],display_size=[1920,1080],debug_mode=0):
        super().__init__(kmodel_path,model_input_size,rgb888p_size,debug_mode)
        self.kmodel_path=kmodel_path
        self.model_input_size=model_input_size
        self.dict_path=dict_path
        self.rgb888p_size=[ALIGN_UP(rgb888p_size[0],16),rgb888p_size[1]]
        self.display_size=[ALIGN_UP(display_size[0],16),display_size[1]]
        self.debug_mode=debug_mode
        self.dict_word=None
        self.read_dict()
        self.ai2d=Ai2d(debug_mode)
        self.ai2d.set_ai2d_dtype(nn.ai2d_format.RGB_packed,nn.ai2d_format.NCHW_FMT,np.uint8, np.uint8)
Cropped text images of varying sizes output by
OCRDetectionApp.Preprocessing: The recognition model also requires fixed-size input. This function uses Ai2d to uniformly process these text images of different sizes into a standard size.
The
read_dict()function loads thedict.txtfile. This dictionary defines the mapping between numerical labels output by the AI model and the corresponding characters, such as ‘A’, ‘a’, ‘B’, and ‘b’. It ensures the correct reading of English characters, where English words are recognized as individual characters and then combined to form the word.np.argmax: Find the character label with the highest probability at each position in the sequence.Perform duplicate and blank removal by traversing the sequence. According to the CTC decoding rules, skip blank labels and consecutive repeated character labels.
Dictionary lookup: Translate valid character labels into the final string through the
self.dict_worddictionary.
Draw Results
    def draw_result(self,pl,det_res,rec_res):
        pl.osd_img.clear()
        if det_res:
            for j in range(len(det_res)):
                # Draw bounding box
                for i in range(4):
                    x1 = det_res[j][(i * 2)] / self.rgb888p_size[0] * self.display_size[0]
                    y1 = det_res[j][(i * 2 + 1)] / self.rgb888p_size[1] * self.display_size[1]
                    x2 = det_res[j][((i + 1) * 2) % 8] / self.rgb888p_size[0] * self.display_size[0]
                    y2 = det_res[j][((i + 1) * 2 + 1) % 8] / self.rgb888p_size[1] * self.display_size[1]
                    pl.osd_img.draw_line((int(x1), int(y1), int(x2), int(y2)), color=(255, 0, 0, 255),thickness=5)

                # Prepare text coordinates, ensuring they are on-screen
                text_x = det_res[j][0] / self.rgb888p_size[0] * self.display_size[0]
                text_y = det_res[j][1] / self.rgb888p_size[1] * self.display_size[1] - 32
                if text_y < 0: text_y = 0

                # Draw recognized text
                pl.osd_img.draw_string_advanced(int(text_x),int(text_y),32,rec_res[j],color=(0,0,255))
Draw red detection boxes on the screen layer.
pl.osd_img.clear(): Clear the previous frame’s OSD content before each drawing.For each detected text item
det, extract coordinate informationdet[1].Then, convert these coordinates proportionally to match the display size coordinates based on AI input image
rgb888p_sizecoordinates.Finally, call
pl.osd_img.draw_lineto connect the four vertices, forming a red quadrilateral box.pl.osd_img.draw_linedraws red bounding boxes.Call
pl.osd_img.draw_string_advancedto draw the recognized text in blue near the box.
5.19 Self-Learning
5.19.1 Experiment Overview
This section demonstrates the self-learning functionality on the K230 development board through programming, performing feature extraction on specific images and then implementing object recognition.
5.19.2 Preparation
Module Connection
Connect the K230 development board to your PC using a Type-C data cable, as shown below:

Double-click to open CanMV IDE K230.

Click the connection button in the lower left corner.
Upon successful connection, the icon in the lower left corner of CanMV IDE will change to the following:

If the connection takes more than 10 seconds, it indicates a connection failure. Click the Cancel button, and a pop-up window will appear. Click OK and recheck the connection.

Note
Connection Failure Causes and Solutions:
Cable is not a data cable: Some Type-C cables are charging-only cables without data transfer capability. Please use a Type-C cable with data transfer functionality. The factory-supplied cable is a Type-C data cable.
Other K230 firmware was flashed: Re-flash the factory firmware, then reconnect.
5.19.3 Program Execution and Download
Display Mode Configuration:
The program can use the select_display="" parameter to choose the display mode: HDMI, LCD, or IDE virtual.

The K230 program supports two operation modes: online execution and offline execution.
Online Execution:
After connecting, drag the program self_learning.py into the CanMV IDE K230 code editor area, then click the run button  in the lower left corner to run the program online, as shown below:
Note
Programs run using this method will be lost upon disconnection or power-off and will not be saved on the development board.

Offline Execution:
After connecting, drag the program self_learning.py from this section’s directory into the CanMV IDE K230 code editor area, click Tools in the toolbar, and select Save open script to CanMV Board (as main.py), as shown below:

Click Yes.

Once the file is written, click OK to confirm and complete saving the MicroPython file to the K230 development board.

With this method, the K230 development board will automatically run the MicroPython file upon power-up without connection, enabling offline execution.
5.19.4 Program Outcome
When the program runs, the returned video feed is shown. Press the designated key on the development board according to the on-screen instructions to perform learning. After learning, the box displays the name and features, calculates similarity, and outputs the recognition result.
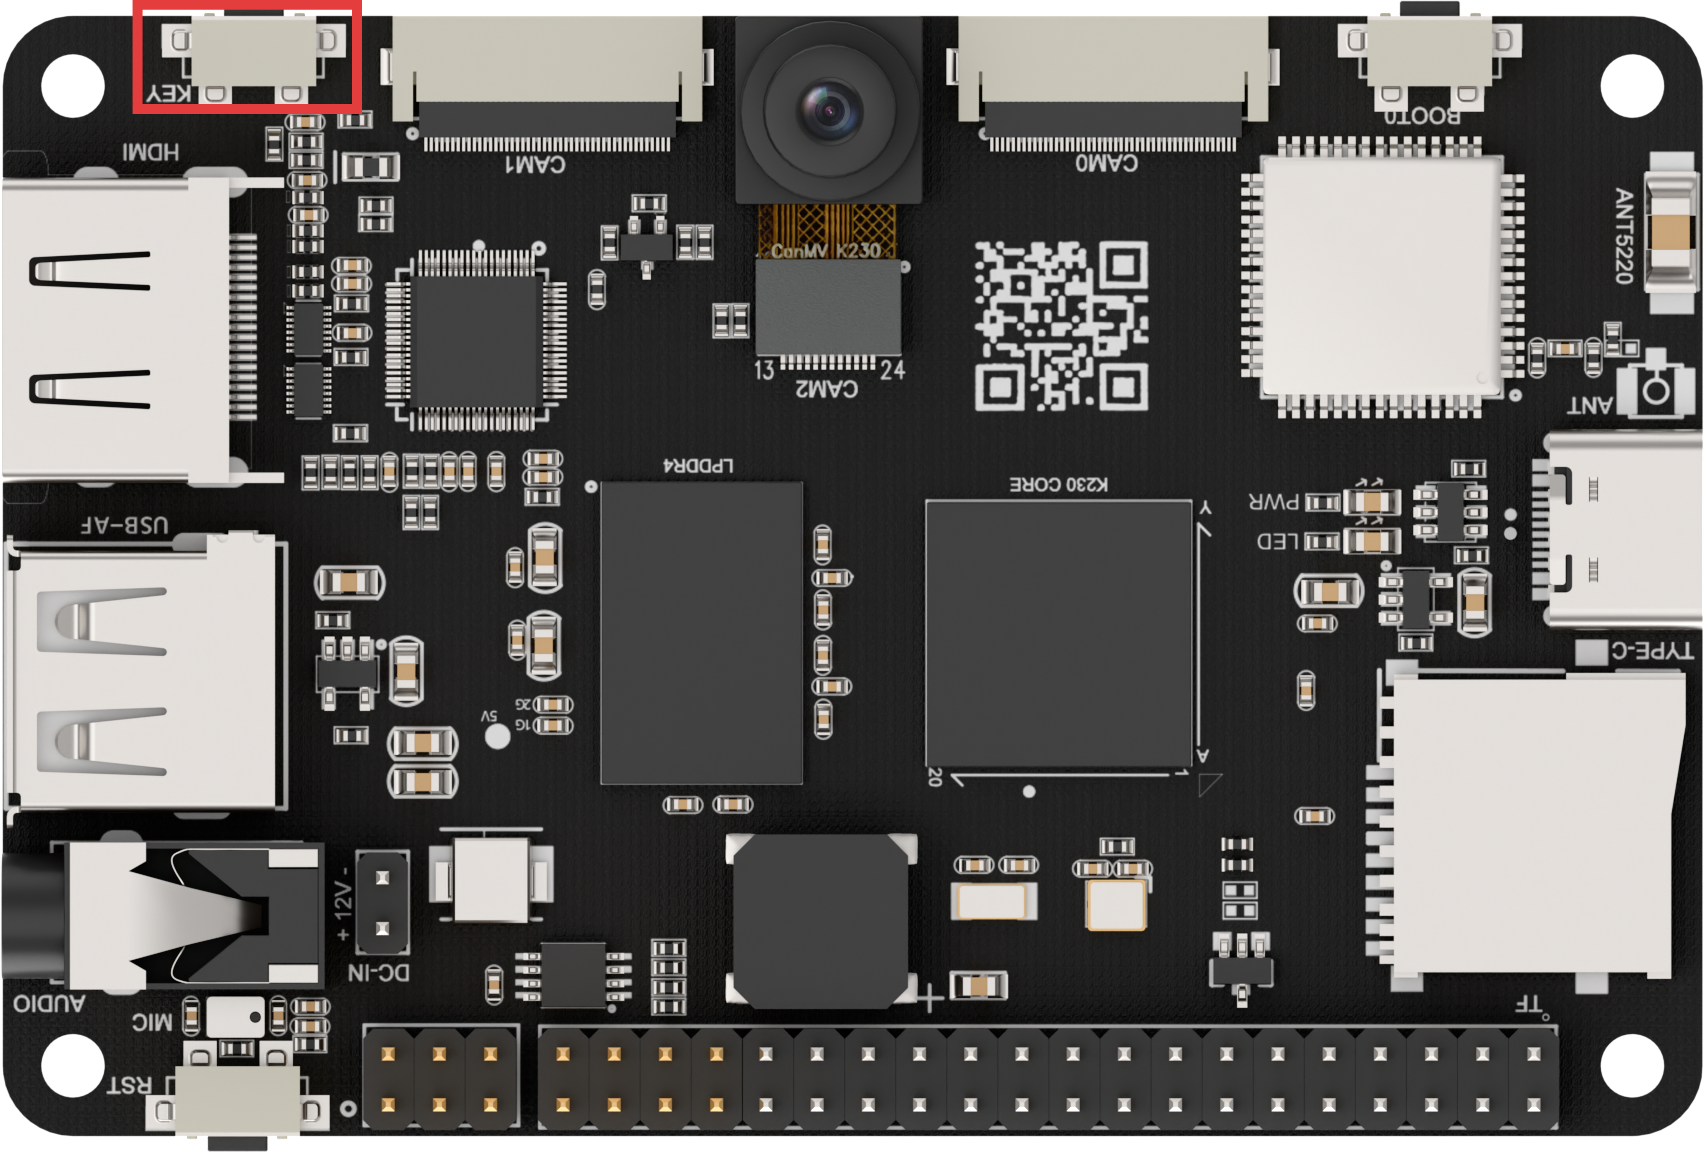
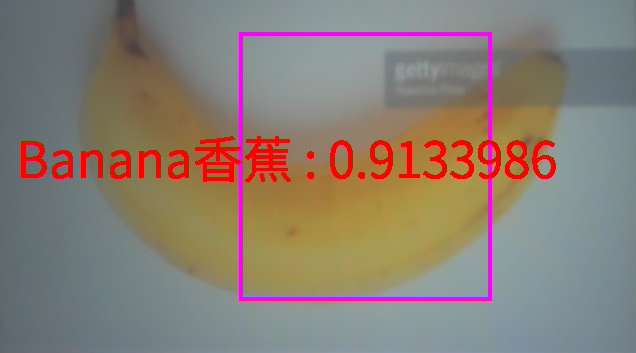
5.19.5 Program Analysis
Import Required Libraries
from libs.PipeLine import PipeLine
from libs.AIBase import AIBase
from libs.AI2D import Ai2d
from libs.Utils import *
import os, sys, ujson, gc, math, uos
from media.media import *
from media.display import Display
import nncase_runtime as nn
import ulab.numpy as np
import image
import `aicube`
from machine import Pin
from machine import FPIOA
import time
SelfLearningApp
class SelfLearningApp(AIBase):
    def __init__(self,kmodel_path,model_input_size,labels,top_k,threshold,features_save_path,rgb888p_size=[224,224],display_size=[1920,1080],debug_mode=0):
        super().__init__(kmodel_path,model_input_size,rgb888p_size,debug_mode)
        self.kmodel_path=kmodel_path
        self.model_input_size=model_input_size
        self.labels=labels
        self.features_save_path=features_save_path
        self.database_path=features_save_path+"features/"
        self.rgb888p_size=[ALIGN_UP(rgb888p_size[0],16),rgb888p_size[1]]
        self.display_size=[ALIGN_UP(display_size[0],16),display_size[1]]
        self.debug_mode=debug_mode
        self.threshold = threshold
        self.top_k = top_k
        self.features=[2,2]
        self.time_one=60
        self.time_all = 0
        self.time_now = 0
        self.category_index = 0
        self.crop_w = 400
        self.crop_h = 400
        self.crop_x = self.rgb888p_size[0] / 2.0 - self.crop_w / 2.0
        self.crop_y = self.rgb888p_size[1] / 2.0 - self.crop_h / 2.0
        self.crop_x_osd=0
        self.crop_y_osd=0
        self.crop_w_osd=0
        self.crop_h_osd=0
        self.ai2d=Ai2d(debug_mode)
        self.ai2d.set_ai2d_dtype(nn.ai2d_format.NCHW_FMT,nn.ai2d_format.NCHW_FMT,np.uint8, np.uint8)
        self.learning = False
        self.need_press_to_start = True
        self.data_init()
SelfLearningApp is the core class of the program, responsible for the self-learning process of object recognition. It handles image preprocessing, feature extraction, feature storage, and the learning logic controlled by key inputs.
Initialize various variables including image cropping dimensions, learning state, feature collection time, etc.
Set the input and output format for Ai2d.
Create a database directory to store features for each category.
Image Preprocessing
    def config_preprocess(self,input_image_size=None):
        with ScopedTiming("set preprocess config",self.debug_mode > 0):
            ai2d_input_size=input_image_size if input_image_size else self.rgb888p_size
            self.ai2d.crop(int(self.crop_x),int(self.crop_y),int(self.crop_w),int(self.crop_h))
            self.ai2d.resize(nn.interp_method.tf_bilinear, nn.interp_mode.half_pixel)
            self.ai2d.build([1,3,ai2d_input_size[1],ai2d_input_size[0]],[1,3,self.model_input_size[1],self.model_input_size[0]])
Set the image preprocessing steps, including cropping and resizing the image to match the model’s input dimensions.
Crop the image based on crop_x and crop_y, then resize the image using bilinear interpolation to ensure the input image meets model requirements.
Image Display
    def draw_result(self,pl,feature):
        pl.osd_img.clear()
        with ScopedTiming("display_draw",self.debug_mode >0):
            pl.osd_img.draw_rectangle(self.crop_x_osd,self.crop_y_osd, self.crop_w_osd, self.crop_h_osd, color=(255, 255, 0, 255), thickness = 4)
            if self.need_press_to_start:
                pl.osd_img.draw_string_advanced(50, 50, 40, "Press the button to start learning", color=(255,255,0,0))  # Press the button to start learning
            else:
                if self.learning:
                    if (self.category_index < len(self.labels)):
                        pl.osd_img.draw_string_advanced(50, self.crop_y_osd-50, 30,
                            "Place object to add within frame for feature collection: "+self.labels[self.category_index] + "_" + str(int(self.time_now-1) // self.time_one) + ".bin",  # Place the object inside the frame for feature collection
                            color=(255,255,0,0))
                        with open(self.database_path + self.labels[self.category_index] + "_" + str(int(self.time_now-1) // self.time_one) + ".bin", 'wb') as f:
                            f.write(feature.tobytes())
                        self.time_now += 1
                        if (self.time_now // self.time_one == self.features[self.category_index]):
                            self.category_index += 1
                            self.time_all -= self.time_now
                            self.time_now = 0
                            self.learning = False
                    else:
                        self.learning = False
                        pl.osd_img.draw_string_advanced(50, 50, 40, "All categories collected", color=(255,255,0,0))  # All categories collected
                else:
                    if self.category_index < len(self.labels):
                        pl.osd_img.draw_string_advanced(50, 50, 40, f"Press button to start learning category: {self.labels[self.category_index]}", color=(255,255,0,0))  # Press the button to start learning this category
                    else:
                        results_learn = []
                        list_features = os.listdir(self.database_path)
Draw information during the learning process on the display, including learning prompts, cropping box, and recognition results.
If learning is required, display a prompt on the screen to guide placing the object within the box for learning.
If learning has been completed and a class switch is in progress, display the current class and its learning progress.
If learning is complete, display recognition results including category and similarity.
Determine Similarity Between Input Features and Saved Features
    def getSimilarity(self,output_vec,save_vec):
        tmp = sum(output_vec * save_vec)
        mold_out = np.sqrt(sum(output_vec * output_vec))
        mold_save = np.sqrt(sum(save_vec * save_vec))
        return tmp / (mold_out * mold_save)
Compute the cosine similarity between two feature vectors to determine the similarity between the input feature and the saved feature. The similarity is calculated by taking the dot product of the vectors and normalizing by their magnitudes.
5.20 Object Detection
5.20.1 Experiment Overview
This section demonstrates object detection functionality on the K230 development board through programming, implementing object detection and recognition, and indicating the recognition results with drawings.
5.20.2 Preparation
Module Connection
Connect the K230 development board to your PC using a Type-C data cable, as shown below:

Double-click to open CanMV IDE K230.

Click the connection button in the lower left corner.

Upon successful connection, the icon in the lower left corner of CanMV IDE will change to the following:

If the connection takes more than 10 seconds, it indicates a connection failure. Click the Cancel button, and a pop-up window will appear. Click OK and recheck the connection.
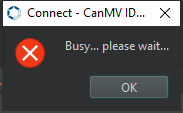
Note
Connection Failure Causes and Solutions:
Cable is not a data cable: Some Type-C cables are charging-only cables without data transfer capability. Please use a Type-C cable with data transfer functionality. The factory-supplied cable is a Type-C data cable.
Other K230 firmware was flashed: Re-flash the factory firmware, then reconnect.
5.20.3 Program Execution and Download
Display Mode Configuration:
The program can use the select_display="" parameter to choose the display mode: HDMI, LCD, or IDE virtual.

The K230 program supports two operation modes: online execution and offline execution.
Online Execution:
After connecting, drag the program object_detect_yolov8n.py into the CanMV IDE K230 code editor area, then click the run button  in the lower left corner to run the program online, as shown below:
Note
Programs run using this method will be lost upon disconnection or power-off and will not be saved on the development board.

Offline Execution:
After connecting, drag the program object_detection.py into the CanMV IDE K230 code editor area, click Tools in the toolbar, and select Save open script to CanMV Board (as main.py), as shown below:

Click Yes.

Once the file is written, click OK to confirm and complete saving the MicroPython file to the K230 development board.

With this method, the K230 development board will automatically run the MicroPython file upon power-up without connection, enabling offline execution.
5.20.4 Program Outcome
When the program runs, press the key to detect and recognize objects. The results are drawn on the display and compared with the stored model to determine the object identity.
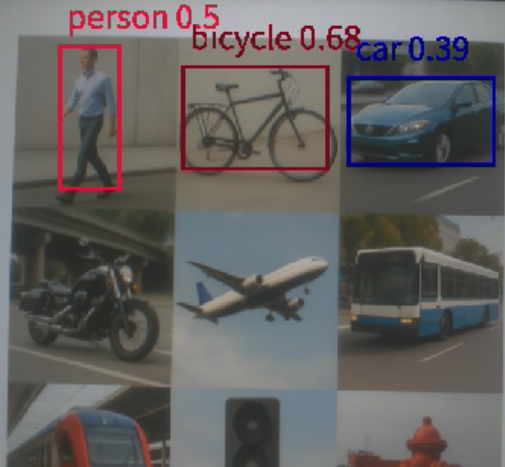
The example is based on YOLOv8n and supports the recognition of 80 object categories. For details, please refer to:

Original image:
5.20.5 Program Analysis
Import Required Libraries
from libs.PipeLine import PipeLine, ScopedTiming
from libs.AIBase import AIBase
from libs.AI2D import Ai2d
import os
import ujson
from media.media import *  # Import Display from here
from media.sensor import *
from media.display import Display # Explicitly import Display class
import nncase_runtime as nn
from time import *
import nncase_runtime as nn
import ulab.numpy as np
import time
import utime
import image
import random
import gc
import sys
import aidemo
Object Detection
# Custom YOLOv8 detection class
class ObjectDetectionApp(AIBase):
    def __init__(self, kmodel_path, labels, model_input_size, max_boxes_num, confidence_threshold=0.5, nms_threshold=0.2, rgb888p_size=[224, 224], display_size=[1920, 1080], debug_mode=0):
        super().__init__(kmodel_path, model_input_size, rgb888p_size, debug_mode)
        self.kmodel_path = kmodel_path
        self.labels = labels
        # Model input resolution
        self.model_input_size = model_input_size
        # Threshold settings
        self.confidence_threshold = confidence_threshold
        self.nms_threshold = nms_threshold
        self.max_boxes_num = max_boxes_num
        # Image resolution from sensor to AI
        self.rgb888p_size = [ALIGN_UP(rgb888p_size[0], 16), rgb888p_size[1]]
        # Display resolution
        self.display_size = [ALIGN_UP(display_size[0], 16), display_size[1]]
        self.debug_mode = debug_mode
        # Preset color values for detection boxes
        self.color_four = [(255, 220, 20, 60), (255, 119, 11, 32), (255, 0, 0, 142), (255, 0, 0, 230),
                         (255, 106, 0, 228), (255, 0, 60, 100), (255, 0, 80, 100), (255, 0, 0, 70),
                         (255, 0, 0, 192), (255, 250, 170, 30), (255, 100, 170, 30), (255, 220, 220, 0),
                         (255, 175, 116, 175), (255, 250, 0, 30), (255, 165, 42, 42), (255, 255, 77, 255),
                         (255, 0, 226, 252), (255, 182, 182, 255), (255, 0, 82, 0), (255, 120, 166, 157)]
        # Width and height scaling ratios
        self.x_factor = float(self.rgb888p_size[0]) / self.model_input_size[0]
        self.y_factor = float(self.rgb888p_size[1]) / self.model_input_size[1]
        # Ai2d instance for implementing model preprocessing
        self.ai2d = Ai2d(debug_mode)
        # Set Ai2d input/output format and type
        self.ai2d.set_ai2d_dtype(nn.ai2d_format.NCHW_FMT, nn.ai2d_format.NCHW_FMT, np.uint8, np.uint8)
Initialize the base class by calling super(), then configure parameters such as labels, input size, and thresholds. After that, create an Ai2d object to perform image preprocessing and set up the input and output formats.
Calculate the image scaling factors x_factor and y_factor to map the detection boxes from the model input size to the actual display size.
labels: Labels used for object detection, representing different object categories.model_input_size: YOLOv8 model input size.max_boxes_num: Maximum number of detection boxes.confidence_threshold: Confidence threshold. Detection results below this value will be ignored.nms_threshold: Non-Maximum Suppression (NMS) threshold for removing redundant detection boxes.rgb888p_size: Input image size, specified for RGB images.
Image Preprocessing and Post-processing
    # Configure preprocessing operations. Here resize is used. Ai2d supports crop/shift/pad/resize/affine. For details, see /sdcard/libs/AI2D.py
    def config_preprocess(self, input_image_size=None):
        with ScopedTiming("set preprocess config", self.debug_mode > 0):
            # Initialize ai2d preprocessing config. Default is sensor-to-AI size. You can modify input size by setting input_image_size
            ai2d_input_size = input_image_size if input_image_size else self.rgb888p_size
            self.ai2d.resize(nn.interp_method.tf_bilinear, nn.interp_mode.half_pixel)
            self.ai2d.build([1, 3, ai2d_input_size[1], ai2d_input_size[0]], [1, 3, self.model_input_size[1], self.model_input_size[0]])

    # Custom post-processing for current task
    def postprocess(self, results):
        with ScopedTiming("postprocess", self.debug_mode > 0):
            result = results[0]
            result = result.reshape((result.shape[0] * result.shape[1], result.shape[2]))
            output_data = result.transpose()
            boxes_ori = output_data[:, 0:4]
            scores_ori = output_data[:, 4:]
            confs_ori = np.max(scores_ori, axis=-1)
            inds_ori = np.argmax(scores_ori, axis=-1)
            boxes, scores, inds = [], [], []
            for i in range(len(boxes_ori)):
                if confs_ori[i] > self.confidence_threshold: # Use self.confidence_threshold
                    scores.append(confs_ori[i])
                    inds.append(inds_ori[i])
                    x = boxes_ori[i, 0]
                    y = boxes_ori[i, 1]
                    w = boxes_ori[i, 2]
                    h = boxes_ori[i, 3]
                    left = int((x - 0.5 * w) * self.x_factor)
                    top = int((y - 0.5 * h) * self.y_factor)
                    right = int((x + 0.5 * w) * self.x_factor)
                    bottom = int((y + 0.5 * h) * self.y_factor)
                    boxes.append([left, top, right, bottom])
            if len(boxes) == 0:
                return []
            boxes = np.array(boxes)
            scores = np.array(scores)
            inds = np.array(inds)
            # NMS process
            keep = self.nms(boxes, scores, self.nms_threshold) # Use self.nms_threshold
            dets = np.concatenate((boxes, scores.reshape((len(boxes), 1)), inds.reshape((len(boxes), 1))), axis=1)
            dets_out = []
            for keep_i in keep:
                dets_out.append(dets[keep_i])
            dets_out = np.array(dets_out)
            dets_out = dets_out[:self.max_boxes_num, :]
            return dets_out
Image preprocessing, mainly performing padding and scaling to ensure the input image meets the model requirements.
input_image_sizespecifies the size of the input image, defaulting torgb888p_size.Calculate the padding and cropping parameters, using
letterbox_pad_paramfor padding.Apply
Ai2dfor image padding and scaling, then post-process the model output to obtain the detection boxes and associated information.Then, transpose and process the output results, and apply Non-Maximum Suppression (NMS) to extract valid detection boxes, classes, and confidence scores.
Draw Results
    def draw_result(self, pl, dets):
        with ScopedTiming("display_draw", self.debug_mode > 0):
            if dets:
                pl.osd_img.clear()
                for det in dets:
                    x1, y1, x2, y2 = map(lambda x: int(round(x, 0)), det[:4])
                    x = x1 * self.display_size[0] // self.rgb888p_size[0]
                    y = y1 * self.display_size[1] // self.rgb888p_size[1]
                    w = (x2 - x1) * self.display_size[0] // self.rgb888p_size[0]
                    h = (y2 - y1) * self.display_size[1] // self.rgb888p_size[1]
                    pl.osd_img.draw_rectangle(x, y, w, h, color=self.get_color(int(det[5])), thickness=4)
                    pl.osd_img.draw_string_advanced(x, y - 50, 32, " " + self.labels[int(det[5])] + " " + str(round(det[4], 2)), color=self.get_color(int(det[5])))
            else:
                pl.osd_img.clear()
Draw the detection results on the screen, showing the bounding boxes, classes, and confidence scores.
pl: Display object responsible for rendering results on the screen.dets: Detection box information, including position, class, and confidence score.
5.21 Object Segmentation
5.21.1 Experiment Overview
This section demonstrates object segmentation functionality on the K230 development board through programming, implementing object detection and recognition, and segmenting different objects using different colors.
5.21.2 Preparation
Module Connection
Connect the K230 development board to your PC using a Type-C data cable, as shown below:

Double-click to open CanMV IDE K230.

Click the connection button in the lower left corner.

Upon successful connection, the icon in the lower left corner of CanMV IDE will change to the following:

If the connection takes more than 10 seconds, it indicates a connection failure. Click the Cancel button, and a pop-up window will appear. Click OK and recheck the connection.

Note
Connection Failure Causes and Solutions:
Cable is not a data cable: Some Type-C cables are charging-only cables without data transfer capability. Please use a Type-C cable with data transfer functionality. The factory-supplied cable is a Type-C data cable.
Other K230 firmware was flashed: Re-flash the factory firmware, then reconnect.
5.21.3 Program Execution and Download
Display Mode Configuration:
The program can use the select_display="" parameter to choose the display mode: HDMI, LCD, or IDE virtual.

The K230 program supports two operation modes: online execution and offline execution.
Online Execution:
After connecting, drag the program object_detection.py into the CanMV IDE K230 code editor area, then click the run button  in the lower left corner to run the program online, as shown below:
Note
Programs run using this method will be lost upon disconnection or power-off and will not be saved on the development board.
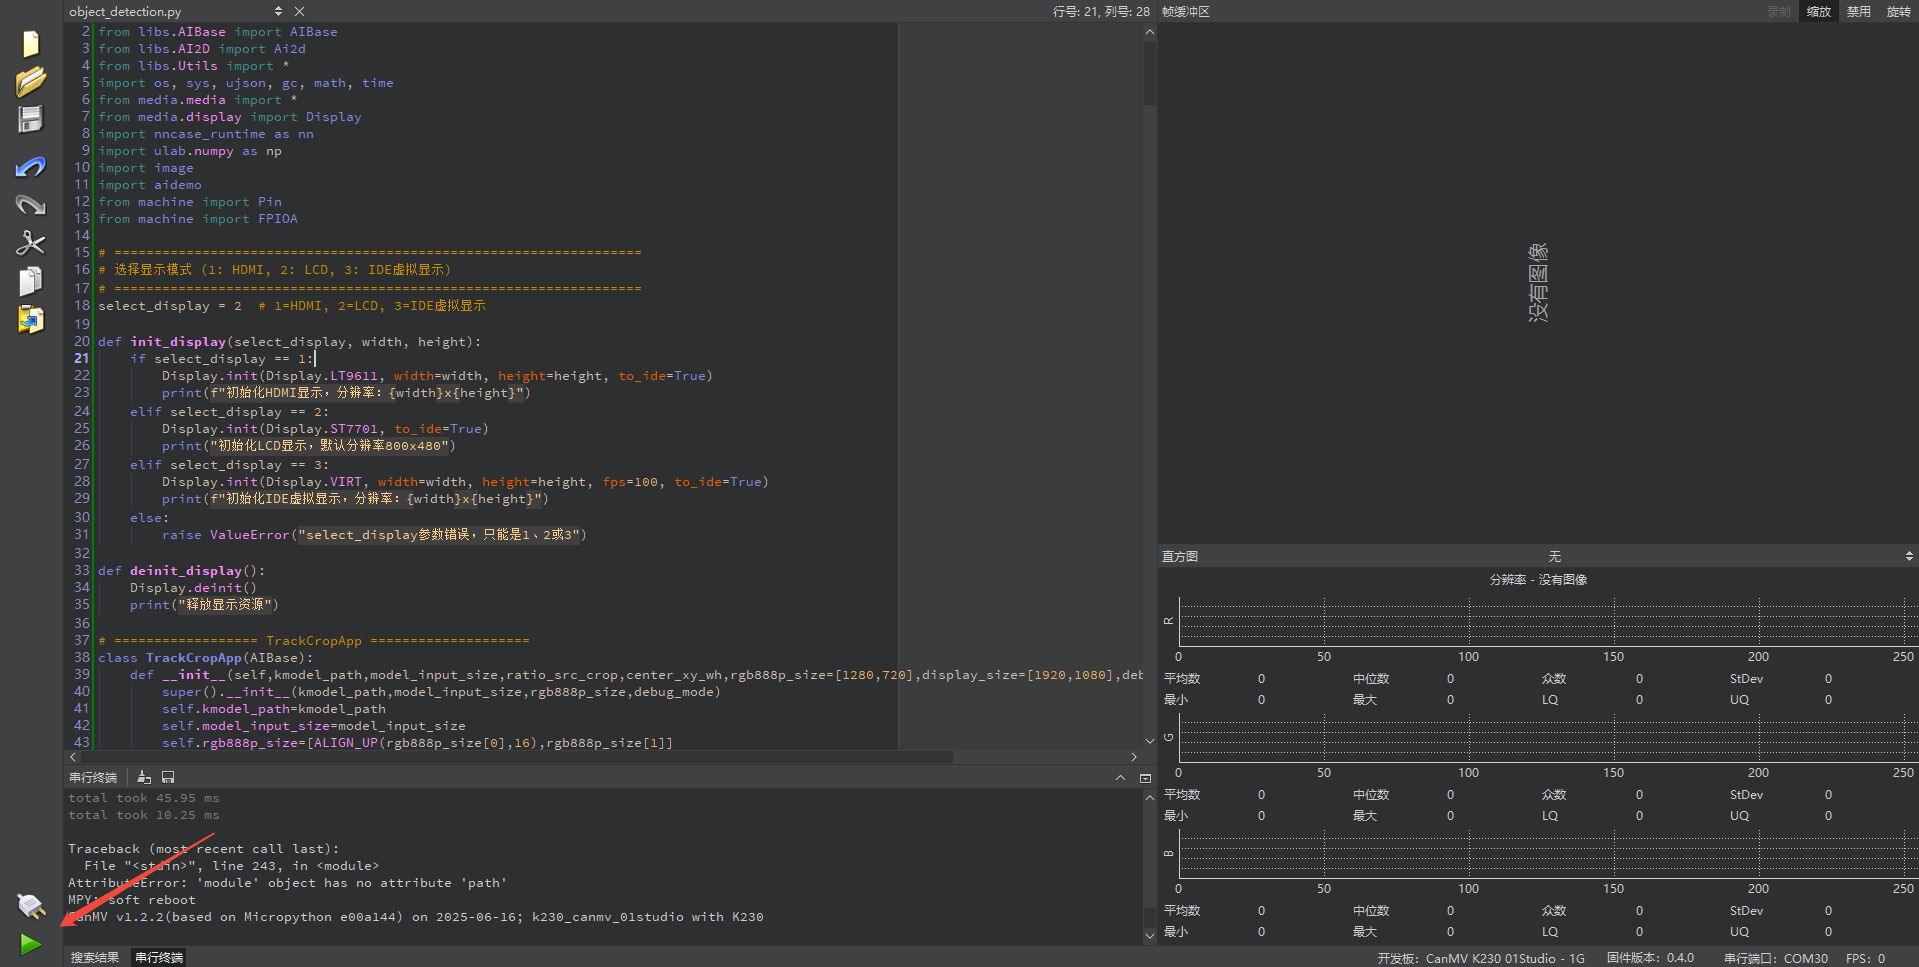
Offline Execution:
After connecting, drag the program object_detection.py into the CanMV IDE K230 code editor area, click Tools in the toolbar, and select Save open script to CanMV Board (as main.py), as shown below:

Click Yes.

Once the file is written, click OK to confirm and complete saving the MicroPython file to the K230 development board.

With this download method, when you subsequently power on the K230 development board without connecting it, the board will run the MicroPython file, enabling offline operation. | With this method, the K230 development board will automatically run the MicroPython file upon power-up without connection, enabling offline execution.
5.21.4 Program Outcome
When the program runs, it detects and recognizes objects, and segments each object with a different color for clear distinction.
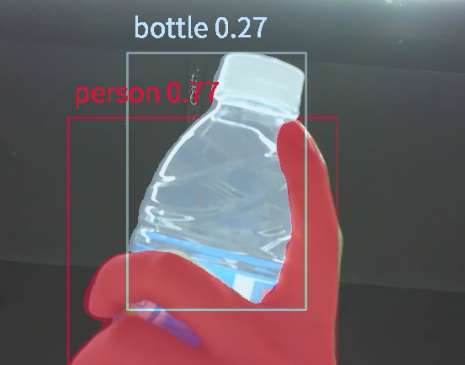
5.21.5 Program Analysis
Import Required Libraries
from libs.PipeLine import PipeLine, ScopedTiming
from libs.AIBase import AIBase
from libs.AI2D import Ai2d
from libs.Utils import *
import os, sys, ujson, gc, math, random
from media.media import *  # This will import Display
from media.sensor import *
from media.display import Display  # Ensure SDK support
import nncase_runtime as nn
import ulab.numpy as np
import image
import aidemo
import time # Import time for clock
Object Segmentation
# Custom YOLOv8 segmentation class
class SegmentationApp(AIBase):
    def __init__(self, kmodel_path, labels, model_input_size, confidence_threshold=0.2, nms_threshold=0.5, mask_threshold=0.5, rgb888p_size=[224, 224], display_size=[1920, 1080], debug_mode=0):
        super().__init__(kmodel_path, model_input_size, rgb888p_size, debug_mode)
        # Model path
        self.kmodel_path = kmodel_path
        # Segmentation category labels
        self.labels = labels
        # Model input resolution
        self.model_input_size = model_input_size
        # Confidence threshold
        self.confidence_threshold = confidence_threshold
        # NMS threshold
        self.nms_threshold = nms_threshold
        # Mask threshold
        self.mask_threshold = mask_threshold
        # Image resolution from sensor to AI
        self.rgb888p_size = [ALIGN_UP(rgb888p_size[0], 16), rgb888p_size[1]]
        # Display resolution
        self.display_size = [ALIGN_UP(display_size[0], 16), display_size[1]]
        self.debug_mode = debug_mode
        # Preset color values for detection boxes
        self.color_four = get_colors(len(self.labels))
        # Segmentation result numpy array for aidemo post-processing interface
        # Note: self.masks will be populated by aidemo.segment_postprocess
        self.masks = np.zeros((1, self.display_size[1], self.display_size[0], 4), dtype=np.uint8) # Specify dtype

        # Ai2d instance for implementing model preprocessing
        self.ai2d = Ai2d(debug_mode)
        # Set Ai2d input/output format and type
        self.ai2d.set_ai2d_dtype(nn.ai2d_format.NCHW_FMT, nn.ai2d_format.NCHW_FMT, np.uint8, np.uint8)
Initialize the model by setting the model path, segmentation classes, input resolution, confidence threshold, and other parameters.
Image Preprocessing and Post-processing
    # Configure preprocessing operations. Here pad and resize are used. Ai2d supports crop/shift/pad/resize/affine. For details, see /sdcard/app/libs/AI2D.py
    def config_preprocess(self, input_image_size=None):
        with ScopedTiming("set preprocess config", self.debug_mode > 0):
            # Initialize ai2d preprocessing config. Default is sensor-to-AI size. You can modify input size by setting input_image_size
            ai2d_input_size = input_image_size if input_image_size else self.rgb888p_size
            top, bottom, left, right, _ = center_pad_param(self.rgb888p_size, self.model_input_size)
            self.ai2d.pad([0, 0, 0, 0, top, bottom, left, right], 0, [114, 114, 114])
            self.ai2d.resize(nn.interp_method.tf_bilinear, nn.interp_mode.half_pixel)
            self.ai2d.build([1, 3, ai2d_input_size[1], ai2d_input_size[0]], [1, 3, self.model_input_size[1], self.model_input_size[0]])

    # Custom post-processing for current task
    def postprocess(self, results):
        with ScopedTiming("postprocess", self.debug_mode > 0):
            # Using aidemo's segment_postprocess interface
            seg_res = aidemo.segment_postprocess(results, [self.rgb888p_size[1], self.rgb888p_size[0]], self.model_input_size, [self.display_size[1], self.display_size[0]], self.confidence_threshold, self.nms_threshold, self.mask_threshold, self.masks)
            return seg_res
Perform image preprocessing, including padding and scaling, to ensure the input conforms to the model’s requirements. The
input_image_sizeparameter defines the image dimensions, with the default set torgb888p_size.Call
aidemo.segment_postprocessto decode the segmentation results.Then, transpose and process the outputs, apply Non-Maximum Suppression (NMS), and obtain the valid detection boxes along with their class labels and confidence scores.
Draw Results
    # Draw results
    def draw_result(self, pl, seg_res):
        with ScopedTiming("display_draw", self.debug_mode > 0):
            if seg_res[0]:
                pl.osd_img.clear()
                # Create image object referencing the numpy array populated by aidemo.segment_postprocess
                mask_img = image.Image(self.display_size[0], self.display_size[1], image.ARGB8888, alloc=image.ALLOC_REF, data=self.masks)
                pl.osd_img.copy_from(mask_img)
                dets, ids, scores = seg_res[0], seg_res[1], seg_res[2]
                for i, det in enumerate(dets):
                    x1, y1, w, h = map(lambda x: int(round(x, 0)), det)
                    pl.osd_img.draw_string_advanced(x1, y1 - 50, 32, " " + self.labels[int(ids[i])] + " " + str(round(scores[i], 2)), color=self.color_four[int(ids[i])])
            else:
                pl.osd_img.clear()
Draw the detection results on the screen, displaying detection boxes, class labels, and confidence scores.
pl: Display object responsible for rendering results on the screen.dets: Detection box information including position, class label, and confidence score.
5.22 Target Tracking
5.22.1 Experiment Overview
This section demonstrates target tracking functionality on the K230 development board through programming. Target tracking is used to follow objects of interest in the image.
5.22.2 Preparation
Module Connection
Connect the K230 development board to your PC using a Type-C data cable, as shown below:

Double-click to open CanMV IDE K230.

Click the connection button in the lower left corner.

Upon successful connection, the icon in the lower left corner of CanMV IDE will change to the following:

If the connection takes more than 10 seconds, it indicates a connection failure. Click the Cancel button, and a pop-up window will appear. Click OK and recheck the connection.

Note
Connection Failure Causes and Solutions:
Cable is not a data cable: Some Type-C cables are charging-only cables without data transfer capability. Please use a Type-C cable with data transfer functionality. The factory-supplied cable is a Type-C data cable.
Other K230 firmware was flashed: Re-flash the factory firmware, then reconnect.
5.22.3 Program Execution and Download
Display Mode Configuration:
The program can use the select_display="" parameter to choose the display mode: HDMI, LCD, or IDE virtual.

The K230 program supports two operation modes: online execution and offline execution.
Online Execution:
After connecting, drag the program object_detection.py into the CanMV IDE K230 code editor area, then click the run button in the lower left corner to run the program online, as shown below:
Note
Programs run using this method will be lost upon disconnection or power-off and will not be saved on the development board.

Offline Execution:
After connecting, drag the program object_detection.py into the CanMV IDE K230 code editor area, click Tools in the toolbar, and select Save open script to CanMV Board (as main.py), as shown below:

Then click Yes.

Once the file is written, click OK to confirm and complete saving the MicroPython file to the K230 development board.

With this method, the K230 development board will automatically run the MicroPython file upon power-up without connection, enabling offline execution.
5.22.4 Program Outcome
When the program runs, the returned video feed appears. Press the key as instructed on the screen to learn the object. After learning, the object is enclosed in a box, and small movements will keep it centered in the video feed.
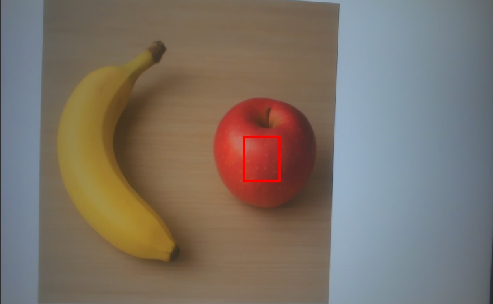
5.22.5 Program Analysis
Import Required Libraries
from libs.PipeLine import PipeLine
from libs.AIBase import AIBase
from libs.AI2D import Ai2d
from libs.Utils import *
import os, sys, ujson, gc, math, time
from media.media import *
from media.display import Display
import nncase_runtime as nn
import ulab.numpy as np
import image
import aidemo
from machine import Pin
from machine import FPIOA
Object Cropping
class TrackCropApp(AIBase):
    def __init__(self,kmodel_path,model_input_size,ratio_src_crop,center_xy_wh,rgb888p_size=[1280,720],display_size=[1920,1080],debug_mode=0):
        super().__init__(kmodel_path,model_input_size,rgb888p_size,debug_mode)
        self.kmodel_path=kmodel_path
        self.model_input_size=model_input_size
        self.rgb888p_size=[ALIGN_UP(rgb888p_size[0],16),rgb888p_size[1]]
        self.display_size=[ALIGN_UP(display_size[0],16),display_size[1]]
        self.debug_mode=debug_mode
        self.CONTEXT_AMOUNT = 0.5
        self.ratio_src_crop = ratio_src_crop
        self.center_xy_wh=center_xy_wh
        self.pad_crop_params=[]
        self.ai2d_pad=Ai2d(debug_mode)
        self.ai2d_pad.set_ai2d_dtype(nn.ai2d_format.NCHW_FMT,nn.ai2d_format.NCHW_FMT,np.uint8, np.uint8)
        self.ai2d_crop=Ai2d(debug_mode)
        self.ai2d_crop.set_ai2d_dtype(nn.ai2d_format.NCHW_FMT,nn.ai2d_format.NCHW_FMT,np.uint8, np.uint8)
        self.need_pad=False
Initialize the model path and input size, then set the image cropping parameters, including crop ratio and center coordinates.
Initialize two Ai2d modules: one for image padding and the other for cropping.
kmodel_path: Path to the cropping model file.
model_input_size: Model input size, representing the required input image dimensions.
ratio_src_crop: Source crop ratio used to adjust the cropping region size.
center_xy_wh: List containing the object’s center coordinates and dimensions in the format [xcenter, ycenter, width, height].
Image Preprocessing and Post-processing
    def config_preprocess(self,input_image_size=None):
        with ScopedTiming("set preprocess config",self.debug_mode > 0):
            ai2d_input_size = input_image_size if input_image_size else self.rgb888p_size
            self.pad_crop_params= self.get_padding_crop_param()
            if (self.pad_crop_params[0]!=0 or self.pad_crop_params[1]!=0 or self.pad_crop_params[2]!=0 or self.pad_crop_params[3]!=0):
                self.need_pad=True
                self.ai2d_pad.resize(nn.interp_method.tf_bilinear, nn.interp_mode.half_pixel)
                self.ai2d_pad.pad([0,0,0,0,self.pad_crop_params[0],self.pad_crop_params[1],self.pad_crop_params[2],self.pad_crop_params[3]],0,[114,114,114])
                output_size=[self.rgb888p_size[0]+self.pad_crop_params[2]+self.pad_crop_params[3],
                             self.rgb888p_size[1]+self.pad_crop_params[0]+self.pad_crop_params[1]]
                self.ai2d_pad.build([1,3,ai2d_input_size[1],ai2d_input_size[0]],
                                   [1,3,output_size[1],output_size[0]])

                self.ai2d_crop.resize(nn.interp_method.tf_bilinear, nn.interp_mode.half_pixel)
                self.ai2d_crop.crop(int(self.pad_crop_params[4]),int(self.pad_crop_params[6]),
                                    int(self.pad_crop_params[5]-self.pad_crop_params[4]+1),
                                    int(self.pad_crop_params[7]-self.pad_crop_params[6]+1))
                self.ai2d_crop.build([1,3,output_size[1],output_size[0]],
                                    [1,3,self.model_input_size[1],self.model_input_size[0]])
            else:
                self.need_pad=False
                self.ai2d_crop.resize(nn.interp_method.tf_bilinear, nn.interp_mode.half_pixel)
                self.ai2d_crop.crop(int(self.center_xy_wh[0]-self.pad_crop_params[8]/2.0),
                                    int(self.center_xy_wh[1]-self.pad_crop_params[8]/2.0),
                                    int(self.pad_crop_params[8]),
                                    int(self.pad_crop_params[8]))
                self.ai2d_crop.build([1,3,ai2d_input_size[1],ai2d_input_size[0]],
                                    [1,3,self.model_input_size[1],self.model_input_size[0]])

    def preprocess(self,input_np):
        if self.need_pad:
            pad_output=self.ai2d_pad.run(input_np).to_numpy()
            return [self.ai2d_crop.run(pad_output)]
        else:
            return [self.ai2d_crop.run(input_np)]
Calculate the padding parameters for the cropping area to ensure it fits the model input. If padding is required, apply it using the Ai2d module before cropping. If no padding is needed, crop directly based on the specified center and size.
Calculate Cropping Region
    def get_padding_crop_param(self):
        s_z = round(np.sqrt((self.center_xy_wh[2] + self.CONTEXT_AMOUNT * (self.center_xy_wh[2] + self.center_xy_wh[3])) *
                           (self.center_xy_wh[3] + self.CONTEXT_AMOUNT * (self.center_xy_wh[2] + self.center_xy_wh[3]))))
        c = (s_z + 1) / 2
        context_xmin = np.floor(self.center_xy_wh[0] - c + 0.5)
        context_xmax = int(context_xmin + s_z - 1)
        context_ymin = np.floor(self.center_xy_wh[1] - c + 0.5)
        context_ymax = int(context_ymin + s_z - 1)
        left_pad = int(max(0, -context_xmin))
        top_pad = int(max(0, -context_ymin))
        right_pad = int(max(0, int(context_xmax - self.rgb888p_size[0] + 1)))
        bottom_pad = int(max(0, int(context_ymax - self.rgb888p_size[1] + 1)))
        context_xmin += left_pad
        context_xmax += left_pad
        context_ymin += top_pad
        context_ymax += top_pad
        return [top_pad,bottom_pad,left_pad,right_pad,
                context_xmin,context_xmax,context_ymin,context_ymax,s_z]
Calculate the padding parameters for the cropping region to ensure the center of the crop region is positioned over the target object.
Source Feature Extraction
class TrackSrcApp(AIBase):
    def __init__(self,kmodel_path,model_input_size,ratio_src_crop,rgb888p_size=[1280,720],display_size=[1920,1080],debug_mode=0):
        super().__init__(kmodel_path,model_input_size,rgb888p_size,debug_mode)
        self.kmodel_path=kmodel_path
        self.model_input_size=model_input_size
        self.rgb888p_size=[ALIGN_UP(rgb888p_size[0],16),rgb888p_size[1]]
        self.display_size=[ALIGN_UP(display_size[0],16),display_size[1]]
        self.pad_crop_params=[]
        self.CONTEXT_AMOUNT = 0.5
        self.ratio_src_crop = ratio_src_crop
        self.debug_mode=debug_mode
        self.ai2d_pad=Ai2d(debug_mode)
        self.ai2d_pad.set_ai2d_dtype(nn.ai2d_format.NCHW_FMT,nn.ai2d_format.NCHW_FMT,np.uint8,np.uint8)
        self.ai2d_crop=Ai2d(debug_mode)
        self.ai2d_crop.set_ai2d_dtype(nn.ai2d_format.NCHW_FMT,nn.ai2d_format.NCHW_FMT,np.uint8,np.uint8)
        self.need_pad=False
Initialize parameters for the source image feature extraction model.
kmodel_path: Path to the source feature extraction model.model_input_size: Model input size.ratio_src_crop: Source crop ratio.rgb888p_size: Input image size.display_size: Display resolution.debug_mode: Debug mode flag.
Tracking Box Generation and Update
class NanoTracker:
    def __init__(self,track_crop_kmodel,track_src_kmodel,tracker_kmodel,
                 crop_input_size,src_input_size,threshold=0.25,
                 rgb888p_size=[1280,720],display_size=[1920,1080],debug_mode=0):
        self.track_crop_kmodel=track_crop_kmodel
        self.track_src_kmodel=track_src_kmodel
        self.tracker_kmodel=tracker_kmodel
        self.crop_input_size=crop_input_size
        self.src_input_size=src_input_size
        self.threshold=threshold

        self.CONTEXT_AMOUNT=0.5
        self.ratio_src_crop = 0.0
        self.track_x1 = float(600)
        self.track_y1 = float(300)
        self.track_w = float(100)
        self.track_h = float(100)
        self.draw_mean=[]
        self.center_xy_wh = []
        self.track_boxes = []
        self.center_xy_wh_tmp = []
        self.track_boxes_tmp=[]
        self.crop_output=None
        self.src_output=None

        self.seconds = 8
        self.endtime = None  # Initialize as None, countdown starts after external button press
        self.countdown_active = False # New flag: whether countdown is in progress
        self.initial_setup_done = False # New flag: whether initial countdown setup is complete

        self.rgb888p_size=[ALIGN_UP(rgb888p_size[0],16),rgb888p_size[1]]
        self.display_size=[ALIGN_UP(display_size[0],16),display_size[1]]
NanoTracker is responsible for tracking box generation and update, cropping, source feature extraction, etc.
track_crop_kmodel: Path to the cropping model.track_src_kmodel: Path to the source feature extraction model.tracker_kmodel: Path to the tracking model.crop_input_size: Cropping model input size.src_input_size: Source feature extraction model input size.threshold: Tracking threshold.rgb888p_size: Image size.display_size: Display device resolution.
run Function
    def run(self,input_np, external_tracking_enabled):
        nowtime = time.time()

        if external_tracking_enabled and not self.initial_setup_done:
            # User wants to start tracking, and initial setup (countdown) is not yet complete
            if not self.countdown_active: # If countdown is not yet active, start it
                self.endtime = nowtime + self.seconds
                self.countdown_active = True
                print(f"Countdown started (first tracking). Current time: {nowtime}, End time: {self.endtime}")

            if self.countdown_active and nowtime <= self.endtime:
                # Countdown in progress
                countdown = int(self.endtime - nowtime)
                # During countdown phase, continuously update initial cropped image (template)
                self.crop_output=self.track_crop.run(input_np)
                return self.draw_mean, countdown # Return initial box and countdown
            elif self.countdown_active and nowtime > self.endtime:
                # Countdown just ended
                print("Countdown ended, starting tracking.")
                self.countdown_active = False
                self.initial_setup_done = True # Mark initial setup as complete
                # After countdown ends, immediately perform one tracking to update state
                self.track_src.config_preprocess(self.center_xy_wh)
                self.src_output=self.track_src.run(input_np)
                det=self.tracker.run(self.crop_output,self.src_output,self.center_xy_wh)
                return det, None
        elif self.initial_setup_done and external_tracking_enabled:
            # Initial setup complete and external tracking switch is True (normal tracking mode)
            self.track_src.config_preprocess(self.center_xy_wh)
            self.src_output=self.track_src.run(input_np)
            det=self.tracker.run(self.crop_output,self.src_output,self.center_xy_wh)
            return det, None
        else:
            # External tracking switch not enabled, or initial setup not complete and external tracking not enabled (waiting for button press state)
            # In these cases, only show initial box, don't show countdown
            return self.draw_mean, None
Run the entire tracking process including cropping, feature extraction, tracking steps, and return the tracking box or countdown.
Draw Results
    def draw_result(self,pl,box,countdown=None):
        pl.osd_img.clear()
        if not self.initial_setup_done: # If initial setup (countdown) is not yet complete
            pl.osd_img.draw_rectangle(box[0],box[1],box[2],box[3],color=(255,0,255,0),thickness=4)
            if countdown is not None: # Only show countdown text when countdown is active
                pl.osd_img.draw_string_advanced(50, 50, 50, f"Countdown: {countdown} seconds", color=(255, 255, 0, 0))
        else: # Initial setup complete, entering tracking mode
            self.track_boxes = box[0]
            self.center_xy_wh = box[1]
            track_bool = True
            if (len(self.track_boxes) != 0):
                track_bool = (self.track_boxes[0] > 10 and self.track_boxes[1] >10 and
                              self.track_boxes[0]+self.track_boxes[2]<self.rgb888p_size[0]-10 and
                              self.track_boxes[1]+self.track_boxes[3]<self.rgb888p_size[1]-10)
            else:
                track_bool = False

            if (len(self.center_xy_wh) != 0):
                track_bool = track_bool and self.center_xy_wh[2]*self.center_xy_wh[3]<40000
            else:
                track_bool = False

            if (track_bool):
                self.center_xy_wh_tmp = self.center_xy_wh
                self.track_boxes_tmp = self.track_boxes
                x1 = int(self.track_boxes[0]*self.display_size[0]/self.rgb888p_size[0])
                y1 = int(self.track_boxes[1]*self.display_size[1]/self.rgb888p_size[1])
                w = int(self.track_boxes[2]*self.display_size[0]/self.rgb888p_size[0])
                h = int(self.track_boxes[3]*self.display_size[1]/self.rgb888p_size[1])
                pl.osd_img.draw_rectangle(x1,y1,w,h,color=(255,255,0,0),thickness=4)
            else:
                self.center_xy_wh = self.center_xy_wh_tmp
                self.track_boxes = self.track_boxes_tmp
                x1 = int(self.track_boxes[0]*self.display_size[0]/self.rgb888p_size[0])
                y1 = int(self.track_boxes[1]*self.display_size[1]/self.rgb888p_size[1])
                w = int(self.track_boxes[2]*self.display_size[0]/self.rgb888p_size[0])
                h = int(self.track_boxes[3]*self.display_size[1]/self.rgb888p_size[1])
                pl.osd_img.draw_rectangle(x1,y1,w,h,color=(255,255,0,0),thickness=4)
                pl.osd_img.draw_string_advanced(x1,y1-50,32,"Please move away from camera, keep tracked object size consistent!", color=(255,255,0,0))
                pl.osd_img.draw_string_advanced(x1,y1-100,32,"Please move closer to center!", color=(255,255,0,0))
Draw tracking results including the tracking box, countdown, and prompt messages.