8. Imitation Learning Tutorial
8.1 Introduction to LeRobot
LeRobot is an open-source robotics learning framework developed by Hugging Face, specifically designed for robot behavioral cloning and reinforcement learning. The framework provides researchers and developers with a unified platform to train, deploy, and evaluate robotic policies.
8.1.1 Core Features
Multimodal Data Support: Supports diverse sensor data, including vision, touch, and audio.
Flexible Policy Architectures: Supports multiple learning paradigms, such as behavioral cloning and reinforcement learning.
Extensive Robot Support: Compatible with various robotic platforms and hardware configurations.
Cloud Training Support: Supports distributed training and cloud deployment.
Easy Extensibility: Features a modular design that facilitates the addition of new robot types and algorithms.
8.1.2 Technical Architecture
LeRobot is built on PyTorch and utilizes a modern deep learning technology stack:
Data Processing: Efficient data loading and preprocessing pipelines.
Model Training: Supports various neural network architectures and training strategies.
Real-Time Inference: Optimized inference engines that support real-time robot control.
Visualization Tools: Comprehensive data visualization and training monitoring utilities.
8.1.3 Applications
Industrial Automation: Industrial tasks such as assembly, sorting, and welding.
Service Robotics: Domestic services, medical assistance, and educational robotics.
Research and Development: Research on robot learning algorithms and prototype verification.
Education and Training: Instruction in robot learning and artificial intelligence.
8.1.4 Ecosystem
LeRobot is deeply integrated with the Hugging Face ecosystem:
Model Sharing: Sharing trained models via the Hugging Face Hub.
Dataset Management: Unified dataset storage and version control.
Community Support: An active open-source community alongside extensive documentation resources.
Continuous Updates: Regular releases of new features and performance optimizations.
8.1.5 Development Prospects
The NexArm robotic arm represents a significant development direction in the field of robot learning. By lowering the entry barrier to robot learning, it accelerates the popularization and application of robotics technology. As artificial intelligence continues to advance, the NexArm robotic arm will continue to drive innovation and progress in robot learning technologies.
8.2 Hardware and Environment Setup
8.2.1 Hardware Checklist
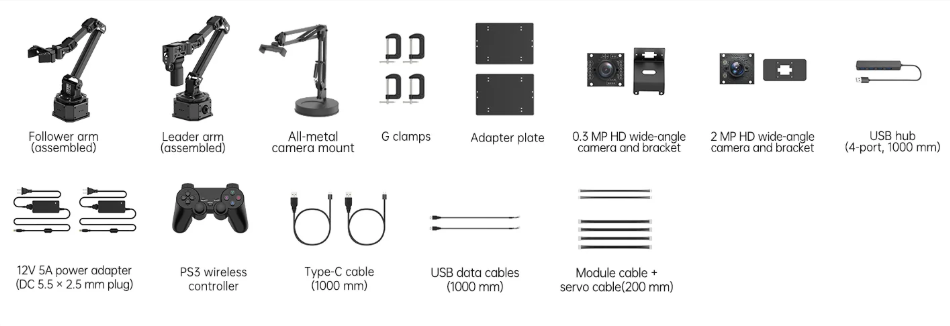
8.2.2 Installing Miniconda
(1) Windows Installation
① Download the Miniconda Package
Official Miniconda Installation Packages
Locate Miniconda3-py311_25.7.0-2-Windows-x86_64.exe and download the package to the computer. Alternatively, the pre-packaged software can be accessed directly via the link: 2. Softwares\9. Imitation Learning Tool\01 Software & Tool.

② Install Miniconda
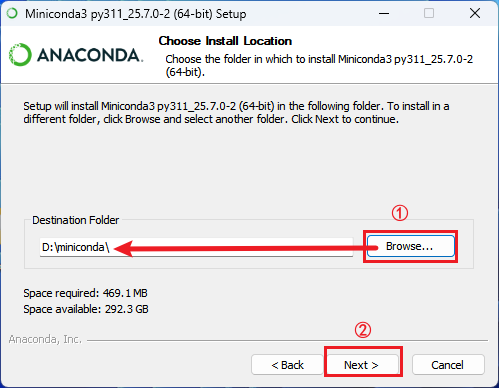
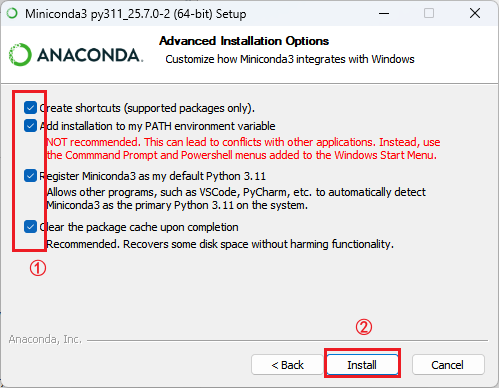
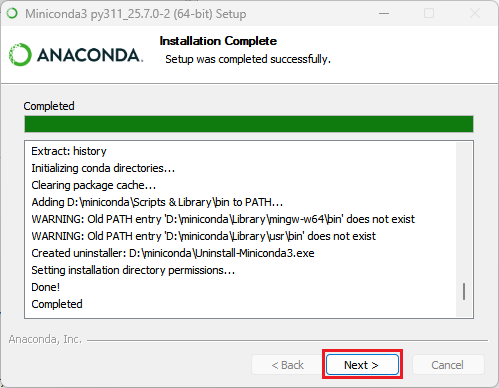
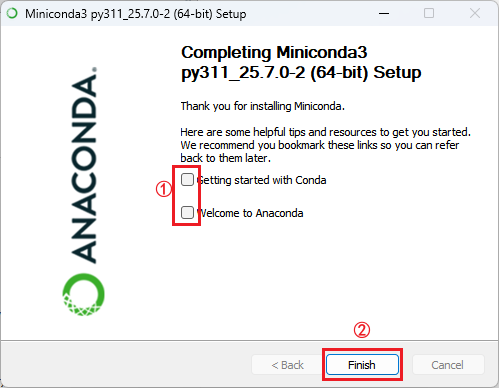
Locate the downloaded Miniconda installation package and double-click to install.

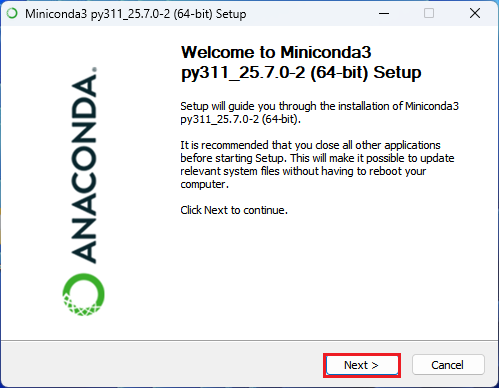
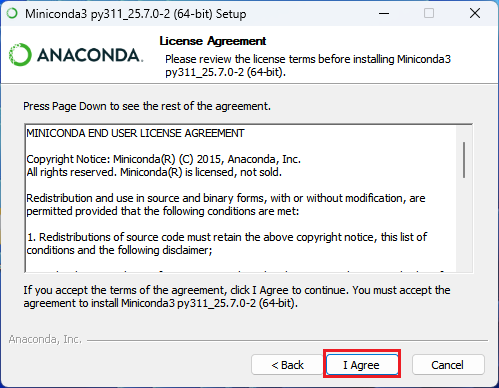
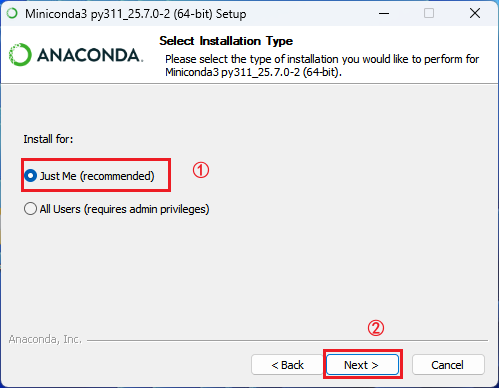
Note
All options below must be selected. Otherwise, environment configuration issues may occur!
(2) Ubuntu Installation
① Download the Miniconda Package
Press Ctrl + Alt + T to open the terminal, and enter the command to download the Miniconda package.
wget https://repo.anaconda.com/miniconda/Miniconda3-py311_25.7.0-2-Linux-x86_64.sh

② Install Miniconda
Enter the command to install Miniconda.
sh Miniconda3-py311_25.7.0-2-Linux-x86_64.sh

Press Enter to continue.

Type yes and press Enter to continue.

The default installation path is /home/ubuntu/miniconda3. If changing the directory is unnecessary, press Enter to continue. To change the installation path, enter the desired directory and press Enter.

Type yes and press Enter to complete the installation.

Upon closing and reopening the terminal, the interface shown below will appear.

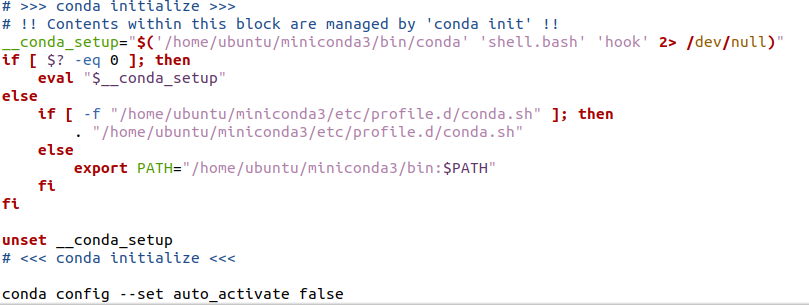
To prevent the Miniconda Python environment from being utilized by default, a command must be added to the .bashrc file.
Enter the command to open the .bashrc file.
gedit .bashrc

Locate the conda initialize code section and append the command beneath it. Save the changes by pressing Ctrl + S, close the editor, and reopen the terminal.
conda config --set auto_activate false
8.2.3 Configuring the Virtual Environment
(1) Windows Virtual Environment Configuration
① Open the Terminal
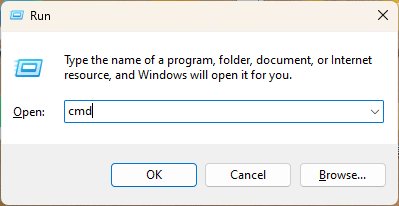
Press Win + R, type cmd, and open the terminal.
② Create a Virtual Environment
Enter the command and press Enter to create the virtual environment, specifying Python version 3.12.
conda create -n nexarm python=3.12 -y

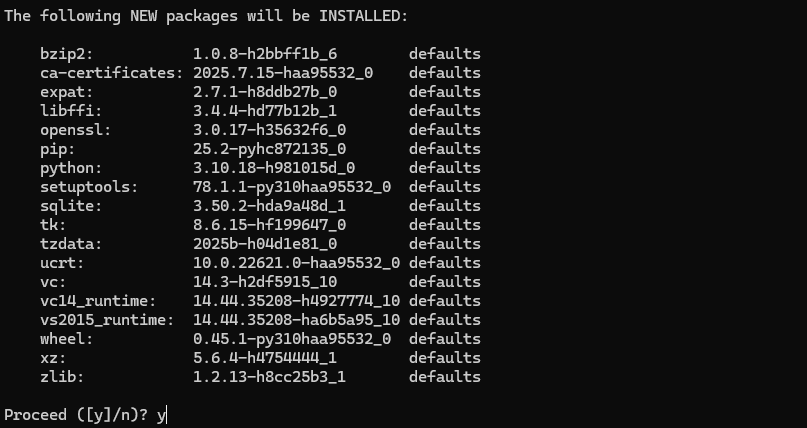
When the prompt shown below appears, enter y and then press Enter to continue.
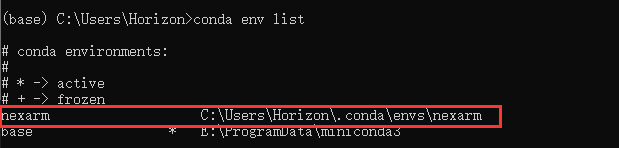
Once creation is complete, enter the command to list the created virtual environments.
conda env list
③ Activate the Virtual Environment
conda activate nexarm

④ Download the Repository
NexArm project package path: 2. Softwares\9. Imitation Learning Tool\02 Source Code\2. Imitation Learning Project Package\finsh.zip.
Open the NexArm project package and extract the project files to the desktop.
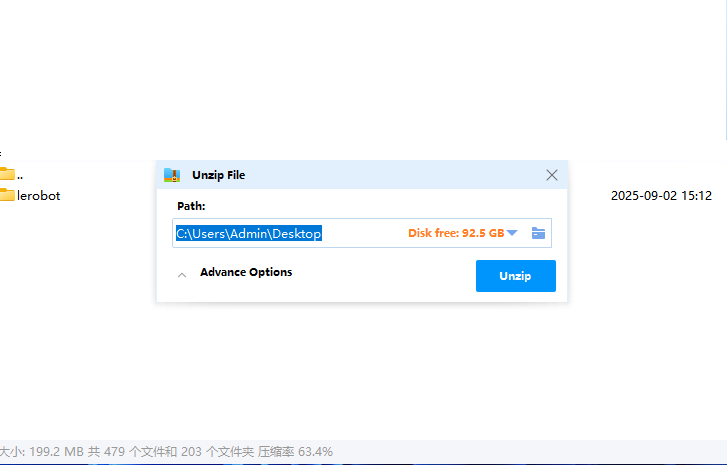
⑤ Install Dependency Packages
Navigate to the finsh directory and install the dependencies for NexArm.
cd Desktop\finsh
pip install -e ".[nexarm]"
pip install "lerobot[dataset]"
pip install -e ".[nexarm,viz]"

Upon completion, the following command can be entered to verify whether the installation was successful. If successful, OK will be returned.
python -c "import lerobot.rollout; print('OK')"
If local model training is required in the future, the additional dependency package lerobot[training] must be installed.
pip install "lerobot[training]"
(2) Ubuntu Virtual Environment Configuration
① Create a Virtual Environment
Press Ctrl + Alt + T to open the terminal, enter the command, and press Enter to create the virtual environment.
conda create -n nexarm python=3.12 -y
If the following prompt appears, the service terms must be accepted by running the commands below before executing the aforementioned virtual environment creation command.
conda tos accept --override-channels --channel [https://repo.anaconda.com/pkgs/main](https://repo.anaconda.com/pkgs/main)
conda tos accept --override-channels --channel [https://repo.anaconda.com/pkgs/r](https://repo.anaconda.com/pkgs/r)
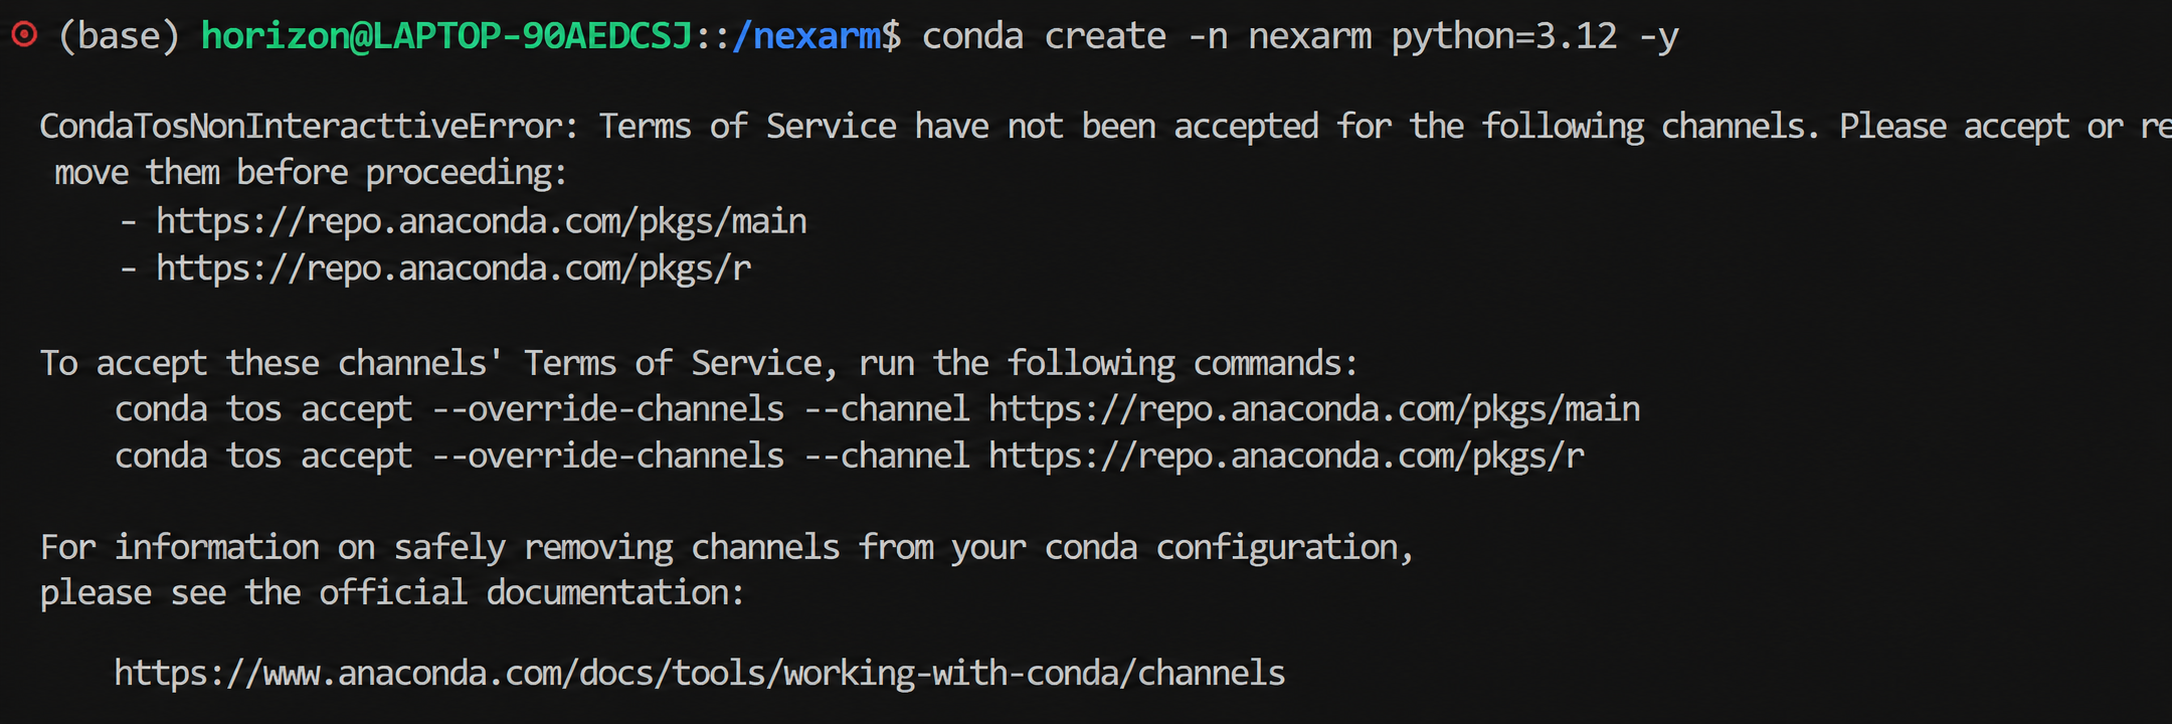
When the prompt shown below appears, enter y and then press Enter to continue.
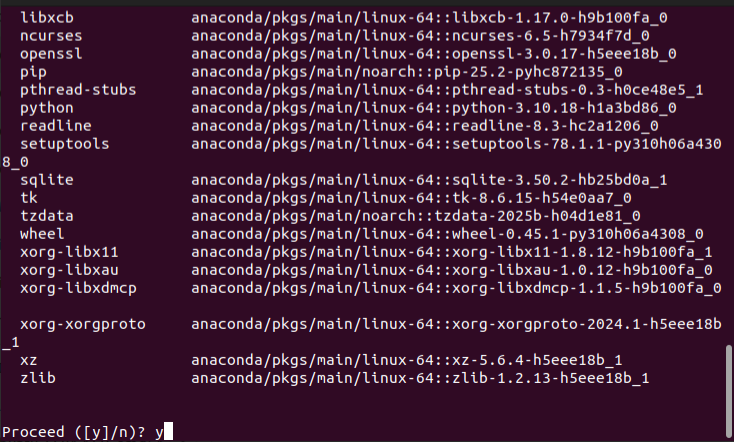
Once creation is complete, enter the command to list the created virtual environments.
conda env list

② Activate the Virtual Environment
conda activate nexarm

③ Download the Repository
NexArm robotic arm project package path: 2. Softwares\9. Imitation Learning Tool\02 Source Code\2. Imitation Learning Project Package\finsh.zip.
Copy the NexArm robotic arm project package to the Ubuntu system into the /nexarm directory, then use the unzip tool to extract it by running the command.
unzip finsh.zip

Enter the command in the terminal to view the files.
ls

④ Install Dependency Packages
Navigate to the finsh directory and install the dependencies for NexArm.
cd /nexarm/finsh
pip install -e ".[nexarm]"
pip install "lerobot[dataset]"
pip install -e ".[nexarm,viz]"

8.3 Robotic Arm Assembly
The subsequent procedures are identical for both Ubuntu and Windows systems. Windows is used as an example here.
Note
On Ubuntu systems, access permissions to the USB ports may need to be granted by running the following commands:
sudo chmod 666 /dev/ttyACM0
sudo chmod 666 /dev/ttyACM1
8.3.1 Hardware Assembly
Refer to the related video for robotic arm assembly: Leader Arm & Follower Arm Assembly.
8.3.2 Wiring Instructions
Refer to the related video for wiring: Wiring & Power Setup.
8.3.3 Locating Port Numbers
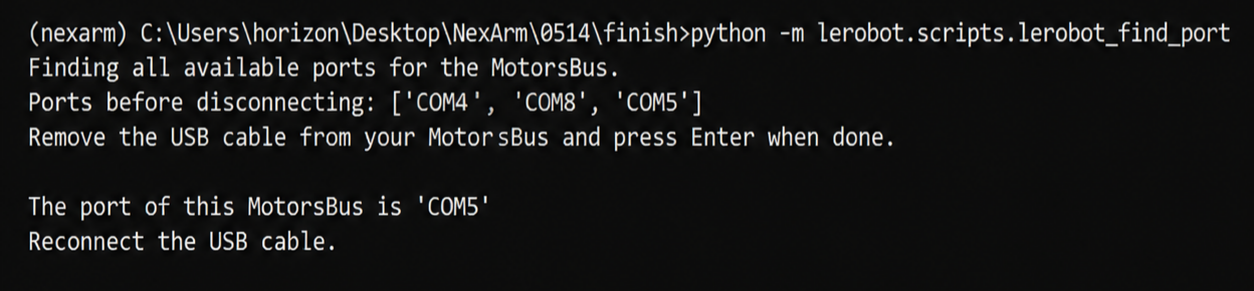
Connect the follower arm first, run the following command, and wait for a prompt to appear. At this point, disconnect the follower arm port, press Enter to retrieve the port number of the follower arm, and finally reconnect the follower arm.
python -m lerobot.scripts.lerobot_find_port
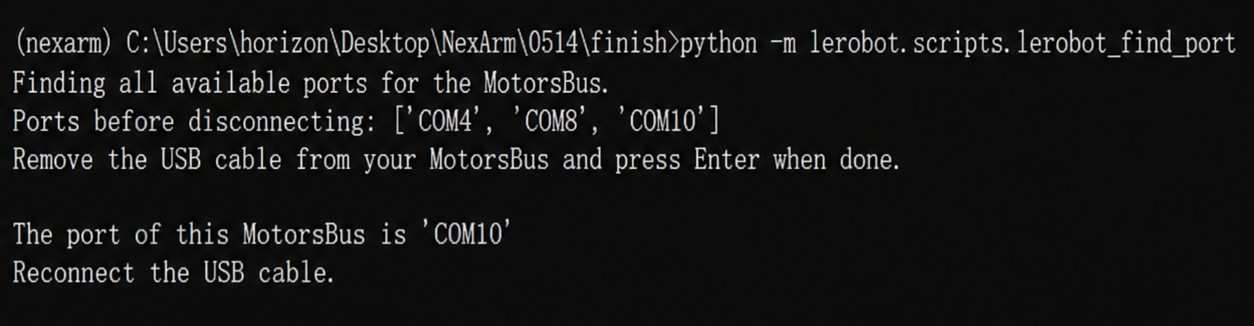
Connect the leader arm next, repeat the aforementioned procedure, and retrieve the port number of the leader arm.
8.3.4 Servo ID Diagram (Optional)
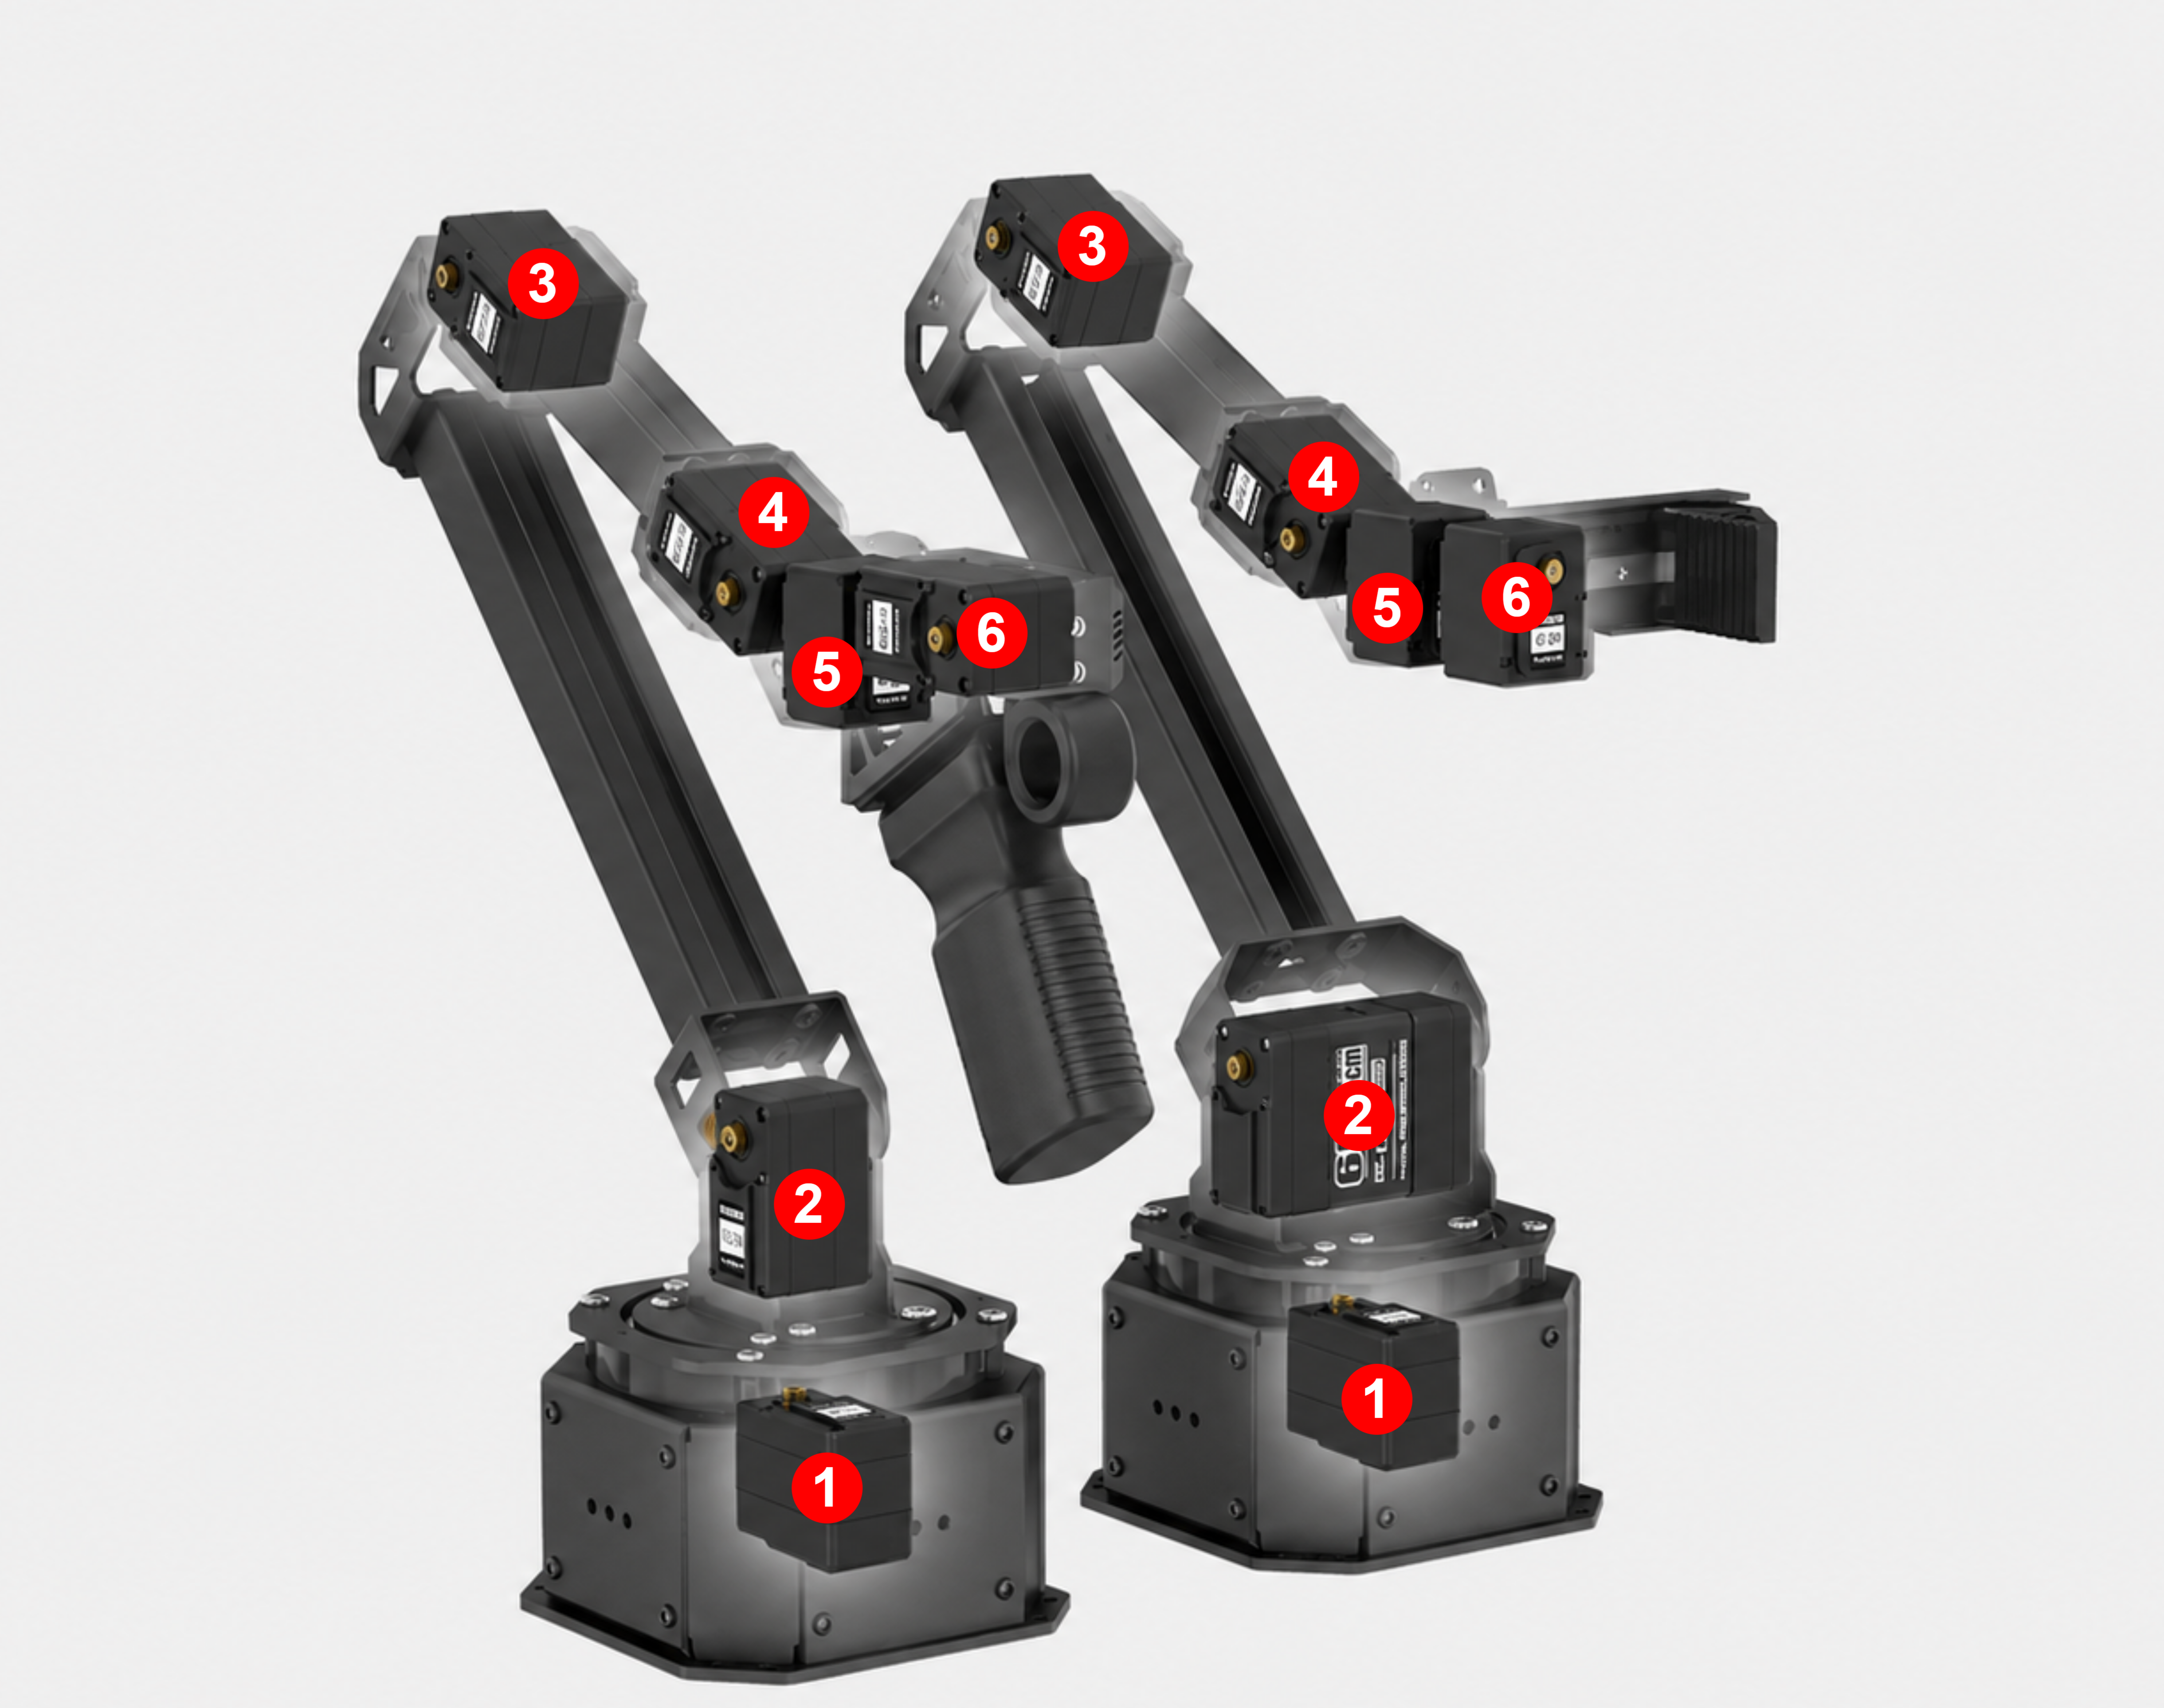
The naming convention for each servo from top to bottom is: gripper, wrist_roll, wrist_flex, elbow_flex, shoulder_lift, and shoulder_pan, corresponding to ID6 through ID1, respectively.
8.4 Robotic Arm Control
Note
If a docking station is utilized, the USB connectors of both cameras must not be connected to the same docking station simultaneously.
The feed from the fixed environmental camera must completely capture the movements of the follower arm.
Enter the command to locate the camera IDs and verify whether video feeds from both cameras are present.
python -m lerobot.scripts.lerobot_find_cameras opencv
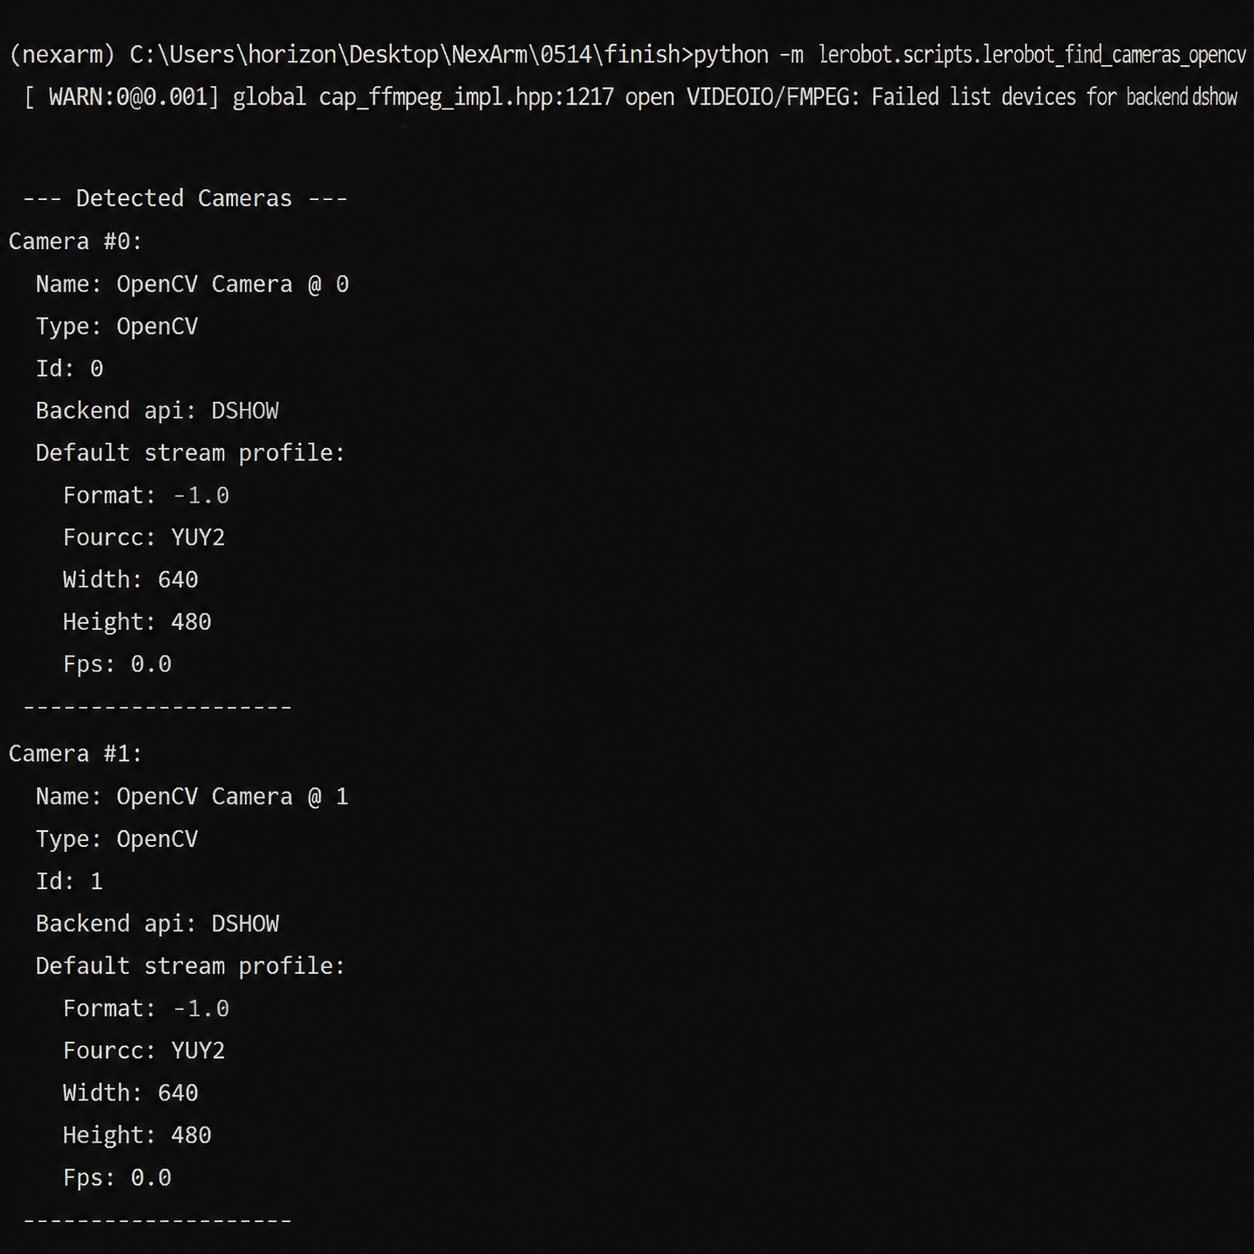
Once execution completes, captured images will be saved to outputs\captured_images.

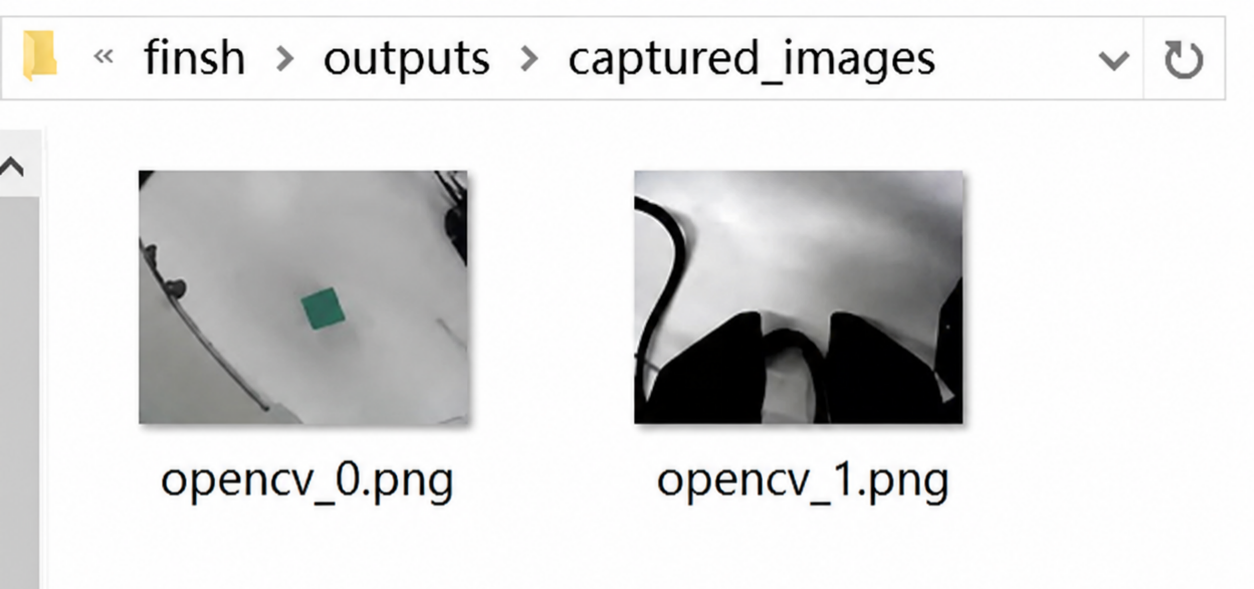
The camera IDs can be distinguished by file names: opencv_0 corresponds to index_or_path: 0, and opencv_1 corresponds to index_or_path: 1.
Open the examples/nexarm/teleoperate.yaml file at the specified path, enter the port numbers for the leader and follower arms, and modify the IDs for the main and wrist cameras. Run the command to perform teleoperated robotic arm visualization. The parameter display_data is used to open the visualization interface. Set it to false if it is not required.
python -m lerobot.scripts.lerobot_teleoperate --config_path=examples/nexarm/teleoperate.yaml
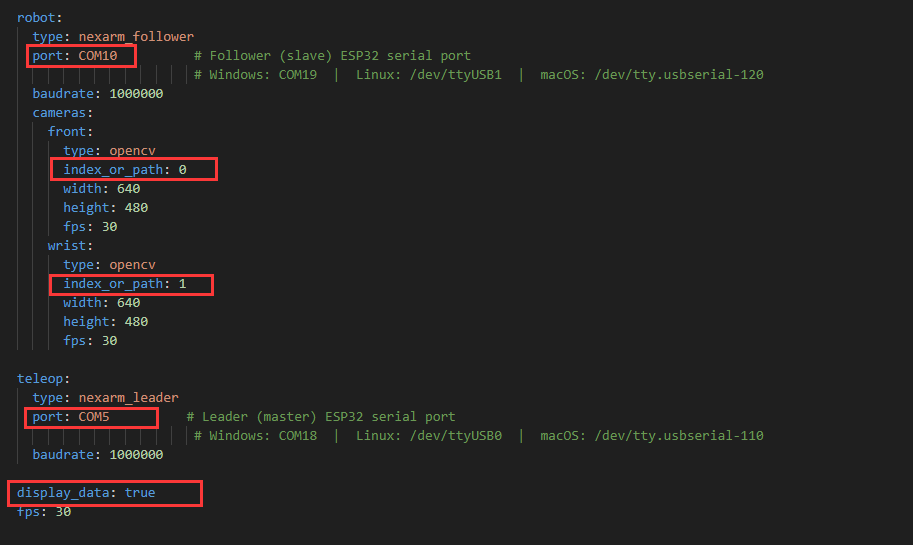
Note
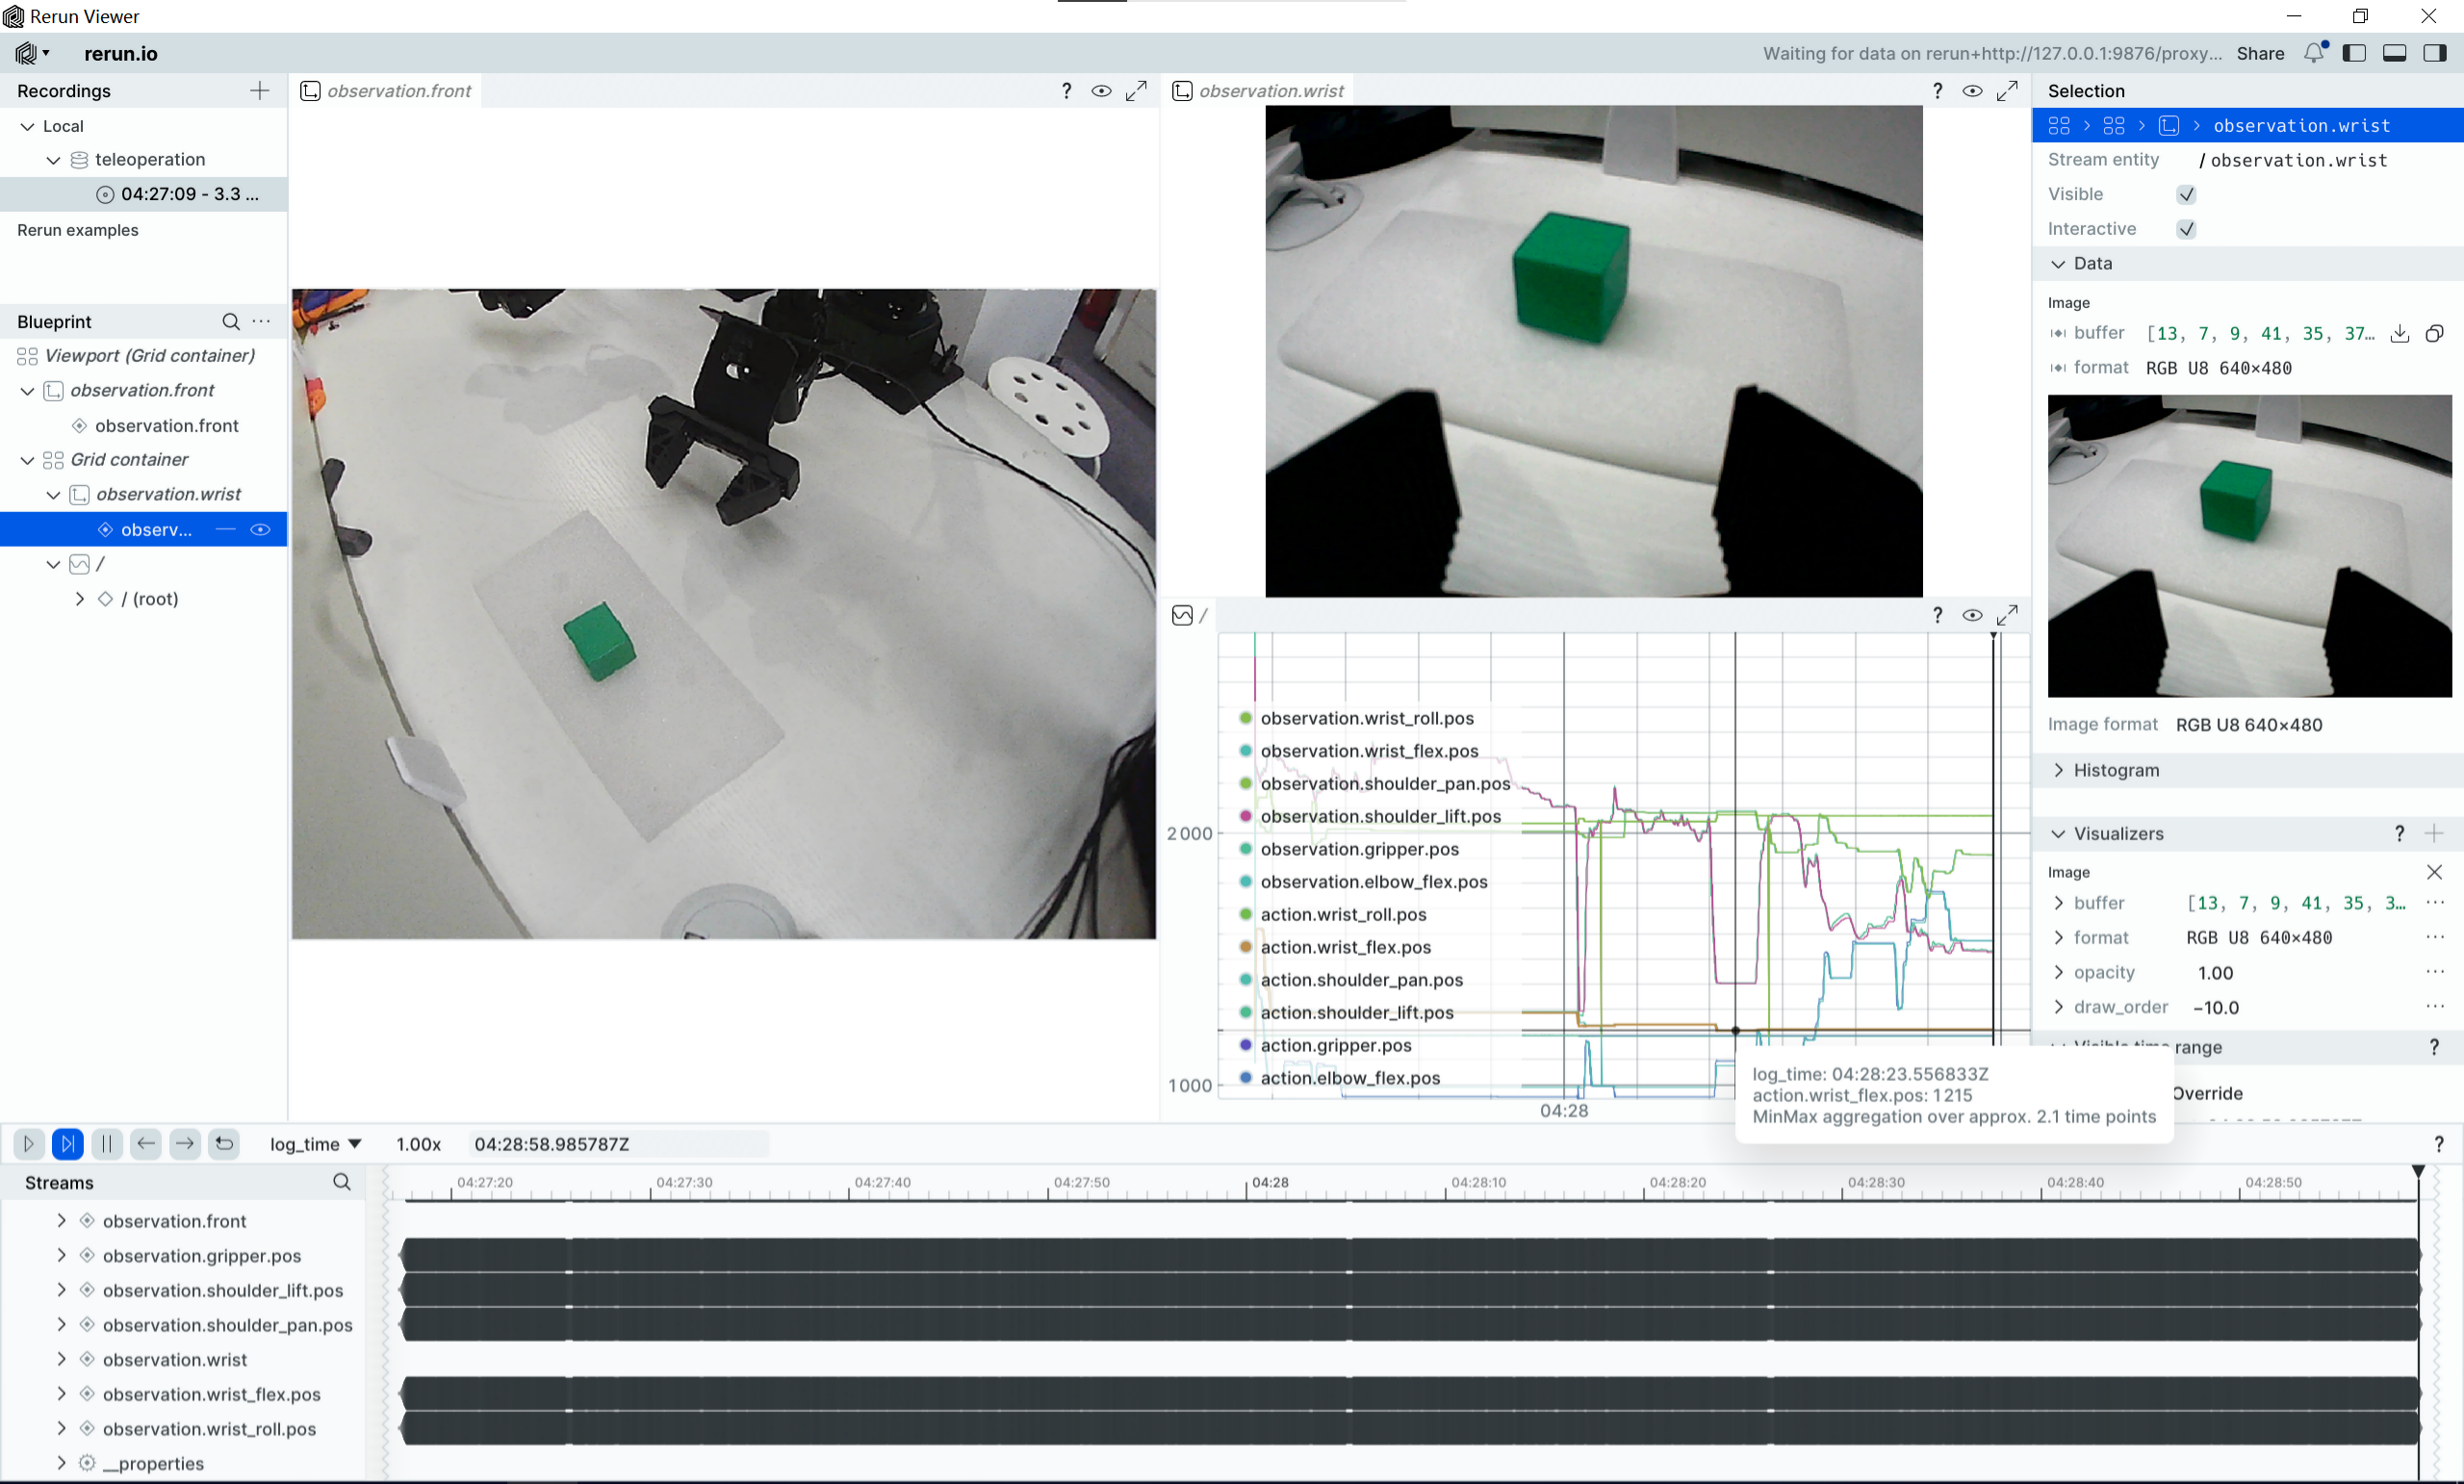
front refers to the fixed environmental camera, and wrist refers to the gripper camera.
Controlling the follower arm via the leader arm concurrently streams back the feeds captured by the cameras. To terminate the program, press Ctrl + C in the terminal.
8.5 Data Collection
Data collection steps:
Initialize the robot and sensors.
Launch the teleoperation interface.
The operator controls the robot to complete tasks.
The system synchronously records all sensor data and control commands.
Data is saved in the standard LeRobot data format.
Optional real-time quality monitoring and visualization.
Note
Data collection requires proficient control of the robotic arm for grasping operations to prevent imprecise data caused by non-standard manipulation.
Run the command to initiate data collection. The placeholder ${HF_USER} can be replaced with a custom username, which must be in English. This command uses an example of collecting 50 episodes. To collect more episodes, the value 50 in num_episodes:50 can be changed to a higher number, as larger datasets yield better performance.
python -m lerobot.scripts.lerobot_record --config_path=examples/nexarm/record.yaml
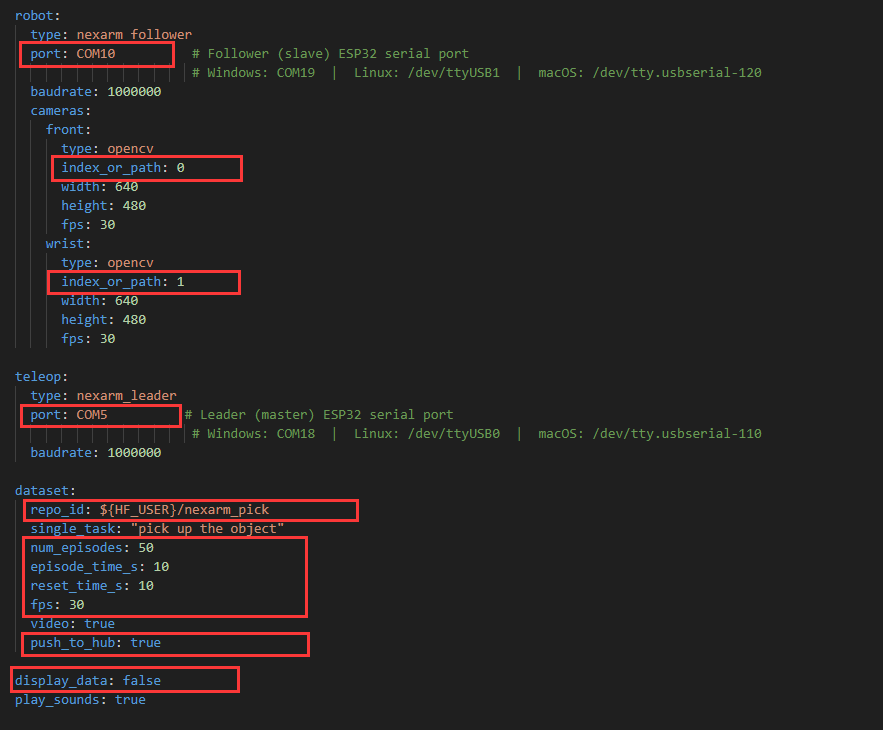
Key Parameter Descriptions:
| Parameter | Default Value | Description |
|---|---|---|
repo_id |
${HF_USER}/nexarm_pick | Dataset name in Hugging Face Hub format |
num_episodes |
50 | Number of recorded episodes |
episode_time_s |
10 | Duration of each episode in seconds |
reset_time_s |
10 | Waiting time between episodes to reset the scene |
fps |
30 | Recording frame rate |
push_to_hub |
true | Specifies whether to upload to the Hugging Face Hub; set to false for local collection |
display_data |
false | Specifies whether to enable the visualization interface |
When the prompt shown below appears, data recording has commenced. At this point, the leader arm can be manipulated to control the follower arm to grasp the target object and place it at the destination.

Note
During recording, the environment should remain relatively static apart from the robotic arm to achieve optimal results. For instance, the camera feed should ideally capture only the robotic arm in motion, while human arms, operators, or other moving elements should be excluded from the frame.
Upon completion of the actions, the environment can be reset when the prompt below appears. The data is completely saved once the progress bar reaches 100%.

The indicator for the end of the previous recording round and waiting for the next recording is shown below, signifying that the next round of data recording has begun.

Once the terminal outputs Recording episode 49, the fiftieth round of recording has started. After this round concludes, Stop recording will be printed, indicating completion.

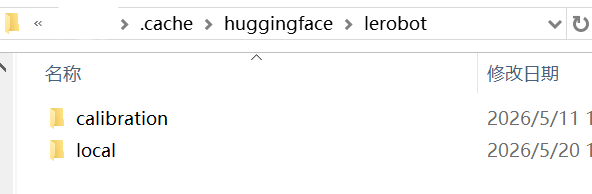
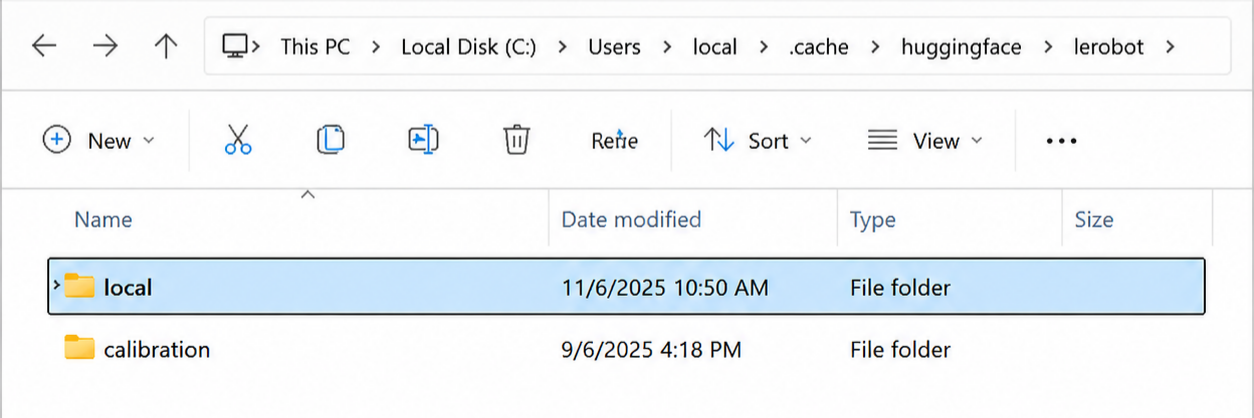
Data is saved by default to C:\Users{name}.cache\huggingface\lerobot.
8.6 Dataset Training
8.6.1 Local Training
Datasets are saved by default to C:\Users\Admin.cache\huggingface\lerobot.
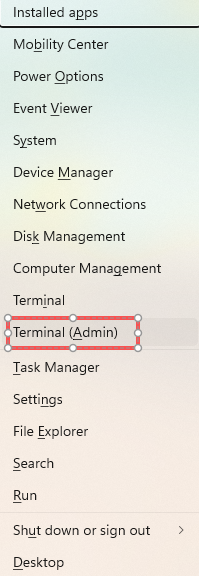
Press Win + X and click Terminal (Admin) to open the command-line terminal with administrative privileges.
Enter the commands to activate the virtual environment and switch to the finsh working directory.
conda activate nexarm
cd .\Desktop\finsh\

Note
Local training is not recommended on computers without a dedicated graphics card.
The following steps require a dedicated graphics card to execute.
Enter the command to install cuda11.8 for GPU training, as training solely on a CPU is highly time-consuming.
pip install torch==2.7.1 torchvision==0.22.1 torchaudio==2.7.1 --index-url [https://download.pytorch.org/whl/cu118](https://download.pytorch.org/whl/cu118)

Enter the command to initiate training. Detailed parameters can be reviewed in Key Parameter Descriptions.
python -m lerobot.scripts.lerobot_train --dataset.repo_id=local/nexarm_pick_20260518_115258 --dataset.root=local/nexarm_pick_20260518_115258 --policy.type=act --output_dir=outputs/train/nexarm_act --batch_size=32 --steps=100000 --save_freq=25000 --policy.push_to_hub=false

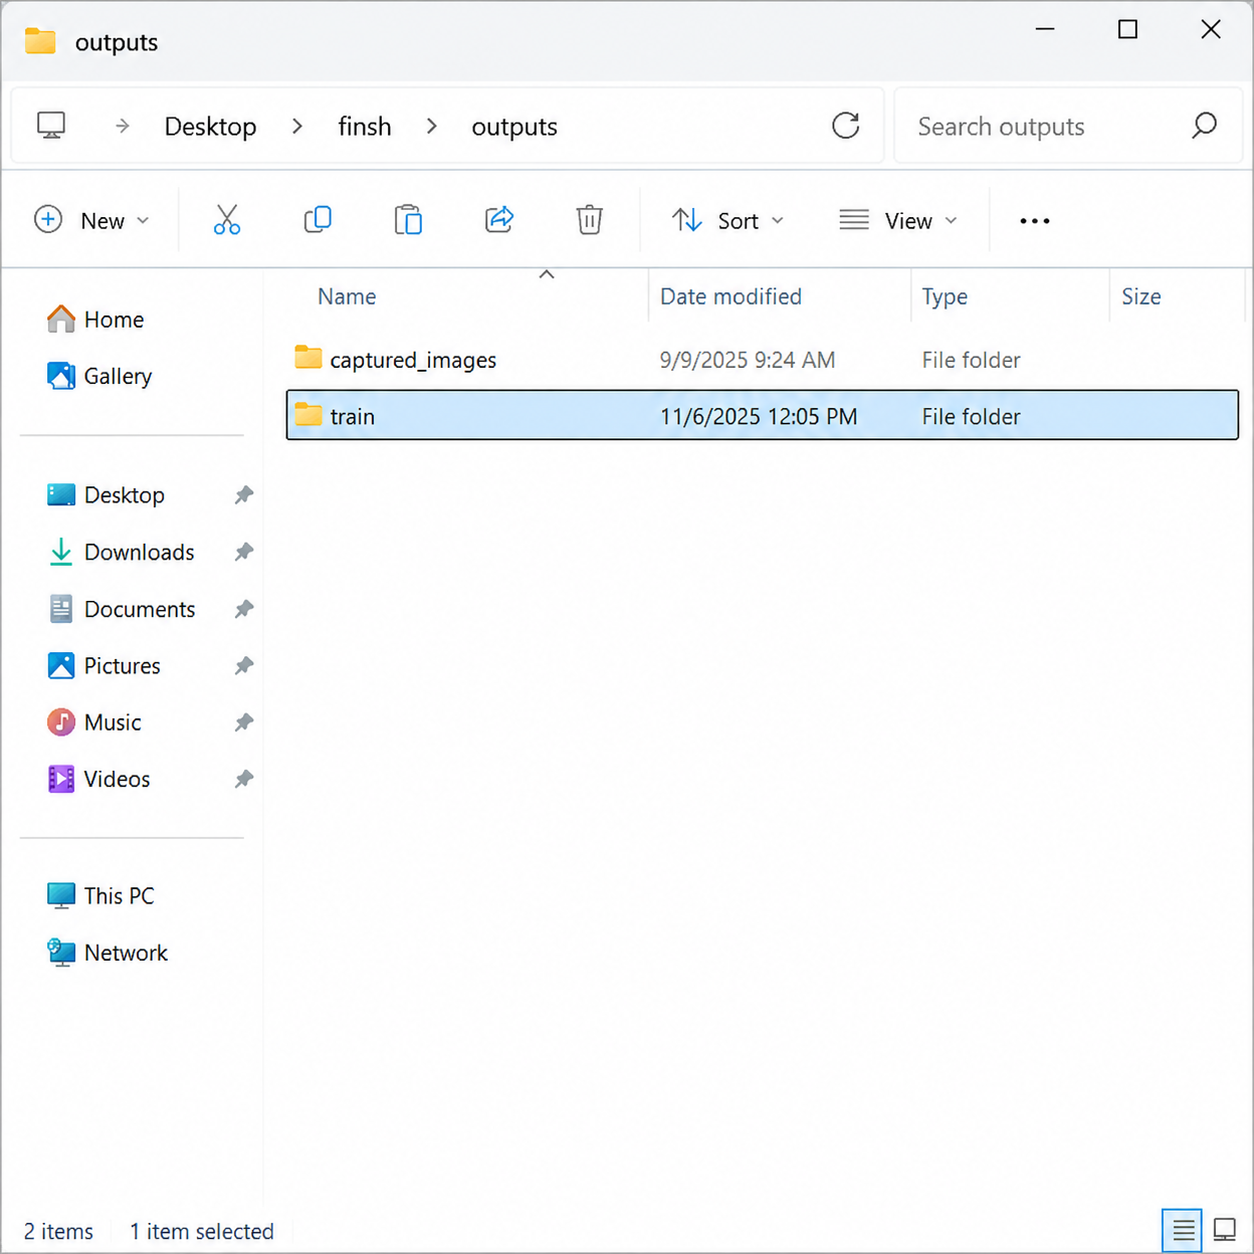
Upon completion of the training, a train folder containing the model files will be generated in finsh/outputs.
8.7 Model Testing
NexArm inference utilizes a data-driven approach to enable the robot to imitate human behavior. This framework treats complex robot control challenges as a supervised learning task. The inference process relies on a trained model that executes multimodal fusion of information extracted from natural language instructions and environmental inputs, primarily visual observations, and maps this data directly to specific control actions. Fundamentally, this methodology represents imitation learning based on behavioral cloning, which aims to grant the robot end-to-end inference capabilities from perception to action through training on human demonstration data to accomplish specific tasks.
Inference deployment steps:
Load the trained policy model.
Initialize the physical robot and its sensors.
Establish the mapping from sensor data to policy inputs.
Establish the mapping from policy outputs to robot control commands.
Execute policy inference and robot control within the control loop.
Optional real-time visualization and monitoring.
8.7.1 Real-Time Inference Testing
Press Win + R, type cmd, and open the terminal.
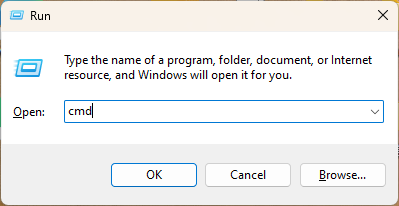
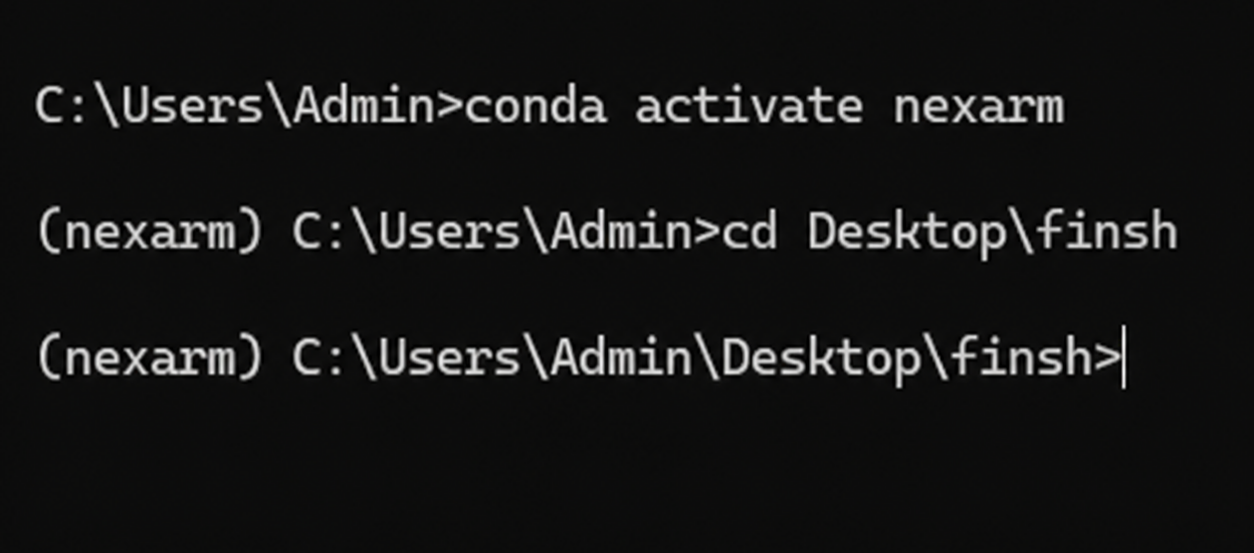
Enter the commands to enter the virtual environment and navigate to the project directory.
conda activate nexarm
cd Desktop\finsh
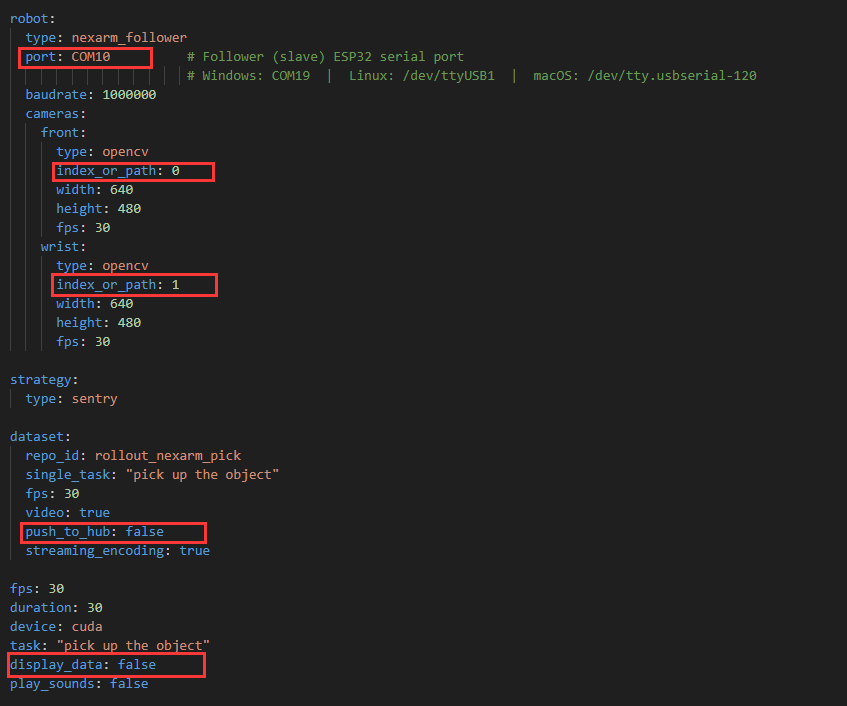
Next, modify the configuration in finsh/examples/nexarm/inference.yaml by setting the follower arm port and camera IDs according to the specific parameters, and choose whether to enable the upload and visualization functions.
After completing the modifications, enter the command to perform inference.
python -m lerobot.scripts.lerobot_rollout --config_path=examples/nexarm/inference.yaml --policy.path=outputs/train/nexarm_act/checkpoints/last/pretrained_model
The terminal log shown below indicates the start of robotic arm inference.

The terminal log shown below indicates the completion of robotic arm inference.

8.7.2 Inference Troubleshooting
Issue 1: Error Occurs During the Second Inference Run

Description: An error occurs when executing the inference command for the second time.
Cause: The program detects the existence of the eval\rollout_nexarm_pick folder under the finsh/outputs directory. This folder must be deleted before the command can be re-executed.
Issue 2: Distribution Shift and Poor Generalization
Description: The model performs well under states encountered during training, such as specific object positions, lighting, and backgrounds. However, performance degrades sharply when encountering conditions slightly different from the training data, which represents out-of-distribution data. For instance, if a white table is used during training and replaced with a wood-grain table during inference, the robot may fail to recognize objects.
Cause: The model learns a static distribution of states within the training data rather than a deep understanding of the physical world. It memorizes rather than truly understands the task.
Issue 3: Compounding Errors
Description: This is a classic challenge in behavioral cloning. At each step of inference, the model generates minor action errors. Due to open-loop execution lacking real-time correction based on outcomes, the input state for the subsequent step is already skewed by the previous erroneous action, drifting further from the ideal states in the training data. Errors accumulate progressively, ultimately causing the robot to deviate completely from the correct trajectory and fail the task.
Cause: Errors occur during the inference process, and the continuous accumulation of these errors causes the execution to gradually deviate from the intended trajectory.
Issue 4: Overfitting to Demonstration Style
Description: The model may learn not only the essential actions required to complete a task but also the personal habits or specific styles of the demonstrator, such as an unusual or inefficient grasping posture. This rigid style may become ineffective when the environment changes.
Cause: The objective of the model is to maximize imitation of the demonstration data, which may contain sub-optimal or task-irrelevant behavioral patterns.